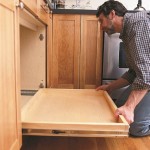
Ace Hardware: Selecting the Right Kitchen Cabinet Paint
Kitchen cabinets are a focal point within a home, significantly contributing to the overall aesthetic and functionality of the space. Over time, cabinets can become worn, outdated, or simply no longer align with evolving design preferences. Painting kitchen cabinets provides a cost-effective and efficient alternative to complete cabinet replacement, offering a chance to refresh the look and feel of the kitchen without the major expense and disruption of a full renovation. Ace Hardware is a recognized retailer offering a range of paint products and supplies tailored to this specific project. This article provides a comprehensive overview of selecting the right kitchen cabinet paint at Ace Hardware, covering the types of paint available, preparatory steps, application techniques, and considerations for ensuring a durable and long-lasting finish.
Before embarking on a kitchen cabinet painting project, careful planning and preparation are essential. This involves assessing the existing cabinets, selecting the appropriate paint and ancillary materials, and preparing the work area. Neglecting these preliminary steps can compromise the final result and lead to complications during the painting process. A well-prepared surface ensures optimal paint adhesion and a smooth, professional-looking finish.
Understanding Paint Chemistry for Kitchen Cabinets
The selection of paint for kitchen cabinets is a critical decision that impacts both the aesthetic appeal and the longevity of the finished product. Different types of paint offer varying levels of durability, ease of application, and resistance to common kitchen conditions such as grease, moisture, and frequent cleaning. At Ace Hardware, several paint options are available, each with distinct characteristics.
Acrylic latex paints are a popular choice due to their water-based formulation, low odor, and ease of cleanup. These paints offer good adhesion, flexibility, and color retention. Acrylic latex paints have evolved significantly in recent years, with advanced formulations offering improved durability and scrubbability. Some acrylic latex paints are specifically designed for cabinets and trim, providing a hard, enamel-like finish that resists chipping and scratching. These paints are typically formulated with higher levels of resins and binders, enhancing their durability and stain resistance.
Alkyd paints, also known as oil-based paints, offer exceptional durability and a smooth, hard finish. They are known for their excellent leveling properties, resulting in a flawless appearance with minimal brushstrokes. Alkyd paints are particularly resistant to stains, grease, and chemicals, making them a suitable choice for high-use areas like kitchen cabinets. However, alkyd paints have a longer drying time compared to latex paints and require mineral spirits or paint thinner for cleanup. They also emit strong odors during application and drying, necessitating adequate ventilation. Due to environmental concerns and regulations, low-VOC (volatile organic compound) alkyd paints are becoming increasingly available.
Another option is enamel paint. Enamel paints are formulated to provide a hard, glossy finish that is highly resistant to abrasion and impact. They are frequently used on surfaces that require exceptional durability, such as doors, trim, and cabinets. Enamel paints can be either water-based (acrylic enamel) or oil-based (alkyd enamel), each offering its own set of advantages and disadvantages. Acrylic enamels are easier to work with and clean up, while alkyd enamels provide superior hardness and durability.
Primer is a crucial component of any successful cabinet painting project. Primer serves several important functions, including sealing the existing surface, promoting adhesion of the topcoat, and providing a uniform base for the paint. Priming is especially important when painting over previously painted or stained surfaces, as it helps to prevent bleed-through and ensures consistent color coverage. At Ace Hardware, a range of primers are available, including acrylic primers, oil-based primers, and specialty primers designed for specific surfaces such as laminate or melamine.
When selecting paint at Ace Hardware, consider consulting with the paint department staff. They can provide expert advice on choosing the best paint for the specific project, based on the cabinet material, existing finish, and desired aesthetic. They also can offer recommendations on primers, applicators, and other necessary supplies.
Surface Preparation: The Foundation for a Flawless Finish
Proper surface preparation is arguably the most important step in painting kitchen cabinets. A clean, smooth, and properly prepared surface is essential for ensuring optimal paint adhesion and a professional-looking finish. Neglecting this step can lead to paint peeling, chipping, and an uneven appearance.
The first step in surface preparation is removing the cabinet doors and drawers. This allows for easier access to all surfaces and ensures a more uniform paint application. Remove all hardware, such as knobs, pulls, and hinges. Store the hardware in a safe place to prevent loss or damage. Consider labeling or photographing the hardware and its corresponding location on the cabinets to facilitate reassembly.
Next, thoroughly clean the cabinet surfaces to remove any dirt, grease, and grime. Use a degreasing cleaner specifically designed for kitchen surfaces. Scrub the cabinets with a non-abrasive sponge or cloth. Rinse the cabinets with clean water and allow them to dry completely. For cabinets with stubborn grease or stains, consider using a stronger cleaner or a degreasing agent.
Sanding is a crucial step in preparing the cabinet surfaces for painting. Sanding roughens the surface, creating a better grip for the primer and paint. Use a medium-grit sandpaper (120-180 grit) to sand the cabinets. Focus on sanding down any glossy or uneven areas. For cabinets with intricate details or molding, use a sanding sponge or a detail sander to reach tight spaces. After sanding, thoroughly remove all sanding dust with a tack cloth or a vacuum cleaner with a brush attachment. Failure to remove sanding dust can result in a gritty finish.
If the cabinets have any holes, dents, or imperfections, fill them with wood filler. Apply the wood filler according to the manufacturer's instructions. Allow the wood filler to dry completely, and then sand it smooth with fine-grit sandpaper (220 grit). Ensure that the wood filler is flush with the surrounding surface. Remove any sanding dust before proceeding.
Finally, apply a coat of primer to the prepared cabinet surfaces. Choose a primer that is compatible with the type of paint selected. Apply the primer evenly, using a brush, roller, or sprayer. Allow the primer to dry completely according to the manufacturer's instructions. Lightly scuff-sand the primed surface with fine-grit sandpaper to create a smooth base for the paint.
Proper ventilation is essential during the surface preparation process, especially when using chemical cleaners or sanding. Open windows and doors to provide adequate airflow. Consider wearing a dust mask or respirator to protect from inhaling sanding dust or fumes. Use drop cloths or plastic sheeting to protect floors and other surfaces from dust and debris.
Application Techniques for a Professional Finish
The application of paint is the final step in transforming kitchen cabinets. Proper application techniques are essential for achieving a smooth, even, and durable finish. Several factors can influence the final result, including the choice of applicator, the number of coats, and the drying time between coats.
There are several options for applying paint to kitchen cabinets, each with its own advantages and disadvantages. Brushes are a versatile option that allows for precise application, especially in tight spaces and around intricate details. Choose a high-quality brush with synthetic bristles for water-based paints and natural bristles for oil-based paints. Rollers are ideal for painting large, flat surfaces, providing a smooth and even finish. Use a foam roller or a microfiber roller for the best results. Paint sprayers offer the fastest and most efficient way to apply paint, achieving a flawless, factory-like finish. However, sprayers require more preparation and skill to use effectively. Consider the project scope, budget, and skill level when choosing an applicator.
Apply the paint in thin, even coats. Avoid applying thick coats, as this can lead to drips, runs, and an uneven finish. Allow each coat of paint to dry completely according to the manufacturer's instructions. Lightly scuff-sand the painted surface with fine-grit sandpaper between coats to remove any imperfections and create a smooth base for the next coat. This process, known as "de-nibbing," helps to achieve a professional-looking finish.
Typically, two coats of paint are sufficient for achieving full coverage and a durable finish. However, depending on the color and opacity of the paint, additional coats may be necessary. Allow the final coat of paint to dry completely before reassembling the cabinets and hardware. Consider applying a clear topcoat for added protection and durability. A clear topcoat can help to resist scratches, stains, and wear.
When painting cabinet doors, consider using a spray booth or a well-ventilated area to minimize overspray and ensure a clean finish. Use painters tape to mask off any areas that should not be painted, such as the inside of cabinets or the edges of drawers. Remove the tape carefully after the paint has dried to prevent peeling or chipping. Clean brushes and rollers immediately after use. Use water and soap for water-based paints and mineral spirits or paint thinner for oil-based paints. Store brushes and rollers properly to maintain their shape and performance.
After the paint has dried completely, reassemble the cabinets and hardware. Handle the painted surfaces with care to avoid scratching or damaging the finish. Consider using felt pads on the inside of cabinet doors and drawers to prevent them from sticking or rubbing against the frame. Allow the paint to cure completely before placing items back in the cabinets. Curing can take several days or even weeks, depending on the type of paint and environmental conditions.
By following these application techniques, it is possible to achieve a professional-looking finish on kitchen cabinets, enhancing the beauty and functionality of the kitchen. Ace Hardware provides the products and guidance necessary to facilitate this project.
How To Create Farmhouse Kitchen Ace Hardware

Cabinet Painting Refinishing Ace Hardware Services

How To Paint Kitchen Cabinets Ace Hardware

How To Paint Kitchen Cabinets Ace Hardware

How To Paint Laminate Cabinets Ace Hardware

How To Paint Laminate Cabinets Ace Hardware

What I Wish Knew Before Painting Cabinets Ace Hardware

Paint Kitchen Cabinets Trim Great Lakes Ace Hardware

Best Colors When Painting Kitchen Cabinets Ace Hardware

How To Paint Kitchen Cabinets Without Fancy Equipment
Related Posts

