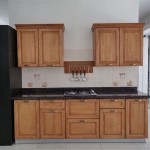
Add Molding to Kitchen Cabinets: A Complete Guide
Kitchen cabinets are an essential part of any kitchen. They provide storage, organization, and style. Adding molding to kitchen cabinets can enhance their appearance and give them a more finished look. Molding can be used to create a variety of styles, from traditional to modern. It can also be used to add visual interest and depth to your kitchen.
There are many different types of molding available, so you can choose the one that best suits your kitchen's style. Some of the most popular types of molding include:
- Crown molding: This type of molding is installed at the top of cabinets, where they meet the ceiling. It can create a grand and elegant look.
- Base molding: This type of molding is installed at the bottom of cabinets, where they meet the floor. It can help to protect the cabinets from damage and give them a more finished look.
- Light rail molding: This type of molding is installed between the upper and lower cabinets. It can be used to create a more layered look.
- Valance molding: This type of molding is installed over the range hood. It can help to conceal the range hood and give it a more finished look.
Once you have chosen the type of molding you want to use, you will need to decide how to install it. There are two main ways to install molding: with nails or with adhesive. If you are using nails, be sure to use a nail gun to ensure that the nails are driven in securely. If you are using adhesive, be sure to use a strong adhesive that is designed for use on wood.
Here are the steps for adding molding to kitchen cabinets:
- Measure and cut the molding to the desired length.
- Apply adhesive to the back of the molding.
- Press the molding into place.
- Secure the molding with nails or screws.
- Fill any nail holes or gaps with wood filler.
- Sand the wood filler smooth.
- Paint or stain the molding to match the cabinets.
Adding molding to kitchen cabinets is a relatively easy project that can make a big difference in the appearance of your kitchen. With a little bit of planning and effort, you can achieve stunning results.
Here are some tips for adding molding to kitchen cabinets:
- Use a level to ensure that the molding is installed straight.
- Use a miter saw to cut the molding at a 45-degree angle. This will help to create a professional-looking finish.
- Caulk any gaps between the molding and the cabinets. This will help to prevent moisture from damaging the molding.
- Paint or stain the molding to match the cabinets. This will help to create a cohesive look.
Adding molding to kitchen cabinets is a great way to update the look of your kitchen without having to replace the cabinets. With a little bit of planning and effort, you can achieve stunning results.

From Drab To Fab Adding Trim Cabinets

Adding Crown Molding To Cabinets Young House Love

How To Add Trim And Paint Your Laminate Cabinets

From Drab To Fab Adding Trim Cabinets

Diy Kitchen Cabinet Upgrade With Paint And Crown Molding

How To Get A Custom Cabinet Look Using Trim Sincerely Marie Designs

Easy And Inexpensive Cabinet Updates Adding Trim To Cabinets Drawers The Rozy Home

Adding Shaker Trim To Flat Panel Cabinets Hometalk

How To Add Crown Molding Kitchen Cabinets Abby Organizes

How To Add Molding Cabinets For A Gorgeous Finish Inspiration Moms
Related Posts

