Add Trim to Old Kitchen Cabinets: A Step-by-Step Guide to Revitalize Your Space
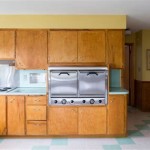
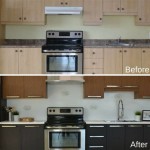
Kitchen cabinets are the backbone of any kitchen design, providing both functionality and aesthetic appeal. Over time, however, even the most durable cabinets can start to show their age. Instead of replacing them entirely, adding trim is an affordable and effective way to revitalize their appearance and create a fresh new look for your kitchen.
Benefits of Adding Trim to Kitchen Cabinets
- Enhanced Aesthetics: Trim adds depth and dimension to cabinets, giving them a more sophisticated and polished appearance.
- Camouflaged Flaws: Trim can effectively hide scratches, dents, or other imperfections on cabinet surfaces, restoring their pristine condition.
- Improved Functionality: Moldings and trim can be used to create decorative elements like handles or corbels, improving the overall functionality of your cabinets.
- Cost-Effective: Adding trim is significantly more affordable than replacing entire cabinets, saving you money while still achieving a dramatic transformation.
Choosing the Right Trim
The key to successful cabinet trim is selecting the right type of trim that complements your existing cabinets and overall kitchen design. Here are some popular options:
- Crown Molding: Installed at the top of cabinets, crown molding adds a touch of elegance and grandeur to your kitchen.
- Light Rail Molding: A narrow strip of molding that sits between the cabinet doors and the countertop, light rail molding provides a decorative accent and adds depth to your cabinets.
- Valance Molding: Installed underneath the cabinet doors, valance molding creates a decorative border and conceals the unsightly gap between the doors and the countertop.
- Base Cap Molding: Similar to crown molding but installed at the bottom of cabinets, base cap molding adds a touch of sophistication and protects your cabinets from floor moisture.
Step-by-Step Guide to Adding Trim
- Measure and Cut: Measure the length of each cabinet and cut the trim accordingly. Use a miter saw for precise angled cuts.
- Apply Adhesive: Apply a generous amount of wood glue or construction adhesive to the back of the trim.
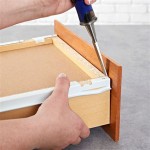
- Align and Attach: Position the trim carefully along the cabinet edge and press it firmly into place. Use a nail gun or small nails to secure the trim.
- Fill and Sand: Fill any nail holes or gaps with wood filler. Once dry, sand the surface smooth.
- Paint or Stain: If desired, paint or stain the trim to match or complement your existing cabinets.
Tips for Adding Trim
* Use decorative nails or tacks to add an extra touch of elegance. * Consider adding trim to other kitchen elements, such as the island or pantry, for a cohesive look. * If the existing finish on your cabinets is peeling or damaged, sand and repaint or refinish them before adding trim. * Seek professional assistance if you encounter any difficulties during the installation process.Final Thoughts
Adding trim to old kitchen cabinets is a cost-effective and transformative project that can revitalize your kitchen's appearance and improve its functionality. By carefully selecting the right trim and following the proper installation techniques, you can create a stunning and customized kitchen that will add value and beauty to your home.

From Drab To Fab Adding Trim Cabinets

From Drab To Fab Adding Trim Cabinets

Adding Molding To Old Cabinets Diy Tutorial Kitchen Cabinet Doors

Adding Shaker Trim To Flat Panel Cabinets Hometalk

How To Add Trim And Paint Your Laminate Cabinets

Add Moulding To Flat Cabinet Doors Home Kitchens Cabinets Kitchen

How To Add Trim And Paint Your Laminate Cabinets

Kitchen Diy Shaker Style Cabinets Cherished Bliss

Easy And Inexpensive Cabinet Updates Adding Trim To Cabinets Drawers The Rozy Home

Adding Moldings To Your Kitchen Cabinets Remodelando La Casa
Related Posts


