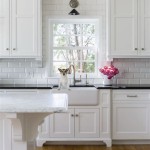
Adding Trim to Kitchen Cabinet Doors: A Guide to Enhancing Your Kitchen Design
Kitchen cabinets are a central element in any kitchen design, and their appearance can significantly impact the overall aesthetic. One simple yet effective way to elevate the look of your cabinets is by adding trim. Trim, which refers to decorative molding applied to the edges of surfaces, can transform plain cabinets into statement pieces, adding a touch of elegance and sophistication to your kitchen. This article will guide you through the process of adding trim to kitchen cabinet doors, exploring the various types of trim available, the tools required, and the steps involved in this enhancement project.
Types of Trim for Kitchen Cabinet Doors
A wide range of trim options are available, each offering unique visual characteristics and design possibilities. Here are some of the most popular choices:
- Casing Trim: Commonly used for framing doors and windows, casing trim can be applied to the edges of cabinet doors to create a traditional and classic look.
- Moulding: Available in various profiles, including crown moulding, chair rail moulding, and beadboard, moulding can add intricate detailing and visual interest to cabinet doors.
- Edge Banding: This type of trim is applied along the edges of cabinet doors to create a smooth and finished look. It comes in various materials, including wood, veneer, and plastic.
- Applied Moulding: This type of trim is designed to be attached to the surface of the cabinet door, allowing for greater design flexibility.
The choice of trim depends on the desired aesthetic, the style of the kitchen, and the overall budget. For a more contemporary look, consider using clean lines and simple profiles. For a traditional kitchen, ornate mouldings and intricate details can add a touch of elegance.
Tools and Materials Needed for Adding Trim
Before you begin adding trim to your kitchen cabinet doors, ensure you have the following tools and materials on hand:
- Trim: Choose the type and size of trim based on your design preferences.
- Miter Saw or Chop Saw: Required for accurately cutting the trim to size.
- Wood Glue: Used to secure the trim to the cabinet doors.
- Finish Nails: These are used to hold the trim in place until the glue dries.
- Nail Gun (Optional): A nail gun can make the process faster and easier.
- Measuring Tape: Used to accurately measure the trim pieces.
- Pencil: Used to mark the trim pieces before cutting.
- Clamps: Used to hold the trim in place while the glue dries.
- Sandpaper: Used to smooth out any rough edges and imperfections.
- Wood Filler: Used to fill in any gaps between the trim and the cabinet doors.
- Paint or Stain: Depending on your desired finish, choose paint or stain to match the existing cabinets or create a contrasting look.
Steps to Add Trim to Kitchen Cabinet Doors
Once you have gathered all the necessary tools and materials, follow these steps to add trim to your kitchen cabinet doors:
- Measure and Cut Trim: Measure the length and width of each cabinet door and cut the trim pieces accordingly. Use a miter saw or chop saw to make precise cuts at 45-degree angles for the corners.
- Apply Glue: Apply a bead of wood glue to the back of the trim pieces.
- Attach Trim: Position the trim on the cabinet doors and secure it in place using finish nails or a nail gun. Use clamps to hold the trim in place while the glue dries.
- Fill Gaps: Use wood filler to fill in any gaps between the trim and the cabinet doors.
- Sand and Finish: Once the wood filler has dried, sand the trim smooth with sandpaper. Then, paint or stain the trim to match the existing cabinets or create a contrasting look.
Adding trim to kitchen cabinet doors is a relatively straightforward project that can dramatically enhance the appearance of your kitchen. By following these steps, you can create a custom look that reflects your personal style and complements the existing design. Remember to choose the right type of trim, use the appropriate tools, and take your time for a professional result.

From Drab To Fab Adding Trim Cabinets

From Drab To Fab Adding Trim Cabinets

Adding Shaker Trim To Flat Panel Cabinets Hometalk

Adding Molding To Old Cabinets Diy Tutorial Kitchen Cabinet Doors

How To Add Trim And Paint Your Laminate Cabinets

Add Moulding To Flat Cabinet Doors Home Kitchens Diy Kitchen Cabinets

Adding Moldings To Your Kitchen Cabinets Remodelando La Casa

How To Add Trim And Paint Your Laminate Cabinets

Easy And Inexpensive Cabinet Updates Adding Trim To Cabinets Drawers The Rozy Home

Kitchen Diy Shaker Style Cabinets Cherished Bliss
Related Posts

