Essential Aspects of Adding Trim to Old Kitchen Cabinets
When it comes to updating the look of your kitchen, adding trim to old cabinets can be a transformative and relatively inexpensive solution. However, there are several key aspects to consider to ensure a successful outcome. This article will explore the essential elements of adding trim to old kitchen cabinets, providing you with a comprehensive guide to achieving a polished and professional finish. ### 1. Selecting the Right Trim The trim you choose will significantly impact the overall appearance of your kitchen. Here are some factors to keep in mind: -Material:
Trim can be made from various materials, including wood, MDF, and plastic. Wood is a classic and durable option, while MDF is a more budget-friendly choice. Plastic is moisture-resistant, making it suitable for areas around the sink or dishwasher. -Profile:
The profile of the trim refers to its shape and detailing. Choose a profile that complements the style of your kitchen and the existing cabinets. -Width:
The width of the trim will determine how much it protrudes from the cabinet. A wider trim can add a more substantial look, while a narrower trim can create a more subtle accent. ### 2. Preparing the Cabinets Before adding trim, ensure that the cabinets are properly prepared. This involves: -Cleaning:
Remove any dirt or grime from the cabinet surfaces. -Sanding:
Lightly sand the cabinet surfaces to provide a smooth surface for adhesion. -Priming:
Apply a coat of primer to the cabinet surfaces to enhance paint or stain adhesion. ### 3. Applying the Trim -Measuring and Cutting:
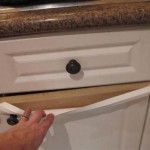
Measure the length of each cabinet where the trim will be installed. Cut the trim accordingly using a miter saw for angled cuts. -Attaching the Trim:
Apply a thin layer of adhesive to the back of the trim and press it firmly into place. Use a brad nailer or finish nails to secure the trim. ### 4. Finishing Touches -Filling Nail Holes:
Fill any nail holes with wood filler or spackling paste. Allow it to dry and then sand it flush with the surface. -Painting or Staining:
Paint or stain the trim to match the existing cabinets or create a contrasting accent. Apply multiple coats for a durable finish. -Sealing:
Apply a clear sealant over the paint or stain to protect it from moisture and wear. ### Conclusion Adding trim to old kitchen cabinets is a rewarding home improvement project that can enhance the aesthetics and functionality of your kitchen. By carefully considering the essential aspects outlined in this article, you can achieve a professional-quality finish that will transform the look of your kitchen for years to come.
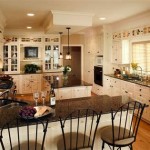
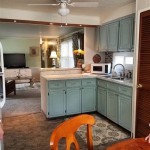
From Drab To Fab Adding Trim Cabinets

From Drab To Fab Adding Trim Cabinets

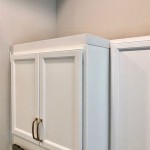
Adding Molding To Old Cabinets Diy Tutorial Cabinet Doors Kitchen

How To Add Trim And Paint Your Laminate Cabinets

Adding Shaker Trim To Flat Panel Cabinets Hometalk

Add Moulding To Flat Cabinet Doors Home Kitchens Cabinets Diy Kitchen

How To Add Trim And Paint Your Laminate Cabinets

From Drab To Fab Adding Trim Cabinets

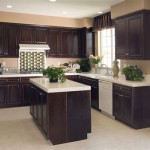
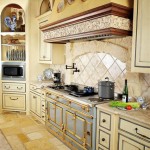
Adding Moldings To Your Kitchen Cabinets Remodelando La Casa

Great Way To Add Interest Bathroom Or Kitchen Cabinets Ck This Out Wow Plain Cabinet Doors Home Diy
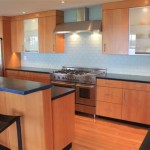
Related Posts