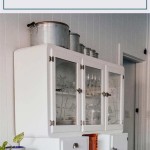
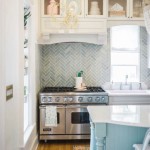
Before and After Painted Kitchen Cabinets: A Guide to Transformation
Revitalizing your kitchen's aesthetic can be as simple as updating your cabinets. Painting kitchen cabinets can create a stunning transformation without the need for a complete remodel. Here are essential aspects to consider when embarking on a before and after painted kitchen cabinet makeover:
1. Preparation is Key
Meticulous preparation is crucial for a flawless finish. Remove all hardware, knobs, and handles. Clean the cabinets thoroughly to remove grease and dirt. Sand lightly to smooth any imperfections and enhance paint adhesion. If your cabinets have a glossy finish, apply a deglosser to create a suitable surface for painting.
2. Choose the Right Paint
Selecting the ideal paint for your cabinets is essential. Opt for a high-quality cabinet or furniture paint designed to adhere well to wood surfaces. Consider semi-gloss or satin finishes for durability and ease of cleaning.
3. Use Primer or Bonding Agent
Apply a primer or bonding agent to ensure the paint adheres properly to the cabinets. This step is particularly important for cabinets with a dark or porous finish. Allow the primer to dry completely before painting.
4. Paint in Thin, Even Coats
Apply several thin coats of paint rather than one thick coat. Allow each coat to dry thoroughly before applying the next. Use a fine brush or roller specifically designed for painting cabinets. Pay close attention to the edges and corners, ensuring even coverage.
5. Sand Between Coats
After each coat of paint has dried, lightly sand the surface with fine-grit sandpaper. This step removes any imperfections or brushstrokes and ensures a smooth finish. Wipe away the sanding dust before applying the next coat.
6. Apply a Topcoat
Once the final coat of paint has dried, apply a polyurethane or lacquer topcoat to protect the finish. This step enhances durability and provides resistance to wear and tear. Allow the topcoat to cure for several days before reinstalling the hardware.
Additional Tips
* Consider cabinet refacing: If your cabinets are in good condition but have outdated finishes, consider refacing them. This involves replacing the cabinet doors and drawer fronts with new ones, which can provide a dramatic update. * Experiment with color: Don't be afraid to experiment with different colors. A fresh coat of paint can completely change the look and feel of your kitchen. * Add hardware: New hardware can complement the painted cabinets and add a touch of personality. Choose knobs and handles that match the style of your kitchen and enhance the overall aesthetic. With careful preparation and attention to detail, painting your kitchen cabinets can result in a stunning transformation. By following these essential aspects, you can create a renewed kitchen space that brings joy to your home.
15 Diy Kitchen Cabinet Makeovers Before After Photos Of Cabinets

Update On Our Diy White Painted Kitchen Cabinets 2 Years Later

Benefits Of Painting Your Kitchen Cabinets George Apap

Our Painted Cabinets Five Years Later Nina Hendrick Home

Painted Cabinets Nashville Tn Before And After Photos Brown Kitchen Painting White

Painted Cabinets Nashville Tn Before And After Photos

20 Pictures Of Before And After Kitchen Makeovers With Cost Painting Cabinets

Should I Paint My Kitchen Cabinets

Painted Cabinets Nashville Tn Before And After Photos

How To Paint Kitchen Cabinets So They Look Amazing And Last Weekend Diy Projects
Related Posts

