Essential Aspects of Before and After Kitchen Cabinet Staining
Revitalizing your kitchen cabinets through staining is a cost-effective alternative to replacement, adding a touch of elegance and functionality to your culinary space. However, achieving a seamless and stunning transformation requires careful consideration of several crucial aspects before and after the staining process.
Pre-Staining Considerations
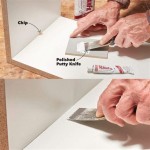
1. Cabinet Inspection: Begin by thoroughly inspecting your cabinets for any signs of damage, such as cracks, chips, or loose joints. Repair or reinforce any issues to ensure a solid foundation for the staining process.
2. Cleaning and Degreasing: Clean your cabinets thoroughly with a degreasing agent like trisodium phosphate (TSP) to remove grease and grime. This will allow the stain to adhere properly to the surface.
3. Sanding: Lightly sand the cabinet surfaces using fine-grit sandpaper (120-150 grit) to create a suitable surface for the stain. Remove any dust residue using a damp cloth.
Staining Process
1. Selecting the Stain: Choose a high-quality stain that complements your desired look and the existing kitchen décor. Consider the type of wood, its natural grain patterns, and the intensity of color you want to achieve.
2. Test the Stain: Apply the stain to an inconspicuous area first to test its compatibility with the wood and ensure you're satisfied with the color.
3. Apply the Stain: Use a foam brush, sponge, or lint-free cloth to apply thin, even coats of stain in the direction of the wood grain. Allow each coat to dry thoroughly before applying the next.
Post-Staining Care
1. Drying Time: Allow the stained cabinets to dry completely. The exact drying time will depend on the stain and the temperature of the room.
2. Protective Finish: Once the cabinets are dry, apply a protective finish such as polyurethane or varnish to enhance durability and protect against moisture and abrasion. Apply multiple thin coats, allowing each coat to dry thoroughly.
3. Maintenance: Clean your stained cabinets regularly with a mild soap and water solution. Avoid using harsh chemicals or abrasive cleaners that could damage the finish.
Conclusion
By meticulously adhering to these essential aspects of kitchen cabinet staining, you can transform your kitchen into a stylish and inviting space. Armed with the right tools and materials, and by taking the necessary pre- and post-staining precautions, you can achieve a professional-looking finish that will enhance the beauty and functionality of your kitchen for years to come.

9 Inspiring Kitchen Cabinet Makeovers Before And After Remodel Small Builder Grade Renovation

Kitchen Cabinet Colors Before After The Inspired Room

Staining Your Wood Cabinets Darker Young House Love

Painting Kitchen Cabinets Before After The Stonybrook House

20 Pictures Of Before And After Kitchen Makeovers With Cost Painting Cabinets

Diy Painting Your Kitchen Cabinets The Right Way

Refinishing Kitchen Cabinets Modern Refacing Made Easy Wisewood

Refinish Kitchen Cabinets With Kilz Restoration Primer

Pa Wedding Photographer Diy Painted Kitchen Cabinets Before After

Before After Grey Kitchen Makeover Diy Cabinets Renovation Remodel Small
Related Posts


