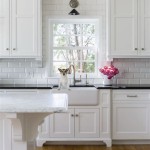
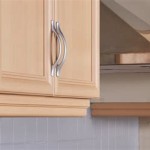
Before and After Painting Kitchen Cabinets: A Comprehensive Guide
Transforming the aesthetics of your kitchen can be as simple as painting your cabinets. A fresh coat of paint can instantly rejuvenate dated cabinetry, enhance the ambiance of the room, and even increase the resale value of your home. However, painting kitchen cabinets is not a task to be taken lightly. Careful preparation, proper technique, and the right materials are crucial for achieving a professional-looking finish that lasts.
Prepping the Cabinets
Thorough preparation is the foundation of a successful painting project. Begin by removing all hardware, such as knobs, handles, and drawers. Next, clean the cabinets thoroughly with a degreasing cleaner. This will remove any dirt, grime, or grease that could interfere with the adhesion of the paint. After cleaning, lightly sand the surfaces of the cabinets using fine-grit sandpaper. This will create a smooth surface for the paint to adhere to.
Choosing the Right Paint
Selecting the right paint is essential for a durable and aesthetically pleasing finish. For kitchen cabinets, enamel or urethane-based paints are recommended. These paints are highly resistant to wear, moisture, and heat, making them ideal for a high-traffic area like the kitchen. Choose a paint that is specifically designed for cabinets and has a glossy or semi-gloss finish for maximum durability.
Applying the Paint
When painting kitchen cabinets, it is crucial to apply thin, even coats. Use a high-quality brush or roller and avoid overloading it with paint. Start by applying a primer to ensure that the paint adheres properly and provides a uniform base color. Allow the primer to dry completely before applying the first coat of paint. After the first coat is dry, lightly sand the surface again to smooth any imperfections.
Apply a second coat of paint and allow it to dry thoroughly as well. If necessary, apply a third coat for a more opaque finish. Always allow each coat to dry completely before applying the next. Once all coats are dry, reattach the hardware and enjoy your newly painted kitchen cabinets!
Tips for a Professional Finish
* Use a high-quality brush or roller specifically designed for painting cabinets. * Avoid using too much paint, as this can lead to drips or runs. * Allow each coat of paint to dry completely before applying the next. * Sand lightly between coats to ensure a smooth finish. * Clean your brushes or rollers thoroughly after each use to prevent paint from drying out and clogging the bristles. * If you are painting over dark-colored cabinets, consider using a pigmented primer to prevent the old color from bleeding through.
9 Inspiring Kitchen Cabinet Makeovers Before And After Remodel Small Builder Grade Renovation

Diy Painting Your Kitchen Cabinets The Right Way

Update On Our Diy White Painted Kitchen Cabinets 2 Years Later

Our Painted Cabinets Five Years Later Nina Hendrick Home

Kitchen Painting Projects Before And After Paper Moon

20 Pictures Of Before And After Kitchen Makeovers With Cost Painting Cabinets

Painted Cabinets Nashville Tn Before And After Photos

15 Diy Kitchen Cabinet Makeovers Before After Photos Of Cabinets

How To Paint Kitchen Cabinets The Love Notes Blog

Benefits Of Painting Your Kitchen Cabinets George Apap
Related Posts


