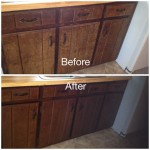
The Art of Staining Unfinished Kitchen Cabinets
Transforming unfinished kitchen cabinets into visually stunning masterpieces is a rewarding endeavor that can elevate the ambiance of your kitchen. Staining allows you to customize the color, finish, and overall character of your cabinetry, creating a look that perfectly complements your kitchen's style. In this comprehensive guide, we'll explore the essential aspects of staining unfinished kitchen cabinets, ensuring a successful and satisfying result.
1. Preparation: The Foundation for Success
Before embarking on the staining process, meticulous preparation is paramount. Begin by removing all cabinet doors and hardware. Clean the cabinets thoroughly with a degreaser, paying close attention to removing any dirt, grease, or debris that may interfere with the stain's adhesion. Sand the surfaces lightly to create a smooth base for the stain. Remove dust particles by wiping down the cabinets with a tack cloth.
2. Choosing the Right Stain: A Matter of Tone
The choice of stain determines the final color and finish of your cabinets. Gel stains offer rich, even coverage and are ideal for creating opaque finishes. Penetrating oil stains penetrate deeply into the wood, highlighting the natural grain and creating a more transparent, rustic look. Water-based stains are less toxic and easier to use than oil-based stains, but they may require multiple coats to achieve the desired depth of color.
3. Pre-Conditioning: Enhancing Stain Absorption
Pre-conditioning the wood before applying the stain ensures even absorption and prevents blotching. Apply a thin coat of pre-stain conditioner and allow it to penetrate for 15-20 minutes. Wipe off any excess conditioner with a clean cloth.
4. Staining Techniques: Achieving the Desired Effect
For gel stains, use a brush or sponge to apply a thin, even layer. Allow the stain to sit for the recommended time, then wipe away excess with a clean cloth. For penetrating oil stains, apply liberally and allow them to penetrate for 20-30 minutes. Wipe off any excess stain and apply a second coat if necessary. For water-based stains, apply multiple thin coats, allowing each coat to dry completely before applying the next.
5. Polyurethane: Protection and Durability
After the stain has dried completely, apply clear polyurethane to protect the finish. Polyurethane creates a barrier against moisture and wear, ensuring the longevity of your stained cabinets. Apply thin, even coats, lightly sanding between coats to achieve a smooth, durable finish.
6. Touch-Ups and Maintenance: Keeping the Finish Pristine
To address any imperfections or scratches that may occur over time, use a touch-up pen or stain marker that matches the original stain color. For regular maintenance, clean the cabinets with a mild cleaner and avoid using harsh chemicals or abrasive materials.
Conclusion: A Transformed Kitchen, a Rewarding Journey
By following these essential steps, you can successfully stain unfinished kitchen cabinets, transforming them into beautiful and functional focal points of your kitchen. With patience, attention to detail, and the right tools and materials, you can create a kitchen that reflects your personal style and provides years of enjoyment.

How To Stain Unfinished Cabinets Painting By The Penny

How To Stain Unfinished Cabinets Painting By The Penny

How To Finish Wood Cabinets Cabinet Doors N More

How To Make Rustic Kitchen Cabinets By Refinishing Them The Best Stain Color Amanda Katherine

How To Stain Unfinished Cabinets Painting By The Penny

How To Stain Unfinished Cabinets Painting By The Penny

How To Paint Unfinished Cabinets Houseful Of Handmade

How To Stain Unfinished Cabinets Painting By The Penny

How To Stain Unfinished Cabinets Painting By The Penny

How To Paint Unfinished Cabinets Houseful Of Handmade
Related Posts


