Bleaching Oak Kitchen Cabinets: A Comprehensive Guide
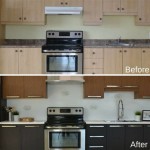
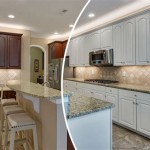
Transforming the appearance of your oak kitchen cabinets can revitalize the entire kitchen. Bleaching is a popular technique for lightening the natural golden-brown hue of oak, creating a brighter and more modern aesthetic. This article provides a comprehensive guide to bleaching oak kitchen cabinets, ensuring a successful and professional-looking result.
1. Gather the Necessary Materials
Before embarking on the bleaching process, gather the following materials:
- Wood bleach (two-part system)
- Neutralizing solution
- Soft cloths or sponges
- Rubber or nitrile gloves
- Safety glasses
- Test piece of oak (optional)
2. Prepare the Surface
Thoroughly clean the cabinet doors and drawers with a degreaser or TSP cleaner. Remove all hardware and ensure the surfaces are dry and free of any dirt or debris.
3. Conduct a Test (Optional)
If desired, apply a small amount of diluted bleach to a hidden area of the cabinet to test the desired level of bleaching. This allows you to adjust the dilution ratio if necessary.
4. Mix the Wood Bleach
Follow the manufacturer's instructions carefully when mixing the two-part wood bleach system. Use the recommended ratio of bleach to water, typically around 1:1 or 1:2.
5. Apply the Bleach
Wearing rubber gloves and safety glasses, apply the bleach liberally to the cabinet surfaces using a soft cloth or sponge. Work in small sections at a time, ensuring that the bleach covers the entire surface evenly.
6. Allow the Bleach to Work
Let the bleach sit for the recommended time, typically around 2-4 hours. Monitor the progress of the bleaching process periodically, as the color will gradually lighten.
7. Neutralize the Bleach
Once the desired level of bleaching is achieved, neutralize the bleach by applying a neutralizing solution according to the manufacturer's instructions. This step stops the bleaching action and removes any residual bleach.
8. Rinse and Dry
Thoroughly rinse the cabinets with clean water to remove any remaining bleach or neutralizer. Wipe down the surfaces with a soft, dry cloth to absorb excess moisture.
9. Seal the Cabinets
To protect the bleached cabinets from moisture and stains, apply a clear sealant or finish. Allow the sealant to dry completely before reattaching the hardware.
Tips
* Work in a well-ventilated area. * Avoid using steel wool or abrasive pads, as they can damage the wood. * If the cabinets have a polyurethane finish, you may need to remove it before bleaching. * Consider hiring a professional for highly valuable or intricate cabinetry. * Bleaching oak cabinets is a permanent alteration, so ensure you are fully satisfied with the desired result before proceeding. * Maintaining bleached cabinets requires regular cleaning and touch-ups to prevent yellowing over time.
Bleached Oak Cabinets Loving This 2024 Kitchen Trend Home Kitchens Decor Natural Wood

Bleached White Oak Cabinets Star In This Two Tone Kitchen

Popular Again Wood Kitchen Cabinets Centsational Style

The New Look Of Wood Kitchens Timeless Or Trendy

Bleached White Oak Cabinets Star In This Two Tone Kitchen

How To Stain Dark Or Yellow Kitchen Cabinets Lighter

How To Lighten Stained Wood 7 Options That Work Grace In My Space

How To Bleach Cabinets Decorate With Tip And More

How To Stain Dark Or Yellow Kitchen Cabinets Lighter

Cerused French Oak Kitchens And Cabinets Kitchen Trend 2024 Petite Haus
Related Posts


