Can I Paint My Kitchen Cupboards White? A Comprehensive Guide
Painting kitchen cupboards white is a common and effective way to refresh the look of a kitchen without a complete renovation. White is a versatile color that can brighten the space, create the illusion of more room, and complement various design styles. However, achieving a professional and durable finish requires careful planning, preparation, and execution. This article explores the considerations involved in painting kitchen cupboards white, providing a comprehensive guide to the process.
Assessing the Suitability of Your Cupboards for Painting
Before embarking on a painting project, it is crucial to assess whether the existing kitchen cupboards are suitable candidates. The material of the cupboards significantly impacts the success of the paint job. Solid wood cupboards, especially those with a smooth surface, are generally the easiest to paint. Laminate or veneer cupboards can be more challenging due to their slick surfaces, which may require specialized primers and more extensive preparation.
The condition of the cupboards also plays a vital role. Cupboards with significant damage, such as deep scratches, water damage, or warped doors, may require extensive repairs before painting. In some cases, the cost and effort of repairs might outweigh the benefits of painting, making replacement a more practical option. Thoroughly inspect the cupboards for any signs of damage or wear and tear to determine if they are in a suitable condition for painting.
Consider the existing finish on the cupboards. If the cupboards are currently painted with a lead-based paint (common in older homes), professional abatement may be necessary before any further work can be done. Lead paint poses significant health risks and should only be handled by qualified professionals. If there's any uncertainty about the paint's composition, testing is essential to ensure safety.
Check the hardware on the cupboards. Evaluate whether the existing knobs, pulls, and hinges are still functional and aesthetically pleasing. Painting the cupboards presents an opportunity to update the hardware, which can significantly impact the overall look of the kitchen. Consider the cost of new hardware when budgeting for the project.
Essential Preparation Steps for a Flawless Finish
Proper preparation is paramount to achieving a smooth and long-lasting paint finish on kitchen cupboards. Neglecting this crucial step can lead to peeling, chipping, and an overall unprofessional appearance. The preparation process typically involves removing the cupboards, cleaning them thoroughly, sanding the surfaces, and applying primer.
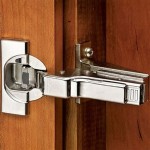
Begin by carefully removing all cupboard doors and drawers. Label each one with a number or letter corresponding to its location in the kitchen. This will ensure that they are reinstalled in the correct positions. Remove all hardware, such as knobs, pulls, hinges, and latches. Store the hardware in a safe place to prevent loss or damage. Taking photos of the cupboard arrangement before disassembly can also be helpful during reassembly.
Clean the cupboard doors and frames thoroughly to remove any grease, grime, or dirt. Use a degreasing cleaner specifically designed for kitchen surfaces. Rinse the surfaces with clean water and allow them to dry completely. Stubborn grease stains may require multiple cleaning passes. Pay particular attention to areas around the handles and near the stove, as these tend to accumulate more grease.
Sanding is an essential step in preparing the cupboard surfaces for paint. Sanding creates a slightly rough surface, allowing the primer and paint to adhere properly. Use a medium-grit sandpaper (around 120-150 grit) for the initial sanding and a fine-grit sandpaper (around 220 grit) for the final sanding. Sand the surfaces gently and evenly, avoiding excessive pressure that could damage the wood. For laminate or veneer cupboards, use an extra-fine grit sandpaper to avoid scratching the surface. Vacuum up the sanding dust thoroughly after each sanding session. A tack cloth is helpful to remove any remaining fine dust particles.
Applying primer is a crucial step in ensuring a long-lasting and durable paint finish. Primer helps to seal the surface, preventing the paint from being absorbed into the wood. It also provides a uniform base for the paint, ensuring consistent color and coverage. Use a high-quality primer specifically designed for kitchen cupboards. For laminate or veneer cupboards, use an adhesion-promoting primer. Apply the primer in thin, even coats, following the manufacturer's instructions. Allow the primer to dry completely before applying the paint.
Once the primer is dry, lightly sand the surface with fine-grit sandpaper (around 220 grit) to smooth out any imperfections. Vacuum up the sanding dust and wipe the surface with a tack cloth. This will create a perfectly smooth surface for the paint.
Selecting the Right Paint and Application Techniques
Choosing the right type of paint and applying it correctly are crucial for achieving a professional-looking finish that will withstand the daily wear and tear of a kitchen environment. The selection of paint type, sheen, and application method all contribute to the overall durability and aesthetic appeal of the finished product.
Select a high-quality paint that is specifically designed for kitchen cupboards. Acrylic latex paints are a popular choice due to their durability, ease of cleaning, and low VOC (volatile organic compounds) content. Oil-based paints offer excellent durability and a smooth finish, but they have a stronger odor and require more time to dry. Consider using a paint specifically formulated for cabinets, as these paints often contain additives that enhance their durability and resistance to chipping and scratching.
The paint sheen or finish impacts the appearance and cleanability of the cupboards. Semi-gloss and high-gloss sheens are durable and easy to clean, making them ideal for kitchen cupboards. However, they also tend to highlight imperfections in the surface. Satin and eggshell sheens offer a softer look and hide imperfections better, but they may not be as durable or easy to clean. Consider the overall style of the kitchen and the amount of wear and tear the cupboards will endure when choosing a paint sheen.
There are several methods for applying paint to kitchen cupboards, including brushes, rollers, and sprayers. Brushes are suitable for small areas and intricate details, but they can leave brush marks if not used carefully. Rollers provide a smooth, even finish on larger surfaces, but they may not be suitable for detailed work. Sprayers offer the most professional-looking finish, but they require more skill and equipment. When using a brush, use high-quality synthetic brushes that are designed for use with latex paints. When using a roller, use a foam roller or a microfiber roller for a smooth finish. When using a sprayer, thin the paint according to the manufacturer's instructions and practice on a scrap piece of wood before painting the cupboards.
Apply the paint in thin, even coats, following the manufacturer's instructions. Allow each coat of paint to dry completely before applying the next coat. Sand lightly between coats with fine-grit sandpaper (around 220 grit) to smooth out any imperfections. Vacuum up the sanding dust and wipe the surface with a tack cloth. Apply at least two coats of paint for optimal coverage and durability. Avoid applying thick coats of paint, as this can lead to drips and runs.
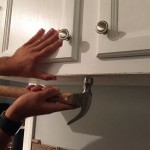
After applying the final coat of paint, allow the cupboards to dry completely before reinstalling the hardware and reattaching the doors and drawers. Follow the labels that were placed on the doors and drawers during disassembly to ensure that they are reinstalled in the correct positions. Install the hardware securely. Clean the cupboards with a mild detergent and water. Avoid using harsh chemicals or abrasive cleaners, as these can damage the paint finish.
Consider using a clear topcoat for added protection and durability. A clear topcoat can help to protect the paint from scratches, stains, and fading. Choose a water-based topcoat for use over latex paint and an oil-based topcoat for use over oil-based paint. Apply the topcoat in thin, even coats, following the manufacturer's instructions. Allow the topcoat to dry completely before using the cupboards.

My Painted Cabinets Two Years Later The Good Bad Ugly

Painting Dark Kitchen Cabinets White My Weathered Home

Update On Our Diy White Painted Kitchen Cabinets 2 Years Later

Pros And Cons Of Painting Kitchen Cabinets White De Manor Farm By Laura Janning

Ask Maria Help My White Painted Kitchen Cabinets Look Bad Advice For Homeowners

Pros And Cons Of Painted White Kitchen Cabinets Julie Blanner

How To Re Paint Your Yucky White Cabinets

Our Favorite White Kitchen Cabinet Paint Colors Christopher Scott Cabinetry

25 Popular Kitchen Paint Colors With White Cabinets For 2024

How To Paint Oak Cabinets And Hide The Grain Tutorial
Related Posts

