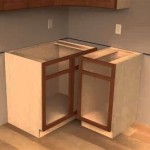
Installing Laminate Flooring Under Kitchen Cabinets: A Comprehensive Guide
Installing laminate flooring in your kitchen can enhance its aesthetic appeal and durability. However, the presence of kitchen cabinets can present a unique challenge when it comes to installation. In this comprehensive guide, we will explore the essential aspects of installing laminate flooring under kitchen cabinets, ensuring a successful and professional-looking result.
1. Plan the Layout and Prepare the Area
Before starting the installation, carefully plan the layout of the laminate flooring, considering the location of kitchen cabinets and appliances. Remove any existing flooring, baseboards, and trim. Clean the subfloor thoroughly to remove any dirt or debris that could interfere with the adhesion of the laminate flooring.
2. Measure and Cut the Laminate Planks
Measure the space under each kitchen cabinet and cut the laminate planks accordingly, ensuring they fit snugly against the cabinets. Use a sharp utility knife or a miter saw to make precise cuts. Remember to allow for a small expansion gap around the edges of the cabinets.
3. Install the Underlayment
Lay down an underlayment over the subfloor. The underlayment provides cushioning and helps reduce noise and moisture. Cut the underlayment to fit the shape and dimensions of the space under the kitchen cabinets, securing it with tape or glue.
4. Start Laying the Laminate Flooring
Begin laying the laminate flooring from the starting point, connecting the planks together using the manufacturer's instructions. As you reach the kitchen cabinets, carefully measure and cut the planks to fit around the base of the cabinets, ensuring a tight fit.
5. Secure the Laminate Flooring
Secure the laminate flooring by tapping the end joints together using a tapping block or a rubber mallet. Avoid using excessive force to prevent damage to the planks. Ensure the flooring is securely locked into place and there are no gaps between the planks.
6. Trim and Install Baseboards
Once the laminate flooring is installed, trim the excess flooring around the edges of the cabinets. Install new baseboards to cover the expansion gap and give the kitchen a finished look. Use a miter saw to cut the baseboards at 45-degree angles for a professional finish.
7. Finishing Touches
Apply caulk around the edges of the cabinets where the laminate flooring meets the cabinets to prevent moisture from seeping in. Install any remaining trim or molding to complete the installation and enhance the overall aesthetic of your kitchen.
Conclusion
Installing laminate flooring under kitchen cabinets requires careful planning, precision cutting, and proper installation techniques. By following these essential steps, you can achieve a seamless and professional-looking result that enhances the functionality and appearance of your kitchen. Remember to read the manufacturer's instructions carefully and take your time during the installation process to ensure a successful outcome.

Do You Install Floating Floor Under Cabinets Wood Flooring

Do You Install Floating Floor Under Cabinets Wood Flooring

Do You Install Floating Floor Under Cabinets Wood Flooring

Can I Use Laminate Flooring Under Cabinets

Do You Install Floating Floor Under Cabinets Wood Flooring

Laminate Flooring In Kitchens Do It Yourself Installation

House Tweaking

Do You Install Floating Floor Under Cabinets Wood Flooring

Do You Install Flooring Before Cabinets Best Practices Reallyfloors America S Est Hardwood

How To Install Laminate Flooring Diy Tips And Tricks
Related Posts


