Can You Paint High Gloss Laminate Kitchen Cabinets? A Comprehensive Guide
High gloss laminate kitchen cabinets, prized for their sleek appearance and ease of cleaning, can sometimes become dated or clash with evolving home decor. The question of whether these cabinets can be successfully painted is a common one. While painting high gloss laminate presents challenges compared to painting wood or other porous surfaces, it is indeed achievable with the correct preparation, materials, and techniques. This article provides a detailed guide on how to paint high gloss laminate kitchen cabinets, addressing critical considerations and outlining the necessary steps for a durable and aesthetically pleasing finish.
The primary obstacle to painting high gloss laminate surfaces lies in the inherent smoothness and non-porosity of the material. Paint, particularly standard acrylic or latex paints, struggles to adhere to such surfaces. Without proper preparation, the paint film is prone to chipping, peeling, and scratching. Therefore, surface preparation is the most crucial element in ensuring a successful and long-lasting paint job.
Understanding the Challenges of Painting High Gloss Laminate
The inherent properties of high gloss laminate, which offer benefits such as easy cleanup and a modern aesthetic, also contribute to the difficulty of painting. The laminate surface lacks the microscopic pores found in wood, which naturally provide a mechanical key for paint to grip. The high sheen further exacerbates the problem, as it indicates an extremely smooth and non-porous surface. Furthermore, some laminates contain additives that can repel paint, further hindering adhesion. Successfully painting this material requires overcoming these challenges through rigorous preparation and the use of specialized primers and paints.
Another challenge stems from the potential for existing damage or wear on the laminate surface. Scratches, chips, or areas where the laminate is lifting can undermine the integrity of the paint job. Addressing these imperfections prior to painting is essential to ensure a smooth and uniform finish. Failing to do so will result in these flaws being amplified by the new paint, detracting from the overall appearance.
Finally, the choice of paint and primer significantly impacts the outcome. Using unsuitable products designed for porous surfaces will likely lead to adhesion failures and a substandard finish. Selecting primers and paints specifically formulated for non-porous surfaces, such as those designed for plastic or metal, is crucial for achieving a durable and attractive result.
Step-by-Step Guide to Painting High Gloss Laminate Kitchen Cabinets
The following steps outline the process for painting high gloss laminate kitchen cabinets, emphasizing surface preparation and the selection of appropriate materials:
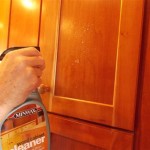
1. Preparation and Cleaning: Begin by removing all cabinet doors and drawers. Remove all hardware, including knobs, pulls, and hinges. Label each door and drawer with its corresponding location using painter's tape to ensure proper reinstallation. Thoroughly clean all surfaces with a degreasing cleaner to remove grease, grime, and any residues that may inhibit paint adhesion. Rinse with clean water and allow the surfaces to dry completely.
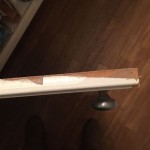
2. Damage Repair: Inspect the laminate surfaces for any damage, such as scratches, chips, or lifting edges. Fill scratches and chips with wood filler or an epoxy filler specifically designed for laminate repair. Allow the filler to dry completely according to the manufacturer's instructions. For lifting edges, carefully apply a thin layer of laminate adhesive under the loose section and clamp it in place until the adhesive dries. Once the filler and adhesive are dry, sand the repaired areas smooth using fine-grit sandpaper (220-grit or higher) to blend them seamlessly with the surrounding surface.
3. Sanding: While high gloss laminate is designed to be smooth, lightly sanding the surface is crucial for creating a mechanical key for the primer to grip. Use fine-grit sandpaper (220-grit or higher) and gently scuff the entire surface of each cabinet door, drawer, and frame. Avoid applying excessive pressure, as this can damage the laminate. The goal is not to remove the laminate, but to create a slightly roughened surface that will enhance adhesion. After sanding, thoroughly remove all sanding dust with a tack cloth or a damp cloth. Allow the surfaces to dry completely.
4. Priming: Apply a high-quality bonding primer specifically designed for non-porous surfaces. These primers contain adhesion promoters that create a strong bond between the laminate and the paint. Epoxy-based primers or those specifically formulated for plastic or metal are excellent choices. Apply the primer in thin, even coats using a high-quality brush, roller, or sprayer. Follow the manufacturer's instructions regarding drying time. Apply a second coat of primer if necessary for complete coverage. Lightly sand the primed surface with fine-grit sandpaper (320-grit or higher) to smooth out any imperfections before applying the paint.
5. Painting: Choose a high-quality paint specifically designed for cabinets and trim. Acrylic or alkyd paints offer good durability and a smooth finish. Consider using a paint with a satin or semi-gloss sheen for easy cleaning. Apply the paint in thin, even coats using a high-quality brush, roller, or sprayer. Avoid applying too much paint at once, as this can lead to drips and runs. Allow the paint to dry completely according to the manufacturer's instructions before applying a second coat. Sand lightly between coats with fine-grit sandpaper (400-grit or higher) to create a smooth and even surface. Two or three coats of paint are typically required for optimal coverage and durability.
6. Sealing (Optional): For added protection and durability, consider applying a clear topcoat or sealant after the final coat of paint has dried completely. A water-based polyurethane sealant will provide a durable and moisture-resistant finish. Apply the sealant in thin, even coats using a high-quality brush, roller, or sprayer. Allow the sealant to dry completely according to the manufacturer's instructions.
7. Reassembly: Once the paint and sealant (if used) are completely dry, carefully reattach the hardware and reinstall the cabinet doors and drawers. Ensure that all doors and drawers are properly aligned and functioning smoothly.
Key Considerations for a Successful Paint Job
Beyond the step-by-step guide, several key considerations contribute to a successful paint job on high gloss laminate kitchen cabinets:
1. Surface Condition: The existing condition of the laminate significantly impacts the outcome. Heavily damaged or peeling laminate may not be suitable for painting. In such cases, replacing the cabinets or refacing them with new laminate may be a more practical solution. A thorough assessment of the surface condition is crucial before embarking on the painting project.
2. Product Selection: Choosing the correct primer and paint is paramount. Primers designed for porous surfaces will not adhere properly to high gloss laminate. Similarly, low-quality paints may lack the durability and adhesion necessary for a long-lasting finish. Invest in high-quality products specifically formulated for non-porous surfaces to ensure a successful outcome. Review product specifications and consult with paint professionals to make informed decisions.
3. Application Techniques: Applying thin, even coats of primer and paint is crucial to avoid drips, runs, and uneven coverage. Using high-quality brushes, rollers, or sprayers will help achieve a smooth and professional finish. Proper technique and patience are essential for achieving optimal results. Practicing on a test piece of laminate before painting the cabinets is recommended to refine your technique and ensure a consistent finish.
4. Curing Time: Allow sufficient curing time for the primer and paint to fully harden before reassembling the cabinets and putting them back into use. Rushing the curing process can lead to dents, scratches, and adhesion problems. Curing times vary depending on the specific products used and the ambient temperature and humidity. Following the manufacturer's instructions regarding curing time is essential for achieving a durable and long-lasting finish.
5. Professional Assistance: While painting high gloss laminate kitchen cabinets is a DIY project, seeking assistance from a professional painter may be beneficial, especially for those with limited experience. A professional painter can provide expert advice on product selection, surface preparation, and application techniques. They can also ensure a smooth and flawless finish, saving time and effort while minimizing the risk of errors.

How To Paint Laminate Kitchen Cabinets Perfect Finish Tips

How To Create A High Gloss Kitchen

Painting High Gloss On White Laminate Diy Home Improvement Forum

Can You Paint High Gloss Kitchen Cupboards Wespray

What Is The Best Spray Paint On Kitchen Cabinets

Painting High Gloss On White Laminate Diy Home Improvement Forum

High Gloss Kitchen Cabinet Designs For Your Home Design Cafe

How To Change Colour Of Gloss Kitchen Doors And Drawers

Painting Laminate Cupboards Crowies Paints

How To Add Trim And Paint Your Laminate Cabinets
Related Posts