Can You Paint Old Wooden Cabinets? A Comprehensive Guide
Old wooden cabinets, often found in kitchens and bathrooms, can become outdated and worn over time. Rather than replacing them entirely, painting offers a cost-effective and relatively straightforward method to revitalize their appearance and integrate them seamlessly into a new or updated decor scheme. However, the success of this endeavor hinges on proper preparation, execution, and the selection of appropriate materials. This article will explore the intricacies of painting old wooden cabinets, providing a comprehensive guide to ensure a professional and long-lasting finish.
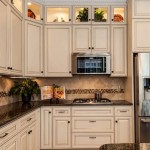
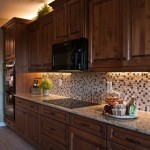
The feasibility of painting old wooden cabinets depends largely on their overall condition. Cabinets with significant structural damage, such as extensive wood rot or warping, may not be suitable for painting and may require replacement. However, cabinets with cosmetic imperfections like surface scratches, minor dents, or outdated finishes are excellent candidates for a paint makeover.
The type of wood the cabinets are constructed from also plays a role in the painting process. Hardwoods like oak and maple are generally more durable and accept paint well, while softer woods like pine may require more preparation and potentially priming to achieve a smooth and even finish. Similarly, the existing finish on the cabinets, whether it's a stain, varnish, or previous coat of paint, will influence the preparation steps required.
Key Point 1: Thorough Preparation is Paramount
The foundation of a successful cabinet painting project lies in meticulous preparation. Shortcuts taken during this stage can compromise the final result, leading to adhesion problems, uneven finishes, and premature wear and tear. The preparation process encompasses several crucial steps, each designed to ensure the paint adheres properly and creates a smooth, durable surface.
The first step is removing all cabinet doors and drawers. This allows for easier access to all surfaces and prevents paint from inadvertently getting onto hinges, knobs, and other hardware. Labeling each door and drawer with its corresponding cabinet frame location is crucial to ensure proper reinstallation later. A simple numbering system using painter’s tape can be highly effective.
Next, remove all hardware, including knobs, handles, hinges, and drawer pulls. Store these items in a safe place to prevent loss or damage. If you plan to replace the hardware, now is the time to address any necessary modifications to the cabinet doors and drawers, such as filling existing holes or drilling new ones.
Cleaning the cabinets thoroughly is essential for removing grease, grime, and other contaminants that can interfere with paint adhesion. Use a degreasing cleaner specifically designed for kitchen surfaces. Ammonia-based cleaners are often effective, but it’s crucial to rinse them thoroughly with clean water to remove any residue. In some cases, a stronger cleaner, such as trisodium phosphate (TSP), may be necessary, but always follow the manufacturer's instructions and wear appropriate safety gear, including gloves and eye protection.
Sanding is another crucial step in the preparation process. Sanding removes the existing finish, creating a slightly rough surface that provides better adhesion for the primer and paint. The grit of sandpaper to use depends on the existing finish. For glossy finishes, start with a coarser grit sandpaper (around 120-grit) to remove the sheen. For less glossy surfaces, a finer grit sandpaper (around 220-grit) may suffice. Regardless of the grit used, it’s important to sand evenly and consistently, paying particular attention to edges and corners. After sanding, thoroughly remove all sanding dust with a tack cloth or vacuum cleaner.
Filling any imperfections, such as dents, scratches, or holes, is the final preparation step. Use wood filler or spackle to fill these areas, allowing it to dry completely according to the manufacturer's instructions. Once dry, sand the filler smooth to blend it seamlessly with the surrounding surface. Again, remove all sanding dust before proceeding.
Key Point 2: Selecting the Right Primer and Paint
Choosing the appropriate primer and paint is paramount for achieving a durable and aesthetically pleasing finish on old wooden cabinets. The type of primer and paint selected will depend on the type of wood, the existing finish, and the desired aesthetic outcome.
Primer serves as a crucial intermediary layer between the prepared surface and the paint. Its primary function is to promote adhesion, ensuring the paint binds properly to the cabinets. Primer also helps to seal the wood, preventing it from absorbing too much paint, which can lead to uneven coverage and a dull finish. It can also block stains and prevent bleed-through from the old finish. For most wooden cabinets, an oil-based or water-based primer designed for wood is recommended. Oil-based primers offer excellent adhesion and stain-blocking properties but require mineral spirits for cleanup. Water-based primers are easier to clean up and are generally more environmentally friendly. Shellac-based primers are also an option, offering superior stain-blocking capabilities and fast drying times.
Selecting the right paint is equally important. For kitchen and bathroom cabinets, durability and moisture resistance are key considerations. Semi-gloss or gloss paints are generally preferred due to their ability to withstand frequent cleaning and resist moisture damage. These paints also offer a more reflective surface, which can brighten up a space. Satin paints provide a softer sheen and are also a viable option, but they may not be as durable as semi-gloss or gloss paints.
Acrylic latex paints are a popular choice for painting wooden cabinets due to their durability, ease of application, and low odor. Alkyd paints, which are oil-based, offer excellent durability and a smooth, hard finish, but they require mineral spirits for cleanup and have a stronger odor. Consider using paint specifically formulated for cabinets and trim, as these paints are designed to withstand the wear and tear that cabinets typically endure.
Tinting the primer to a similar color as the paint can also improve coverage and reduce the number of coats of paint required. This is particularly helpful when painting cabinets a light color over a dark finish.
Key Point 3: Applying the Paint and Achieving a Smooth Finish
The application of the paint is the final stage of the cabinet painting process. Proper technique and the use of appropriate tools are crucial for achieving a smooth, professional-looking finish. Several methods can be used to apply paint to wooden cabinets, including brushes, rollers, and sprayers.
When using a brush, select a high-quality brush made with synthetic bristles. Synthetic bristles are less likely to leave brushstrokes than natural bristles. Apply the paint in thin, even coats, working in the direction of the wood grain. Avoid applying too much paint at once, as this can lead to drips and runs. After each coat, lightly sand the surface with fine-grit sandpaper (around 320-grit) to remove any imperfections and create a smooth surface for the next coat.
Rollers can be used to apply paint to larger, flat surfaces, such as cabinet doors and drawer fronts. Use a foam roller for a smooth, even finish. As with brushes, apply the paint in thin, even coats. Avoid using too much pressure, as this can create a textured finish. After each coat, lightly sand the surface to remove any imperfections.
Spraying the paint offers the most professional-looking finish, but it requires specialized equipment and skills. Airless sprayers and HVLP (high volume low pressure) sprayers are commonly used for painting cabinets. When spraying, apply the paint in thin, even coats, overlapping each stroke slightly. Maintain a consistent distance from the surface and move the sprayer at a steady pace. Proper ventilation is essential when spraying paint. Wear a respirator to protect yourself from inhaling paint fumes.
Regardless of the application method, multiple thin coats of paint are generally better than one thick coat. Thin coats dry more evenly, are less likely to drip or run, and provide a more durable finish. Allow each coat of paint to dry completely according to the manufacturer's instructions before applying the next coat.
After the final coat of paint has dried, allow the cabinets to cure for at least 24 hours before reinstalling the hardware and putting the cabinets back together. This allows the paint to fully harden and prevents damage during handling. Carefully reattach the hardware and reinstall the doors and drawers, ensuring they are properly aligned and function smoothly.
Proper cleaning and maintenance are important for preserving the painted finish on wooden cabinets. Use a mild soap and water solution to clean the cabinets regularly. Avoid using abrasive cleaners, as these can scratch the paint. Wipe up spills promptly to prevent staining. With proper care and maintenance, painted wooden cabinets can provide years of beauty and functionality.

The Best Way To Paint Kitchen Cabinets No Sanding Palette Muse

How To Paint Old Kitchen Cabinets Save Yourself 1 000s Builds By Maz

Painting Oak Cabinets Transform Your Kitchen

Painting Kitchen Cabinets With A Sprayer Lemon Thistle

How To Paint Oak Cabinets And Hide The Grain Tutorial

Diy Kitchen Cabinet Painting The Easy Way

Should I Paint My Kitchen Cabinets

A Step By Guide To Painting Kitchen Cabinets With Kilz Primer Blog

How To Paint Maple Kitchen Cabinets Step By Painting Tutorial

Prep And Paint Cabinets Without Sanding
Related Posts