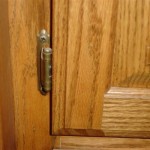
Can You Paint Over Old Wooden Cabinets? A Comprehensive Guide
Painting old wooden cabinets is a common and cost-effective method to revitalize a kitchen or bathroom without the expense of complete replacement. However, achieving a professional and durable finish requires careful planning, proper preparation, and the selection of appropriate materials. A successful paint job can transform the look of cabinetry, increasing its aesthetic appeal and extending its lifespan, while a poorly executed one can result in peeling, chipping, and an overall unattractive outcome. Therefore, understanding the necessary steps and considerations is crucial for homeowners and DIY enthusiasts considering this project.
The answer to whether one *can* paint over old wooden cabinets is definitively yes. The more pertinent question is whether one *should*, and *how* to do it properly. The feasibility of painting hinges on the condition of the existing cabinets, the type of finish they currently have, and the desired aesthetic result. Properly preparing the surface and using correct painting techniques are paramount to ensure the new paint adheres correctly and provides a lasting and visually pleasing finish. This article will delve into the essential aspects of painting old wooden cabinets, covering everything from initial assessment to the final coat.
Assessing the Condition of Your Cabinets
Before embarking on any painting endeavor, a thorough assessment of the existing cabinet condition is paramount. This involves a close inspection for signs of damage, wear, and previous finishes. Key elements to consider include:
Structural Integrity: Check for loose joints, warped doors, or damaged frames. Repairing these issues is crucial before any painting occurs. Loose hinges should be tightened or replaced, and any structural weaknesses need to be addressed to ensure the longevity of the paint job.
Surface Damage: Look for scratches, dents, and gouges. These imperfections will be amplified by a fresh coat of paint if left unaddressed. Filling these imperfections with wood filler and sanding them smooth is a necessary step in achieving a professional finish.
Existing Finish: Identify the type of existing finish on the cabinets. This will influence the preparation methods and the type of primer and paint that will be most suitable. Common finishes include varnish, lacquer, paint, and stain. Testing a small, inconspicuous area with different solvents can help determine the type of finish. For example, lacquer thinner will dissolve lacquer, while mineral spirits will affect varnish. A painted surface may require different priming techniques than a stained surface.
Mold and Mildew: Check for signs of mold or mildew, especially in areas prone to moisture, such as under the sink. If present, these contaminants must be thoroughly cleaned and treated with a mold-killing solution before painting. Painting over mold and mildew will not eliminate the problem and will ultimately lead to paint failure.
Addressing any issues identified during this assessment is critical to a successful painting outcome. Ignoring these factors can lead to poor adhesion, an uneven finish, and ultimately, a need to redo the entire project.
Preparing the Cabinets for Painting
Proper preparation is arguably the most critical step in painting old wooden cabinets. It dictates the adhesion, appearance, and longevity of the paint job. This process involves cleaning, sanding, and priming the surfaces. A meticulous approach at this stage will yield significantly better results.
Cleaning: Begin by thoroughly cleaning the cabinets with a degreasing cleaner. This removes dirt, grease, and grime that can prevent the paint from adhering properly. Trisodium phosphate (TSP) is a traditional cleaner used for this purpose, but there are also phosphate-free alternatives available. Pay particular attention to areas around handles and knobs, as these tend to accumulate grease and dirt. Rinse the cabinets thoroughly with clean water and allow them to dry completely. Remove all hardware, such as knobs, pulls, and hinges. Label each piece and its corresponding location to facilitate reassembly.
Sanding: Sanding creates a slightly rough surface that allows the primer and paint to adhere more effectively. Use a medium-grit sandpaper (around 120-grit) to lightly sand the entire surface of the cabinets. Avoid applying excessive pressure, as this can damage the wood. The goal is not to remove the existing finish entirely but rather to create a "tooth" for the primer to grip onto. After sanding, wipe down the cabinets with a tack cloth to remove all dust particles. A vacuum cleaner with a brush attachment can also be used to remove dust from crevices and corners.
Priming: Applying a primer is an essential step, especially when painting over a dark finish or a glossy surface. A primer seals the wood, prevents bleed-through (where the underlying color shows through the new paint), and provides a uniform surface for the paint to adhere to. Choose a high-quality primer designed for wood, ideally one that is stain-blocking. Apply the primer in thin, even coats, using a brush, roller, or spray gun. Allow the primer to dry completely according to the manufacturer's instructions. Once dry, lightly sand the primed surface with a fine-grit sandpaper (around 220-grit) to smooth out any imperfections. Wipe away the dust with a tack cloth before proceeding to the next step.
Skipping any of these preparation steps can compromise the quality of the finished paint job. Cleaning ensures proper adhesion, sanding creates a receptive surface, and priming provides a uniform base and prevents issues such as bleed-through. Thorough preparation is an investment in the durability and aesthetic appeal of the painted cabinets.
Selecting the Right Paint and Application Techniques
Choosing the correct paint and employing the appropriate application techniques are vital for achieving a professional and long-lasting finish on old wooden cabinets. The type of paint used, the application method, and the number of coats all contribute to the final result.
Paint Type: For painting cabinets, two primary types of paint are commonly used: oil-based and water-based (latex or acrylic). Oil-based paints offer excellent durability and a smooth, hard finish, but they are more difficult to work with, require mineral spirits for cleanup, and have a strong odor. Water-based paints are easier to apply, dry faster, have lower VOCs (volatile organic compounds), and are easier to clean up with soap and water. However, they may not be as durable as oil-based paints. Acrylic enamel paints are a good option for cabinets, as they provide a durable, washable finish. Consider the environment and intended use of the cabinets when selecting the paint type. For high-traffic areas or cabinets exposed to moisture, a more durable paint is recommended.
Application Methods: Paint can be applied using a brush, roller, or spray gun. Brushes are suitable for detailed work and small areas, but they can leave brushstrokes if not used properly. Rollers are good for larger, flat surfaces, but they may not reach into corners and crevices. Spray guns provide the smoothest, most even finish, but they require more skill and equipment. If using a brush or roller, choose high-quality tools designed for the type of paint being used. Use a brush with synthetic bristles for water-based paint and a brush with natural bristles for oil-based paint. When using a roller, select a low-nap roller for a smooth finish.
Application Techniques: Apply the paint in thin, even coats. Avoid applying too much paint at once, as this can lead to drips and sags. Allow each coat to dry completely before applying the next. Lightly sand between coats with a fine-grit sandpaper (around 320-grit) to smooth out any imperfections. Wipe away the dust with a tack cloth before applying the next coat. Apply at least two coats of paint for optimal coverage and durability. For spray painting, maintain a consistent distance and speed to ensure an even coat. Overlap each pass slightly to avoid streaks. Consider the orientation of the wood grain when applying the paint, especially if using a brush or roller. Painting in the direction of the grain can minimize brushstrokes.
Topcoat (Optional): A clear topcoat can provide added protection and durability, especially in high-use areas. Polyurethane or acrylic topcoats are common choices. Apply the topcoat in thin, even coats, following the manufacturer's instructions. Allow each coat to dry completely before applying the next. Lightly sand between coats with a fine-grit sandpaper to smooth out any imperfections.
Careful consideration of the paint type, application method, and techniques is essential for achieving a professional-looking and durable finish. Selecting the right materials and applying them correctly will ensure that the painted cabinets look their best for years to come.
After the final coat of paint has dried completely, reattach the hardware to the cabinets. This includes knobs, pulls, and hinges. Ensure that all hardware is securely fastened. Clean any excess paint from the hardware before reattaching it. Consider replacing old or outdated hardware with new hardware to further enhance the look of the painted cabinets. Using new hardware can give the cabinets a more modern and updated appearance.
Finally, inspect the painted cabinets for any imperfections or missed spots. Touch up any areas as needed. Clean the surrounding area and enjoy the newly painted cabinets. With proper preparation and application, the painted cabinets should provide a fresh and updated look to the kitchen or bathroom.

How To Paint Old Kitchen Cabinets Save Yourself 1 000s Builds By Maz

Painting Over Old Sacked Cabinets Hometalk

Painting Oak Cabinets Transform Your Kitchen

Diy Kitchen Cabinet Painting The Easy Way

How To Achieve A Super Smooth Finish When Painting Old Kitchen Cabinets The Happy Housie

Diy Kitchen Makeover Painted Cabinets Before After

Painting Old Wooden Kitchen Cabinets How To Makeover Your
Tips And Ideas How To Update Oak Or Wood Cabinets Paint Stain More

A Step By Guide To Painting Kitchen Cabinets With Kilz Primer Blog

How To Paint Fake Wood Kitchen Cabinets Simple Made Pretty 2025
Related Posts

