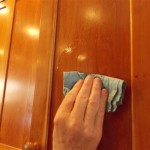
Can You Use Danish Oil on Kitchen Cabinets?
Danish oil is a popular choice for finishing wood furniture, floors, and other surfaces, known for its natural look and protective properties. However, when it comes to kitchen cabinets, the use of Danish oil raises questions about its suitability. This article will explore the pros and cons of using Danish oil on kitchen cabinets, providing a comprehensive understanding of its applicability and limitations.
Pros of Using Danish Oil on Kitchen Cabinets
Danish oil, a blend of drying oils, resins, and solvents, possesses several advantages that might make it appealing for use on kitchen cabinets. Firstly, its unique formula allows it to penetrate deeply into the wood, enhancing its natural beauty and grain patterns. This deep penetration also imparts a level of protection from moisture and minor scratches, making it suitable for surfaces that experience moderate wear and tear.
Another advantage of Danish oil is its ease of application. Unlike some other finishes, it doesn't require numerous coats or specialized equipment. Simply applying a thin layer with a cloth or brush is enough to achieve a desired finish. Furthermore, Danish oil dries relatively quickly, allowing for faster turnaround times in the finishing process.
Finally, Danish oil is a natural product that provides a subtle, non-toxic finish. This is particularly appealing for those concerned about using harsh chemicals in their homes, especially where food preparation takes place. The absence of strong odors also makes it suitable for use in enclosed spaces like kitchens.
Cons of Using Danish Oil on Kitchen Cabinets
While Danish oil has its advantages, it also has some drawbacks that make it less ideal for kitchen cabinets compared to other finishes. The most significant concern is its lack of durability. While it offers some protection, it is not as resistant to water, heat, and stains as other finishes, such as polyurethane or epoxy. Frequent exposure to these elements in a kitchen environment can lead to damage and require frequent reapplications.
Another drawback is that Danish oil can be prone to yellowing over time, especially when exposed to sunlight. This can affect the overall aesthetic appeal of the cabinets, particularly if they are painted or stained in light colors. The yellowing process can also be accelerated by heat and moisture, further impacting the longevity of the finish.
Furthermore, Danish oil is not as easy to maintain as other finishes. Regular cleaning and upkeep are essential to prevent the build-up of dirt, grime, and food spills. The oil's porous nature can trap these substances, making it difficult to clean without affecting the finish.
Alternatives to Danish Oil for Kitchen Cabinets
For a more durable and practical finish on kitchen cabinets, alternative options are available. Polyurethane, known for its water resistance and durability, provides excellent protection against scratches, spills, and heat. It is also available in various finishes, including gloss, satin, and matte, allowing for a customized look. However, polyurethane can be more difficult to apply and requires longer drying times.
Epoxy finishes offer an even higher level of durability and resistance to stains, making them ideal for high-traffic areas like kitchens. They are also resistant to moisture and heat, making them suitable for surfaces that experience frequent spills or high temperatures. However, epoxy finishes can be challenging to apply and require specialized equipment.
Lacquer finishes are another alternative that offers a durable and glossy finish. While they are less resistant to water and stains compared to polyurethane and epoxy, they provide excellent protection against scratches and abrasion. Lacquer finishes also dry quickly, allowing for faster turnaround times in the finishing process.
The choice of finish for kitchen cabinets ultimately depends on the specific needs and preferences of the homeowner. Considering factors like durability, maintenance requirements, aesthetics, and budget is crucial in making an informed decision.

Hand Painting A Kitchen Coated In Danish Oil Traditional Painter

Hand Painting A Kitchen Coated In Danish Oil Traditional Painter

Your Danish Oil Questions Answered Notes From A Cabinet Maker

Danish Oil On Oak Wood We Tested It Mellowpine

The Mysterious Refinishing Magic That Is Danish Oil Vintage Revivals

How To Use Danish Oil Re Pine

Hand Painting A Kitchen Coated In Danish Oil Traditional Painter

Your Danish Oil Questions Answered Notes From A Cabinet Maker

Hand Painting A Kitchen Coated In Danish Oil Traditional Painter

Your Danish Oil Questions Answered Notes From A Cabinet Maker
Related Posts


