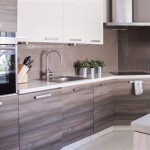
Chalk Paint For Kitchen Cupboards: A Comprehensive Guide
Kitchen cupboards often bear the brunt of daily life, accumulating wear and tear over time. Replacing them can be a significant expense and disruption. Chalk paint offers a viable alternative, providing a cost-effective and relatively simple way to refresh and update the appearance of existing cupboards. This article will explore the use of chalk paint for kitchen cupboards, outlining its advantages, disadvantages, application process, and essential considerations for achieving a durable and aesthetically pleasing finish.
Chalk paint, distinct from traditional chalk board paint, is a decorative paint known for its matte finish and excellent adhesion properties. It is typically composed of pigments, fillers, and a binder that allows it to grip various surfaces with minimal preparation. This characteristic is particularly appealing for kitchen cupboards, which may be constructed from wood, laminate, or other materials. The popularity of chalk paint stems from its ability to create a vintage or distressed look, easily achieved through sanding and layering techniques.
While chalk paint presents a compelling option for cupboard refurbishment, understanding its nuances is crucial for project success. This involves careful planning, meticulous execution, and an awareness of the paint's specific properties and limitations.
Advantages of Using Chalk Paint on Kitchen Cupboards
Chalk paint offers several advantages that make it a popular choice for updating kitchen cupboards. These benefits range from ease of application to aesthetic versatility.
One of the primary advantages of chalk paint is its minimal surface preparation requirement. Unlike many conventional paints that necessitate extensive sanding and priming, chalk paint typically adheres well to most surfaces with only a thorough cleaning. This reduces the labor and time involved in the preparation phase, making it an attractive option for DIY enthusiasts. A simple degreasing and cleaning with a mild detergent are often sufficient to prepare the cupboard surface for painting.
The matte finish of chalk paint lends itself well to various decorating styles, especially those seeking a vintage, farmhouse, or shabby chic aesthetic. The paint's ability to be easily distressed allows for the creation of unique and personalized finishes. This aesthetic flexibility is a significant draw for homeowners looking to customize their kitchens without undertaking a major renovation.
Chalk paint is relatively easy to apply. Its thick consistency minimizes drips and runs, making it forgiving for less experienced painters. The paint can be applied with a brush, roller, or even a sprayer, offering versatility in application methods based on personal preference and the scale of the project. Furthermore, chalk paint dries quickly, which reduces the overall project time. Multiple coats can be applied within a relatively short timeframe, allowing for faster progress.
Many chalk paint brands offer low-VOC (volatile organic compound) formulations. This is a significant advantage for indoor projects, as it minimizes the release of harmful chemicals into the air. Low-VOC paints contribute to a healthier indoor environment, which is particularly important in areas like the kitchen, where people spend a considerable amount of time.
Disadvantages and Considerations When Using Chalk Paint
Despite its numerous advantages, chalk paint also has some drawbacks that should be considered before embarking on a kitchen cupboard painting project. Understanding these limitations is essential for making informed decisions and ensuring a satisfactory final result.
Chalk paint is generally less durable than some other types of paint, particularly in high-traffic areas like kitchen cabinets. The matte finish is more porous and susceptible to stains and damage from water, grease, and everyday wear and tear. This necessitates the application of a protective topcoat, such as wax or a specialized sealant, to enhance durability and prevent staining. The choice of topcoat is critical, as some options may alter the appearance of the paint or require periodic reapplication.
While the minimal prep work is an advantage in some respects, certain surfaces may still require additional preparation for optimal adhesion. Laminate or very glossy surfaces, for example, might benefit from a light sanding or the application of a bonding primer to ensure the chalk paint adheres properly. Neglecting this step could result in peeling or chipping over time, compromising the longevity of the paint job.
The matte finish of chalk paint can sometimes appear chalky or uneven if not applied correctly. Achieving a smooth and consistent finish may require multiple thin coats and careful attention to brushstrokes or roller marks. The application technique can significantly impact the final appearance, and experimentation on a small, inconspicuous area is recommended before painting the entire cupboard.
Compared to some other types of paint, chalk paint can be more expensive. The cost per liter is often higher than that of standard latex or acrylic paints. This cost factor should be considered when budgeting for a kitchen cupboard painting project, especially if a large area needs to be covered. Exploring different brands and retailers can help find the most cost-effective options.
The Application Process: A Step-by-Step Guide
The successful application of chalk paint to kitchen cupboards involves a series of carefully executed steps, from preparation to finishing. A systematic approach will contribute to a durable and visually appealing outcome.
The first step is to thoroughly clean the cupboards to remove any grease, dirt, or grime. A degreasing cleaner is recommended for kitchen surfaces, followed by rinsing with clean water and allowing the cupboards to dry completely. This ensures that the chalk paint adheres properly to the surface. Remove all hardware, such as knobs and handles, before cleaning and painting.
While chalk paint generally requires minimal sanding, lightly sanding glossy or laminate surfaces can improve adhesion. Use a fine-grit sandpaper to gently roughen the surface, creating a better grip for the paint. After sanding, wipe down the cupboards with a damp cloth to remove any dust particles.
Apply the first coat of chalk paint to the cupboards using a brush, roller, or sprayer. Work in thin, even coats, and avoid applying too much paint at once, which can lead to drips and runs. Allow the first coat to dry completely according to the manufacturer's instructions. Drying times may vary depending on the brand and environmental conditions.
Once the first coat is dry, lightly sand the surface with a fine-grit sandpaper to smooth out any imperfections and create a better surface for the second coat. Wipe away any sanding dust with a damp cloth. Apply a second coat of chalk paint, again working in thin, even layers. Allow the second coat to dry completely.
If desired, distress the painted cupboards to create a vintage or aged look. This can be achieved by gently sanding the edges and corners of the cupboards with a fine-grit sandpaper, revealing the underlying surface. The amount of distressing is a matter of personal preference. For a more drastic effect, apply a layer of dark wax or stain and then wipe it away, leaving the color in the crevices and corners.
To protect the chalk paint and ensure durability, apply a topcoat of wax or a sealant. Wax provides a soft, matte finish and requires regular maintenance, while sealants offer a more durable and water-resistant finish. Apply the topcoat according to the manufacturer's instructions, and allow it to dry completely. For wax, buff the surface with a soft cloth to achieve a smooth, polished finish.
Reattach any hardware that was removed before painting. Consider replacing old hardware with new knobs and handles to further update the look of the kitchen cupboards. Ensure that the hardware is securely attached to the doors and drawers.
After completing the project, allow the paint and topcoat to fully cure before using the cupboards extensively. Curing times can vary depending on the product used, but generally, allow several days for the finish to harden completely. This will help ensure the longevity and durability of the painted cupboards.

Chalk Painted Kitchen Cabinets 2 Years Later Our Storied Home

Painting Kitchen Cabinets With Chalk Paint Simply Today Life

Why I Repainted My Chalk Painted Cabinets Sincerely Sara D Home Decor Diy Projects

How 500 And Some Chalk Paint Totally Transformed This Kitchen

How To Paint A Kitchen With Chalk Maison De Pax

7 Chalk Paint Diy Projects To Try Now From Kitchen Cabinets Marbled Tables Architectural Digest

Chalk Paint Furniture Kitchen Cabinets Painting White

Chalk Paint Kitchen Cabinets 2 Amazing Before Afters And How To The Interiors Addict

Chalk Painted Kitchen Cabinets 2 Years Later Our Storied Home

Best Chalk Paint For Cabinets Or Furniture Plus Step By Tutorial
Related Posts

