Chalk Paint Kitchen Cabinet Doors: A Comprehensive Guide
Chalk paint has surged in popularity among homeowners and DIY enthusiasts looking for a cost-effective and visually appealing way to revamp their existing kitchen cabinetry. This specialized paint offers a unique matte finish and excellent adhesion properties, making it a suitable choice for transforming outdated or worn cabinet doors without extensive preparation. This article will delve into the preparation, application, and maintenance involved in using chalk paint to revitalize kitchen cabinet doors.
Preparing Kitchen Cabinet Doors for Chalk Painting
Proper preparation is paramount to achieving a durable and aesthetically pleasing chalk paint finish on kitchen cabinet doors. This process involves cleaning, sanding, and priming (optional) to ensure optimal paint adhesion and longevity. Skipping or skimping on these steps can lead to peeling, chipping, and an overall unsatisfactory result.
The initial step is thorough cleaning. Kitchen cabinets accumulate grease, food splatters, and dust over time. A degreasing cleaner is essential to remove these contaminants. A solution of warm water and dish soap may suffice for light soiling, but commercial degreasers are recommended for heavily soiled surfaces. It's crucial to rinse the cabinets thoroughly with clean water after using any cleaning agent to remove any residue. Allow the cabinet doors to dry completely before proceeding.
Next, lightly sand the cabinet doors. While chalk paint is known for its adhesion properties, sanding enhances its grip, particularly on glossy or previously painted surfaces. Use a fine-grit sandpaper (180-220 grit) to gently scuff the surface. Focus on removing any existing imperfections, such as drips or bumps. Avoid aggressive sanding, as the goal is not to completely remove the existing finish, but rather to create a slightly textured surface for the chalk paint to adhere to. After sanding, remove all dust particles with a tack cloth or a damp cloth. Dust is a common enemy of paint finishes and can create an uneven texture.
The need for priming is a frequently debated topic in chalk paint projects. While chalk paint often eliminates the need for priming due to its inherent adhesion, priming can be beneficial in certain situations. For example, if the existing cabinet doors are made of a porous material like raw wood, a primer will seal the surface and prevent the paint from being absorbed unevenly. Similarly, if the existing finish is a dark color, a primer will help prevent the dark color from bleeding through the chalk paint, especially if a lighter chalk paint color is chosen.
When choosing a primer, select a high-quality acrylic primer that is compatible with chalk paint. Apply the primer in thin, even coats, following the manufacturer's instructions. Allow the primer to dry completely before proceeding to the chalk painting stage. Lightly sand the primed surface with fine-grit sandpaper to create a smooth base for the paint.
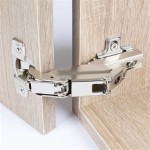
Finally, remove the hardware (knobs, pulls, hinges) from the cabinet doors to prevent them from being painted. Label each piece of hardware and the corresponding cabinet door to ensure easy reassembly. Consider replacing the hardware with new styles to further enhance the updated look of the kitchen.
Applying Chalk Paint to Kitchen Cabinet Doors
The application of chalk paint is relatively straightforward, but attention to detail is critical for achieving a professional-looking finish. The choice of application method, number of coats, and techniques for creating different effects can significantly impact the final outcome.
Chalk paint can be applied using a variety of tools, including brushes, rollers, and sprayers. A brush is the most common and versatile option, providing control and allowing for different textural effects. Choose a high-quality brush with synthetic bristles to avoid brushstrokes and ensure a smooth application. A foam roller can also be used to achieve a smooth finish, particularly on larger, flat surfaces. Sprayers, such as airless or HVLP (High Volume Low Pressure) sprayers, offer the most even and professional-looking finish, but require more skill and equipment.
Before beginning the painting process, stir the chalk paint thoroughly to ensure even pigment distribution. Apply the paint in thin, even coats, working in the direction of the wood grain. Avoid applying thick coats, as this can lead to drips and an uneven finish. Allow each coat to dry completely before applying the next coat. The drying time will vary depending on the humidity and temperature, but typically ranges from 2-4 hours.
The number of coats of chalk paint required will depend on the color of the paint and the desired level of coverage. Generally, two to three coats are sufficient to achieve full coverage. After each coat, inspect the surface for any imperfections, such as drips or brushstrokes. Lightly sand these imperfections with fine-grit sandpaper before applying the next coat.
One of the appealing aspects of chalk paint is its versatility in creating different finishes. For a smooth, modern look, use a foam roller to apply the paint. For a more textured, rustic look, use a brush and apply the paint in irregular strokes. Distressing techniques, such as sanding the edges and corners of the cabinet doors after the paint has dried, can further enhance the vintage aesthetic. Experiment with different techniques to achieve the desired look.
Once the final coat of chalk paint has dried, consider applying a protective topcoat. While some chalk paints are self-sealing, a topcoat provides added durability and protection against scratches, stains, and moisture. Wax, polyurethane, and lacquer are common topcoat options. Wax provides a soft, matte finish and requires regular maintenance. Polyurethane provides a more durable and water-resistant finish, making it a good choice for kitchen cabinets. Lacquer offers a hard, glossy finish and is often used in professional cabinet refinishing. Apply the topcoat in thin, even coats, following the manufacturer's instructions. Allow the topcoat to dry completely before reattaching the hardware and reassembling the cabinet doors.
Maintaining Chalk Painted Kitchen Cabinet Doors
Proper maintenance is essential for preserving the beauty and longevity of chalk painted kitchen cabinet doors. Regular cleaning and occasional touch-ups will help keep the cabinets looking their best for years to come. Understanding the properties of the chosen topcoat is crucial for selecting appropriate cleaning methods.
Regular cleaning is the first line of defense against dirt and grime. Use a soft, damp cloth and a mild detergent to wipe down the cabinet doors regularly. Avoid using abrasive cleaners or scouring pads, as these can scratch or damage the finish. For sticky or stubborn stains, use a solution of warm water and vinegar.
If a wax topcoat was used, avoid using water-based cleaners, as these can remove the wax. Instead, use a dry cloth or a soft brush to dust the cabinets. Occasionally, the wax may need to be reapplied to maintain the protective layer. Follow the manufacturer's instructions for applying wax.
For polyurethane or lacquer topcoats, stronger cleaners can be used, but avoid harsh chemicals or solvents. If a spill occurs, wipe it up immediately to prevent staining. Consider using placemats or coasters to protect the cabinet doors from heat and moisture.
Touch-ups may be necessary over time to repair minor scratches or chips. Lightly sand the affected area with fine-grit sandpaper to smooth the surface. Apply a small amount of chalk paint to the damaged area, using a brush or a cotton swab. Allow the paint to dry completely and then apply a topcoat to blend the repair with the surrounding finish. Use only the topcoat that was originally applied to the cabinet doors.
Consider the environment in which the cabinets exist. Excessive humidity and temperature fluctuations can cause the paint to crack or peel. Ensure adequate ventilation in the kitchen to prevent moisture buildup. Avoid placing hot objects directly on the cabinet doors, as this can damage the finish.
By following these maintenance guidelines, homeowners can enjoy the beauty and durability of their chalk painted kitchen cabinet doors for many years. The relative ease of touch-ups and the inherent rustic charm readily accommodate minor imperfections, making chalk paint a forgiving and aesthetically versatile option for kitchen renovations.

Why I Repainted My Chalk Painted Cabinets Sincerely Sara D Home Decor Diy Projects

Painting Kitchen Cabinets With Chalk Paint Simply Today Life

Chalk Painted Kitchen Cabinets Two Years Later Our Storied Home

Why I Repainted My Chalk Painted Cabinets Sincerely Sara D Home Decor Diy Projects

Painting Kitchen Cabinets With Chalk Paint Simply Today Life

Paint Your Kitchen Cabinets With Chalkboard Jessica Rayome

Paint Your Kitchen Cabinets With Chalkboard Jessica Rayome

Step By Kitchen Cabinet Painting With Annie Sloan Chalk Paint Jeanne Oliver

Step By Kitchen Cabinet Painting With Annie Sloan Chalk Paint Jeanne Oliver

Why I Repainted My Chalk Painted Cabinets Sincerely Sara D Home Decor Diy Projects
Related Posts

