Chalk Paint Kitchen Table Before and After: Transform Your Old Table into a Stunning Centerpiece
Give your outdated kitchen table a fresh and stylish makeover with chalk paint. This versatile paint offers a chic, matte finish that adds instant character and charm. In this comprehensive guide, we'll explore the essential aspects of transforming your kitchen table using chalk paint, from preparation to application and finishing touches. Get ready to create a piece that will become a focal point of your kitchen.
Step 1: Gather Your Materials
Before you begin, gather the necessary materials for the project:
- Chalk paint in your desired color
- Paintbrush or roller
- Primer (optional, but recommended)
- Sandpaper or sanding sponge
- Tack cloth li>Polyurethane or wax for sealing
Step 2: Prepare the Table
Thoroughly clean the table to remove any dirt or grease. Sand any rough or uneven areas to create a smooth surface for the paint. Wipe away any dust using a tack cloth.
Step 3: Apply Primer (Optional)
While not essential, applying primer helps enhance the adhesion and coverage of the chalk paint. Use a light coat of primer and allow it to dry completely.
Step 4: Apply Chalk Paint
Stir the chalk paint thoroughly before starting. Apply a thin, even coat with a paintbrush or roller. Allow the first coat to dry for several hours or overnight.
Step 5: Sand Between Coats
After each coat of paint has dried, lightly sand the surface with sandpaper or a sanding sponge. This helps create a smooth, distressed finish. Wipe away any dust.
Step 6: Apply Additional Coats
Depending on the desired opacity and coverage, apply additional coats of chalk paint. Allow each coat to dry completely and sand in between.
Step 7: Seal the Finish
To protect the painted surface and enhance its durability, apply a clear topcoat. You can use polyurethane or wax. Polyurethane provides a glossier finish, while wax gives a more matte, natural look.
Step 8: Finishing Touches
Once the sealant has dried, add finishing touches to the table. You could add decorative elements like stencils, knobs, or trim. Consider pairing your newly painted table with other elements in your kitchen to create a cohesive and stylish look.
With a little elbow grease and a touch of creativity, you can transform your old kitchen table into a stunning centerpiece that reflects your personal style. Chalk paint offers endless possibilities for customization, allowing you to create a piece that is uniquely yours.

Gorgeous Chalk Paint Dining Table Makeover Diy Kindly Unspoken

Before And After Diy Chalk Paint Dining Table Chairs Shrimp Salad Circus

How To Update A Table With Chalk Paint I Dig

Inspirations Dining Table And Chairs Make Over

Antique Dining Table Updated With Chalk Paint Anderson Grant

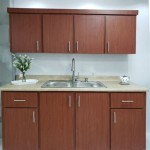
A Kitchen Table That Pops Happiness Is Creating

How To Chalk Paint A Table And Chairs Confessions Of Serial Do It Yourselfer

Painting A Dining Room Set With Chalk Paint The Purple Painted Lady

Before And After Pictures Dining Table Kitchen Makeover Farmhouse Tables Painted

Kitchen Table Makeover Using Chalk Paint And Wood Stain Love Our Real Life
Related Posts