Chalk Paint Over Stained Kitchen Cabinets: A Comprehensive Guide
Transforming stained kitchen cabinets with chalk paint is a clever and cost-effective way to revitalize your kitchen's aesthetics. Whether you're working with dark or light stains, understanding the essential aspects of this technique is crucial for a successful outcome. In this comprehensive guide, we'll delve into the preparation, application, and finishing steps to ensure a professional-looking finish.
Preparing Stained Cabinets for Chalk Paint
1.
Thoroughly Clean and Degrease:
Remove dirt, grease, and residue using a degreaser or TSP solution. Rinse thoroughly and allow to dry completely. 2.Sand Lightly (Optional):
For glossy or heavily stained cabinets, lightly sand the surfaces with 220-grit sandpaper to create a slightly porous surface for better paint adhesion. 3.Apply Deglosser:
Apply a deglosser solution to glossy or polyurethane-coated cabinets. This helps remove the shine and creates a more receptive surface for the paint.Application of Chalk Paint
1.
Stir Well:
Thoroughly mix the chalk paint before applying it to ensure even coverage. 2.Use a Brush:
Apply the paint using a high-quality paintbrush. Start with thin, even strokes and avoid overbrushing. 3.Apply Multiple Coats:
Allow the first coat to dry completely before applying a second and third coat. This helps build up coverage and opacity. 4.Sand Between Coats (Optional):
For a smoother finish, lightly sand the surface between coats with 220-grit sandpaper to remove any brush marks or imperfections.Finishing Chalk-Painted Cabinets
1.
Apply a Sealer:
Protect your chalk-painted finish with a clear polyurethane sealer. Choose a matte, semi-gloss, or gloss finish based on your desired appearance. 2.Use a Brush or Roller:
Apply the sealer using a brush or roller in thin, even coats. Allow each coat to dry completely before applying the next. 3.Consider Glazing or Antiquing (Optional):
For a distressed or antique look, apply a glazing medium or antiquing wax over the sealer. This technique helps create depth and character. 4.Hardware and Other Details:
Re-install your cabinet hardware and any other details, such as knobs, pulls, or moldings, to complete the transformation.Additional Tips
- Use high-quality chalk paint for a durable and professional finish. - Test the paint on an inconspicuous area first to ensure the desired result. - Protect your work surface with drop cloths or plastic sheeting. - Use a conditioning brush to remove any stray brush hairs from the paint. - Allow ample drying time between each step for a long-lasting finish.
Conclusion
By following these essential aspects, you can successfully chalk paint over stained kitchen cabinets and achieve a stunning transformation. With a little preparation, careful application, and proper finishing, you'll end up with a revitalized kitchen that reflects your personal style and elevates the overall ambiance of your home.

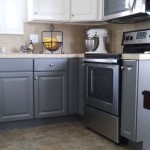
Chalk Painted Kitchen Cabinets 2 Years Later Our Storied Home

Painting Kitchen Cabinets With Chalk Paint Simply Today Life

Chalk Painted Kitchen Cabinets 2 Years Later Our Storied Home

Why I Repainted My Chalk Painted Cabinets Sincerely Sara D Home Decor Diy Projects

Chalk Painted Kitchen Cabinets 2 Years Later Our Storied Home

Why I Repainted My Chalk Painted Cabinets Sincerely Sara D Home Decor Diy Projects

Why I Repainted My Chalk Painted Cabinets Sincerely Sara D Home Decor Diy Projects

Chalk Painted Kitchen Cabinets 2 Years Later Our Storied Home

My Chalk Painted Cabinets 4 Years Later How Did They Do Artsy Rule

Painting Kitchen Cabinets With Chalk Paint Simply Today Life
Related Posts


