```html
Change Color Of Kitchen Cabinets: A Comprehensive Guide
Kitchen cabinets are a dominant feature in any kitchen space. Their color significantly impacts the overall aesthetic and ambiance of the room. Over time, the existing color may become outdated, damaged, or simply no longer align with evolving design preferences. Rather than replacing the entire cabinetry system, changing the color presents a cost-effective and sustainable alternative to refresh the kitchen's appearance. This article will explore various aspects of changing the color of kitchen cabinets, encompassing preparation, methods, and considerations for achieving a professional-looking result.
The decision to change the color of kitchen cabinets should be approached with careful planning and research. Factors such as the existing cabinet material, the desired finish, and the available budget will influence the chosen method and materials. A thorough understanding of these elements will contribute to a successful and satisfying cabinet transformation.
Key Point 1: Assessing Existing Cabinet Material and Condition
Before embarking on any color-changing project, it is crucial to identify the material composition of the kitchen cabinets. Common materials include solid wood, wood veneer, laminate, and metal. Each material requires specific preparation techniques and paint types to ensure proper adhesion and durability. Solid wood cabinets, for example, can be sanded and stained or painted, offering the most versatility. Wood veneer cabinets may be more delicate and require careful sanding to avoid damaging the thin veneer layer. Laminate cabinets often require a specialized primer to promote paint adhesion, as the smooth surface resists traditional paints. Metal cabinets typically require rust removal and a metal-specific primer.
In addition to identifying the cabinet material, a thorough inspection of their condition is essential. Look for signs of damage such as scratches, dents, water damage, peeling veneer, or loose hinges. Addressing these issues before applying a new color is critical for achieving a smooth and professional finish. Minor scratches and dents can be filled with wood filler, while larger areas of damage may require more extensive repairs or even replacement of individual components.
Furthermore, note any existing finish on the cabinets. Is it a painted surface, a stained surface, or a clear coat? The existing finish will dictate the necessary preparation steps, such as cleaning, sanding, and priming. Understanding the existing finish also helps in selecting compatible paints and primers for the new color.
Key Point 2: Preparation is Paramount for Optimal Results
Proper preparation is arguably the most important step in changing the color of kitchen cabinets. Insufficient preparation can lead to poor paint adhesion, an uneven finish, and ultimately, a disappointing outcome. The preparation process typically involves the following steps:
Removal and Labeling: Begin by removing all cabinet doors, drawers, and hardware (knobs, pulls, hinges). Label each door and drawer with a corresponding number or letter that matches the cabinet frame to ensure proper reinstallation. This step prevents confusion and ensures that each component is returned to its original location.
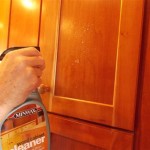
Cleaning: Thoroughly clean all cabinet surfaces with a degreasing cleaner to remove dirt, grease, and grime. Kitchen cabinets are often exposed to cooking splatters and food residue, which can hinder paint adhesion. Rinse the surfaces with clean water and allow them to dry completely.
Sanding: Sanding is essential for creating a smooth surface and promoting paint adhesion. Use medium-grit sandpaper (120-150 grit) to lightly sand the cabinets, focusing on areas with existing finish. For glossy or heavily coated surfaces, a coarser grit (80-100 grit) may be necessary. After sanding, use a fine-grit sandpaper (220 grit) to smooth out any imperfections. Remember to sand in the direction of the wood grain whenever possible. Vacuum up the sanding dust and wipe down the surfaces with a tack cloth.
Priming: Applying a primer is crucial for several reasons. It seals the existing surface, provides a uniform base for the new color, and enhances paint adhesion. Choose a primer that is compatible with the cabinet material and the chosen paint. Apply one or two coats of primer, allowing each coat to dry completely according to the manufacturer's instructions. Lightly sand the primed surface with fine-grit sandpaper before applying the paint.
Masking and Protection: Mask off any areas that you do not want to paint, such as countertops, backsplashes, and walls. Use painter's tape and drop cloths to protect surrounding surfaces from paint splatters and drips. This step helps to ensure clean and professional-looking results.
Key Point 3: Choosing the Right Paint and Application Method
Selecting the appropriate paint is critical for achieving the desired color, finish, and durability. Several paint types are suitable for kitchen cabinets, each with its own advantages and disadvantages:
Latex Paint: Latex paint is a water-based paint that is known for its ease of use, low odor, and good durability. It is a popular choice for kitchen cabinets because it is easy to clean and resistant to mildew. However, latex paint may not be as durable as oil-based paint and may require multiple coats to achieve full coverage. Choose a high-quality acrylic latex paint specifically formulated for cabinets and trim.
Oil-Based Paint: Oil-based paint is known for its durability, smooth finish, and excellent adhesion. It is resistant to scratches, chips, and stains, making it a good choice for high-traffic areas like kitchen cabinets. However, oil-based paint has a strong odor, requires longer drying times, and is more difficult to clean up than latex paint. It also tends to yellow over time, especially in lighter colors.
Alkyd Paint: Alkyd paint is a synthetic resin paint that offers a good compromise between latex and oil-based paints. It has good durability, a smooth finish, and is easier to clean up than oil-based paint. Alkyd paint is also less prone to yellowing than oil-based paint.
Cabinet-Specific Paint: Some manufacturers offer paints specifically formulated for kitchen cabinets. These paints often contain additives that enhance adhesion, leveling, and durability. They may also be self-priming or require a special primer for optimal results.
The application method also plays a significant role in the final appearance of the painted cabinets. Common application methods include:
Brush: Brushing is a traditional method that is suitable for smaller areas and intricate details. Use a high-quality brush with synthetic bristles for latex paint and natural bristles for oil-based paint. Apply thin, even coats, overlapping each stroke slightly to avoid brush marks.
Roller: Rolling is a faster method for covering larger surfaces. Use a short-nap roller for a smooth finish and a longer-nap roller for textured surfaces. Apply thin, even coats, overlapping each stroke slightly to avoid roller marks.
Sprayer: Spraying provides the smoothest and most professional-looking finish. A paint sprayer atomizes the paint into a fine mist, resulting in an even and flawless coating. However, spraying requires more preparation and masking to protect surrounding surfaces. It also requires practice and skill to achieve optimal results. Consider using a high-volume, low-pressure (HVLP) sprayer for better control and reduced overspray.
Regardless of the chosen paint and application method, it is crucial to apply thin, even coats and allow each coat to dry completely according to the manufacturer's instructions. Multiple thin coats are preferable to one thick coat, as they are less likely to drip, sag, or develop brush marks.
After the final coat of paint has dried completely, reinstall the hardware, doors, and drawers. Carefully align each component and secure it in place. Inspect the painted surface for any imperfections and touch up any areas as needed. Clean up the work area and dispose of any leftover paint and materials properly. With careful planning, preparation, and execution, changing the color of kitchen cabinets can transform the look and feel of the entire kitchen, creating a refreshed and updated space.
```
Quick Guide On How You Can Change Color Effects Of The Kitchen

Change The Material Or Color On Kitchen Cabinets And Countertops Roomsketcher Help Center

Cabinet Color Change N Hance Of Lowcountry

Kitchen Cabinet Refinishing Cabinets Colors

How To Paint Kitchen Cabinets Like The Pros

How To Do It Yourself Kitchen Cabinet Color Change No Stripping And Refinishing

The Best Ways To Change Color Of My Cabinets

Repainting Cabinets In Photo And Elements Photolesa Com

9 Examples Of How The Color Cabinet Doors Can Change Old Kitchen

How To Change Kitchen Cabinet Color An Innovative Approach Infinity
Related Posts