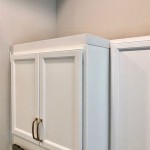
Mastering the Art of Crown Molding on Kitchen Cabinets: A Comprehensive Guide
Crown molding on kitchen cabinets adds an elegant touch to any kitchen design, enhancing the overall aesthetic appeal and creating a more sophisticated ambiance. To achieve a seamless and professional-looking installation, meticulous attention to detail is paramount. This comprehensive guide will provide you with all the essential information you need to conquer the task of installing crown molding on your kitchen cabinets.
Step 1: Gather Necessary Materials and Tools
Before embarking on your installation journey, ensure you have all the necessary materials and tools at your disposal. These include:
- Crown molding
- Miter saw or miter box
- Measuring tape and pencil
- Carpenter's glue
- Brad nailer or hammer and nails
- Safety glasses
- Sandpaper or sanding sponge
- Wood filler
- Paint or stain (optional)
Step 2: Measure and Cut the Molding
Precise measurements are crucial for a successful installation. Using a measuring tape, determine the length of each piece of molding required for the cabinets' top and bottom edges. Mark these measurements on the molding and carefully cut the pieces using a miter saw or miter box. Ensure your cuts are clean and angled correctly to create tight joints.
Step 3: Install the Molding
Start by applying a thin layer of carpenter's glue to the top and bottom edges of the cabinets where the molding will be placed. Carefully position the molding, aligning it with the cut marks. Use a brad nailer or hammer and nails to secure the molding in place. Countersink the nails slightly below the surface of the molding.
Step 4: Fill Gaps and Sand
Inspect the joints between the molding pieces for any gaps or imperfections. Apply wood filler to these areas, allowing it to dry completely. Once dry, sand the filled areas smooth using sandpaper or a sanding sponge. This will create a seamless transition between the molding and cabinets.
Step 5: Finish with Paint or Stain (Optional)
If desired, you can enhance the molding's appearance by applying paint or stain to match the kitchen cabinets. Use a brush or roller to apply an even coat, allowing it to dry thoroughly. Multiple coats may be necessary to achieve the desired finish.
Tips for Achieving Professional Results
- Use a high-quality crown molding made from durable materials.
- Cut the molding precisely to ensure tight joints.
- Apply glue liberally to prevent the molding from loosening over time.
- Countersink the nails slightly to hide them beneath the surface of the molding.
- Fill any gaps or imperfections with wood filler for a seamless finish.
- Sand the filled areas smooth to create a uniform surface.
- Paint or stain the molding to match the kitchen cabinets for a cohesive look.
Conclusion
With patience and precision, you can achieve a flawless crown molding installation on your kitchen cabinets. By following the steps outlined in this guide and utilizing the tips provided, you can transform your kitchen into a sophisticated and inviting space that exudes elegance and charm. Remember to always prioritize safety by wearing eye protection throughout the installation process. Happy DIY-ing!

Adding Crown Molding To Cabinets Young House Love

How To Install Crown Molding On Your Cabinets Construction Repair Wonderhowto

How To Install Kitchen Cabinet Crown Molding Family Handyman

10 Steps To Install Crown Molding On Cabinets Fine Homebuilding

How To Attach Crown Mouldings Frameless Cabinets Stonehaven Life

Installing Kitchen Cabinet Crown Molding

Mudroom Update Installing Wall Cabinets In My Own Style

Installing Crown Molding On Kitchen Cabinets

Cabinet Crown Molding Rogue Engineer

Faq Crown Molding For Cabinets Dura Supreme Cabinetry
Related Posts


