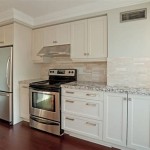
Dark Red Kitchen Cabinet Paint: A Bold Statement for Your Home
Dark red kitchen cabinets offer a dramatic and sophisticated aesthetic, transforming a mundane kitchen into a space of warmth and character. The color choice is a significant one, carrying historical and cultural weight while offering a contemporary edge when implemented effectively. This article explores the multifaceted aspects of dark red kitchen cabinet paint, encompassing its selection, preparation, application, and complementary design elements.
The allure of dark red extends beyond mere visual appeal. It evokes feelings of passion, energy, and comfort, making it a welcoming hue for the heart of the home. From rich burgundy to deep crimson and nuanced cherry tones, the spectrum of dark reds provides options for various design preferences, accommodating both traditional and modern styles. Selecting the right shade requires careful consideration of the existing space, lighting conditions, and desired mood.
Choosing dark red kitchen cabinets is not merely a cosmetic decision; it's an investment in the overall ambiance and value of the home. The color's inherent boldness necessitates thoughtful planning and execution, but the resulting impact can be undeniably transformative. From a purely aesthetic perspective, dark red cabinets function as a focal point, drawing the eye and establishing a sense of refined elegance. This boldness demands careful consideration of complementary elements, such as countertops, backsplash, and hardware, to achieve a harmonious and balanced design.
Understanding the Nuances of Dark Red Shades
The term “dark red” encompasses a diverse range of hues, each possessing distinct characteristics and imparting unique visual effects. Crimson, for instance, leans towards a slightly cooler tone, offering a regal and sophisticated feel. Burgundy, a deeper and more muted red, provides a sense of warmth and comfort, often associated with traditional settings. Cherry red, with its subtle hints of brown, presents a more natural and inviting appearance.
The undertones within each shade are equally crucial. Some dark reds may possess warm undertones, incorporating hints of orange or brown, while others may lean towards cooler undertones with subtle hints of blue or purple. Understanding these nuances is critical for selecting a shade that harmonizes with the existing elements within the kitchen, such as flooring, wall color, and natural light.
Consider the effect of light reflection. Darker shades inherently absorb more light, which can make a small kitchen feel even smaller. In such cases, lighter shades of dark red or incorporating reflective surfaces, such as glossy finishes or strategic lighting, might be beneficial. Conversely, in a large kitchen, a deeper, more saturated dark red can create a sense of intimacy and coziness. Sample painting a small area is highly recommended to observe how the chosen shade appears under different lighting conditions throughout the day.
Beyond the primary hue, the finish of the paint also plays a significant role. Matte finishes offer a softer, more understated look, while semi-gloss or high-gloss finishes provide a more dramatic and reflective appearance. The choice of finish should align with the desired style and the overall maintenance requirements. Glossier finishes are generally easier to clean and more resistant to stains, while matte finishes tend to conceal imperfections better.
Preparing Kitchen Cabinets for Painting
Proper preparation is undeniably the most crucial step in achieving a professional and durable finish on kitchen cabinets. Neglecting this phase can result in paint chipping, peeling, or an uneven surface, ultimately compromising the aesthetic appeal and longevity of the project. The preparation process typically involves cleaning, sanding, priming, and addressing any existing imperfections.
Begin by thoroughly cleaning the cabinets to remove any grease, dirt, or grime. A degreasing cleaner specifically designed for kitchen surfaces is ideal. Avoid harsh chemicals that could damage the existing finish or leave a residue that interferes with paint adhesion. Rinse the cabinets with clean water and allow them to dry completely before proceeding.
Sanding is essential for creating a slightly rough surface that allows the primer and paint to adhere properly. Use a medium-grit sandpaper (around 120-grit) to gently scuff the surfaces. Pay particular attention to areas with existing paint or varnish, ensuring that they are adequately roughened. After sanding, remove any dust with a tack cloth or a slightly damp cloth. Sanding sponges can be particularly useful for reaching intricate details and corners.
Priming is crucial for sealing the cabinets and providing a uniform surface for the paint to adhere to. Choose a high-quality primer specifically designed for use on wood or laminate cabinets. Apply the primer in thin, even coats, allowing each coat to dry completely before applying the next. Depending on the existing surface and the desired final color, two coats of primer may be necessary. Tinting the primer to a similar shade as the dark red paint can improve coverage and color consistency.
Inspect the cabinets for any imperfections, such as chips, dents, or cracks. Fill these imperfections with wood filler and allow it to dry completely. Sand the filled areas smooth and prime them before painting. Addressing these imperfections ensures a flawless and professional-looking finish.
Remove all hardware, such as knobs, pulls, and hinges, before beginning the painting process. This allows for a cleaner and more even paint application. Label each piece of hardware and its corresponding cabinet door or drawer to ensure easy reassembly. Cover countertops, flooring, and appliances with drop cloths to protect them from paint splatters.
Applying Dark Red Paint for a Professional Finish
The application of dark red paint requires patience, precision, and the right tools. Whether using a brush, roller, or sprayer, the goal is to achieve a smooth, even, and durable finish that enhances the beauty of the cabinets. The choice of application method often depends on the individual’s skill level, the size and complexity of the project, and the desired level of finish.
When using a brush, choose a high-quality brush specifically designed for use with the chosen paint type. Angled brushes are particularly useful for reaching corners and intricate details. Apply the paint in thin, even strokes, following the grain of the wood. Avoid applying too much paint at once, as this can lead to drips and runs. Brush marks can be minimized by using a technique called “tipping off,” which involves lightly dragging the brush across the wet paint to smooth out any imperfections.
Rollers can be used to achieve a smoother and more uniform finish on larger, flat surfaces. Choose a roller with a nap length appropriate for the paint type and the surface being painted. Apply the paint in overlapping strokes, ensuring that each stroke blends seamlessly with the previous one. As with brushes, avoid applying too much paint at once. A light touch and even pressure are key to achieving a professional-looking finish.
Spraying offers the most efficient and professional-looking option for applying dark red paint. However, it requires specialized equipment and a certain level of skill. Airless sprayers are commonly used for painting cabinets, as they provide a smooth and even finish with minimal brush marks. Before spraying, practice on a scrap piece of wood to adjust the sprayer settings and technique. Apply the paint in thin, even coats, overlapping each coat slightly. Wear appropriate safety gear, such as a respirator and eye protection, when spraying paint.
Allow each coat of paint to dry completely before applying the next. Lightly sand between coats with fine-grit sandpaper (around 220-grit) to remove any imperfections and create a smoother surface for the next coat. This step is crucial for achieving a flawless finish. Depending on the paint type and the desired level of coverage, two or three coats of paint may be necessary.
Once the final coat of paint has dried completely, carefully reassemble the hardware. Avoid over-tightening the screws, as this can damage the paint or the cabinets. Inspect the finished cabinets for any imperfections or areas that need touch-up. Use a small brush to touch up any blemishes or imperfections. Allow the touch-up paint to dry completely before using the cabinets.

Behr Premium 1 Qt M140 7 Dark Crimson Satin Enamel Interior Exterior Cabinet Door Trim Paint 752304 The Home Depot
:max_bytes(150000):strip_icc()/2.TheRealShakerKitchen-deVOL_LOW-RES-7c114bf22b124683af6927b984246735-e9bafda1a8384ad1bc2a5553959fd13f.jpg?strip=all)
28 Red Kitchens That Prove Color Can Energize Your Space

Modern Shaker Cabinetry With Red Paint And Glaze Finish Traditional Kitchen Kansas City By Wende Woodworking Llc Houzz

80 Amazing Kitchen Cabinet Paint Color Ideas

Red Kitchen How To Get One Blog Design Style Tips Ideas Warehouse

House Home 30 Dark Moody Kitchens That Are Totally Dreamy

Kitchen Colour Ideas Goodhomes

Creating A Stylish Kitchen With Country Cabinets Decor10 Blog
Ont Cottage Our New Red Kitchen Cabinets

What Paint Colors Look Best With Cherry Cabinets
Related Posts


