DIY Antique White Kitchen Cabinets: A Step-by-Step Guide
Transform your kitchen into a timeless masterpiece with DIY antique white cabinets. While it may seem daunting, this guide will empower you to create the kitchen of your dreams with just a few simple steps. Whether you're a seasoned DIYer or a novice, follow along for expert tips and a step-by-step approach to achieving stunning antique white cabinets.
Preparation: Key Steps for Success
Before embarking on your cabinet transformation, proper preparation is crucial. Gather the necessary tools, materials, and safety gear. Ensure your work area is well-ventilated and protected from dust and debris. Sanding and removing existing finishes are essential steps for achieving a smooth and adherent surface. Use fine-grit sandpaper (120-220 grit) for sanding and a chemical stripper or heat gun for removing finishes.
Primer: The Base for a Lasting Finish
A high-quality primer is fundamental for a durable and professional-looking finish. Choose an oil-based primer specifically designed for kitchen cabinets, as it provides excellent adhesion and stain resistance. Apply two coats of primer, allowing ample drying time between coats. Sand lightly with fine-grit sandpaper to smooth out any imperfections.
Paint: Achieving the Perfect Antique White
Selecting the ideal antique white paint is crucial. Experiment with different shades and test them on inconspicuous areas to find the perfect match for your kitchen. Use a brush or roller to apply a thin, even coat of paint. Allow it to dry completely before sanding lightly with fine-grit sandpaper for a smooth finish.
Antiquing: Creating a Vintage Charm
To create the charming antique look, apply a glaze over the painted surface. Start by mixing a glaze with water to achieve the desired consistency. Use a brush to apply the glaze, working it into the recesses and contours of the cabinets. Wipe away excess glaze with a clean cloth, leaving a thin layer behind. This technique adds depth and enhances the antique character.
Distressing: Optional but Impactful
Distressing is an optional step that adds character and authenticity to your cabinets. Use sandpaper, steel wool, or a distressing tool to lightly sand the edges and corners of the cabinets. This creates subtle wear and tear marks, giving the cabinets an aged appearance. However, do so sparingly to avoid an overly distressed look.
Sealing: Protection and Luster
Protecting your newly transformed cabinets is essential. Apply a clear polyurethane sealer in a water-based or oil-based formula. Use a brush or roller to apply a thin, even coat and let it dry completely. This sealer creates a durable barrier against scratches, stains, and moisture, ensuring the longevity of your antique white cabinets.

Painting Kitchen Cabinets Antique White Pictures Ideas

Distressed Kitchen Cabinets How To Distress Your

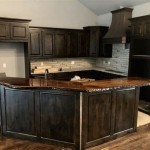
Distressed And Antiqued Kitchen Cabinets

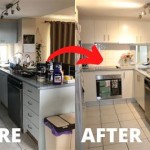
Kitchen Cabinet Reveal Painted Oak

10 Design Tips For Your Kitchen With Antique White Cabinets

Painted Kitchen Cabinet Details Antique White Cabinets Renovation

Why Antique White Kitchen Cabinets Might Not Be The Best Choice In 2024

Rescuing And Reviving A Glazed Distressed Kitchen Bella Tucker

The Best Antique White Paint For Kitchen Cabinets And Other Colors Too Jennifer Rizzo

The Best Antique White Paint For Kitchen Cabinets And Other Colors Too Jennifer Rizzo
Related Posts


