DIY Beadboard Kitchen Cabinets: A Comprehensive Guide to Achieve a Charming Rustic Look
If you're looking to add a touch of charm and rustic beauty to your kitchen, DIY beadboard kitchen cabinets are an excellent option. Beadboard, with its distinctive vertical grooves, creates a timeless appeal that complements both traditional and modern kitchen designs. In this comprehensive guide, we'll delve into the essential aspects of creating your own beadboard kitchen cabinets, from selecting materials to mastering installation techniques.
Materials and Tools
Before embarking on your DIY project, gather the necessary materials and tools. For the cabinets, you'll need beadboard panels (typically made of MDF or plywood), cabinet frames, and hardware (hinges, knobs, pulls). Other tools include a circular saw, jigsaw, drill, brad nailer, level, and sandpaper.
Design Considerations
Before cutting any materials, take the time to plan your cabinet design. Determine the size and shape of your cabinets, and consider adding additional features such as drawers, shelves, or crown molding. Sketching a layout will help ensure your cabinets fit seamlessly into your kitchen.
Building the Frames
Begin by assembling the cabinet frames using your chosen wood. Cut the pieces according to your design and join them using wood glue and nails or screws. Ensure the frames are square and level before proceeding.
Installing the Beadboard
Cut the beadboard panels to fit the cabinet frames, allowing for slight gaps between the panels. Secure the panels to the frames using a brad nailer, spacing the nails evenly. Countersink the nails slightly below the surface of the beadboard for a smooth finish.
Finishing Touches
Sand the surface of the beadboard cabinets lightly to remove any rough edges. Apply a coat of primer to seal the beadboard and ensure even paint application. Choose a paint color that complements your kitchen's décor and apply two or three coats, allowing each coat to dry completely before applying the next.
Installing Hardware
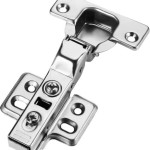
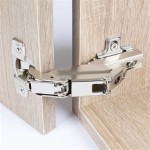
Once the paint has dried, install the cabinet hardware (hinges, knobs, pulls). Mark the locations carefully and drill pilot holes before screwing in the hardware. Adjust the hinges to ensure the doors open and close smoothly.
Conclusion
DIY beadboard kitchen cabinets are a rewarding project that can transform your kitchen's ambiance. By following the steps outlined in this guide and paying attention to details, you can create a charming and functional focal point for your home. Whether you choose to paint them in a classic white or opt for a bolder hue, beadboard cabinets will add a touch of rustic elegance that will stand the test of time.

Diy Beadboard Kitchen Cabinets Project The House On Silverado

Diy Beadboard On Our White Painted Kitchen Cabinets Project Goble

Diy Beadboard On Our White Painted Kitchen Cabinets Project Goble

Beadboard Cabinet Doors For Your Kitchen Cabinetdoors Com

34 Diy Kitchen Cabinet Ideas Wallpaper Cabinets Makeover

Our Kitchen Cupboards Transformed Beadboard Cabinets Cupboard Doors Makeover

Beadboard Kitchen Cabinets Everything To Know

How To Build Cabinet Doors Update Your Cabinets Or Built Ins

How To Build Cabinet Doors Update Your Cabinets Or Built Ins
:max_bytes(150000):strip_icc()/FauxBeadboardCabinetsWithWallpaper-5a1cdb9e47c2660037ebefd4.jpg?strip=all)
10 Diy Kitchen Cabinet Ideas
Related Posts

