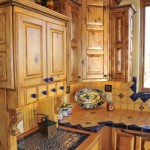
DIY Distressed Gray Kitchen Cabinets: A Comprehensive Guide
Transforming your kitchen with captivating distressed gray cabinets is an attainable DIY project with meticulous planning and craftsmanship. This guide will furnish you with the requisite steps and considerations to embark on this rewarding endeavor.
Materials and Preparations
* Existing kitchen cabinets * Gray latex paint and primer * Sandpaper (120-grit, 220-grit) * Sanding block or orbital sander * Tack cloth * Minwax Polycrylic Protective Finish (matte) * Paintbrush or roller * Distressing tools (wire brush, hammer, chisel) * Gloves and dust maskStep 1: Surface Preparation
Protect the surrounding area with drop cloths or plastic sheeting. Sand the cabinet doors and frames with 120-grit sandpaper to roughen the surface. This facilitates paint adhesion and enhances the distressed effect. Smooth the sanded surfaces with 220-grit sandpaper and wipe them thoroughly with a tack cloth.
Step 2: Priming and Painting
Apply a coat of gray primer to the cabinets, ensuring even coverage. Allow it to dry completely. Subsequently, apply two coats of gray latex paint, permitting sufficient drying time between each coat. This provides a solid base for distressing.
Step 3: Distressing Techniques
Don protective gear. Use a wire brush to create subtle scratches and expose the underlying paint. For more pronounced distressing, employ a hammer and chisel to gouge and chip the cabinet surfaces. Alternatively, consider using sandpaper to distress specific areas for a customized effect.
Step 4: Protective Finish
Once satisfied with the distressing, apply two or three thin coats of Minwax Polycrylic Protective Finish in matte. This transparent finish safeguards the paint and accentuates the distressed appearance. Allow each coat to dry before applying the next.
Step 5: Installation
Reinstall the cabinet doors and frames. Securely fasten them in place and check for proper alignment. Install new hardware, such as knobs or pulls, to complement the distressed aesthetic.
Tips for Success
* Experiment with different distressing techniques on a scrap piece of wood before attempting the actual cabinets. * Use a light touch when distressing to avoid excessive damage. * Vary the distressing intensity across different areas of the cabinets to create visual interest. * Apply the protective finish with even strokes to prevent streaks or bubbles. * Allow ample drying time between steps to ensure durability and prevent adhesion issues.Conclusion
With careful preparation and attention to detail, DIY distressed gray kitchen cabinets can elevate your kitchen's ambiance. This guide provides a comprehensive roadmap to guide you through every stage of the process. Embrace the beauty of distressed finishes and transform your kitchen into a captivating space that reflects your unique style.

How To Use Distressed Kitchen Cabinets Stylize Your Home

Gray Stained Kitchen Cabinets Seasons Of Home Glazed Painted Grey

Distressed Kitchen Cabinets Pictures Options Tips Ideas

Distressed Kitchen Cabinets How To Distress Your

Grey Distressed Kitchen Cabinets Painting

20 Distressed Kitchen Cabinets You Have To See Hunker

Charcoal Grey Cabinets Home Kitchens Kitchen Remodel

50 Awesome Kitchen Design Ideas With Painted Cabinet That Looks More Distressed Cabinets Rustic Renovation

Beautiful Diy Distressed Gray Chalk Paint Furniture Makeover Abbotts At Home

These Gray Kitchen Cabinets Offer A Neutral Twist Bob Vila
Related Posts

