DIY Distressed Kitchen Cabinets: A Step-by-Step Guide to Vintage Charm
Distressing kitchen cabinets is a popular DIY project that can add character and charm to your kitchen. With a few simple steps, you can transform your ordinary cabinets into vintage-inspired pieces that will make your kitchen stand out from the crowd. Here's a step-by-step guide to help you DIY distressed kitchen cabinets:
Step 1: Gather your materials
You'll need the following materials for this project:
- Sandpaper (120-grit and 220-grit)
- Orbital sander or sanding block
- Tack cloth
- Primer
- Paint in your desired color
- Glaze or antiquing wax
- Clean rags or sponges
Step 2: Prepare your cabinets
Start by removing all the doors and hardware from the cabinets. Clean the cabinets thoroughly with a damp cloth to remove any dirt or grease. Let the cabinets dry completely.
Step 3: Sand the cabinets
Use the 120-grit sandpaper to lightly sand the surface of the cabinets to roughen them up a bit. Be careful not to sand too deeply. Wipe away any sanding dust with a tack cloth.
Step 4: Prime the cabinets
Apply a coat of primer to the cabinets using a brush or roller. Let the primer dry completely.
Step 5: Paint the cabinets
Once the primer is dry, you can start painting the cabinets in your desired color. Use a brush or roller to apply the paint evenly. Let the paint dry completely.
Step 6: Glaze or antique the cabinets
To give your cabinets a distressed look, you can apply a glaze or antiquing wax. Glaze is a tinted finish that can be added to the surface of the paint to create a weathered look. Antiquing wax is a type of wax that can be used to create a patina on the surface of the paint. Apply the glaze or wax sparingly and use a clean rag or sponge to work it into the crevices of the paint. Wipe away any excess glaze or wax.
Step 7: Reassemble the cabinets
Once the glaze or wax has dried, you can reassemble the cabinets by attaching the doors and hardware. Enjoy your newly distressed kitchen cabinets!
Tips for distressing kitchen cabinets
Here are a few tips to help you achieve the perfect distressed look for your kitchen cabinets:
- Don't be afraid to experiment with different sanding techniques and paint colors to create a unique look.
- If you're not sure how to distress a particular piece of cabinetry, practice on a scrap piece first.
- Take your time and don't rush the process. Distressing kitchen cabinets can take several days, so don't try to finish it all in one day.
- Have fun and enjoy the process! Distressing kitchen cabinets is a great way to add your own personality to your kitchen.

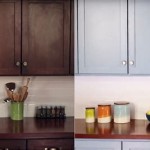
Rescuing And Reviving A Glazed Distressed Kitchen Bella Tucker

Distressed Kitchen Cabinets How To Distress Your

Tired Of Your White Cabinets And Love The French Country Look Watch How She Does This

How To Use Distressed Kitchen Cabinets Stylize Your Home

Distressed Kitchen Cabinets Find The Best Weathered Cabinet Style For

Rustic Style Really Brings The Excitement To Room It Works Great With Farmhouse And Distressed Kitchen Cabinets

Distressed Kitchen Cabinets Pictures Options Tips Ideas

Rescuing And Reviving A Glazed Distressed Kitchen Bella Tucker

Distressed White Kitchen Cabinets For Paige Looks Great With The Marble Too Rustic

Distressed Kitchen Cabinets How To Distress Your
Related Posts