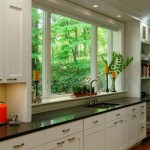
DIY Faux Finish Kitchen Cabinets: Transform Your Kitchen with Style
Tired of your dull and outdated kitchen cabinets? Don't despair! With a little bit of time and effort, you can give your cabinets a stunning faux finish that will transform the look of your kitchen. Here's a comprehensive guide to the essential aspects of DIY faux finish kitchen cabinets.
Preparation: The Key to a Successful Finish
As with any painting project, preparation is crucial for a smooth and professional-looking finish. Start by thoroughly cleaning your cabinets to remove any dirt, grease, or dust. Use a degreaser for heavily soiled surfaces. Once the cabinets are clean, lightly sand them with fine-grit sandpaper. This will help to create a better surface for the paint to adhere to.
Choosing the Right Paint and Tools
For a faux finish, you'll need two contrasting colors of paint. Select a base color and a glaze color. The glaze color should be at least 2 to 3 shades darker than the base color. Additionally, you'll need a few essential tools: a brush, a glazing knife, and a sea sponge.
Base Coat Application
Apply the base coat in even, thin strokes. Allow the base coat to dry completely before moving on to the next step.
Creating the Glaze
In a separate container, mix the glaze color with a glaze medium. The ratio of glaze to medium will depend on the desired transparency and texture. Start with a 1:1 ratio and adjust as needed.
Applying the Glaze
Use a glazing knife to apply a layer of glaze over the base coat. Work in small sections to prevent the glaze from drying too quickly. Hold the knife at a 45-degree angle and spread the glaze thinly in the direction of the wood grain.
Spongeing for Texture
While the glaze is still wet, use a sea sponge to create texture. Dip the sponge into the glaze and dab it onto the surface of the cabinet. Use a light touch and create random patterns to mimic the look of natural wood.
Antiquing for an Aged Look
If desired, you can create an antiqued finish by applying a dark wax over the glazed cabinets. Use a soft cloth to apply the wax and work it into the recesses of the wood grain. Wipe away any excess wax using a clean cloth.
Finishing Touches
Once the antiquing process (if desired) is complete, protect the finish with a clear polyurethane topcoat. Apply several thin coats of topcoat, allowing each coat to dry completely before applying the next. This will help to protect your cabinets from wear and tear.
With a little patience and attention to detail, you can achieve a stunning faux finish for your kitchen cabinets that will transform the look of your kitchen while adding a touch of unique character and style.

Faux Painting Kitchen Surfaces Walls Cabinets Floors Countertops

How To Paint Kitchen Cabinets In 7 Simple Steps

Faux Painting Kitchen Surfaces Walls Cabinets Floors Countertops

Faux Painting Kitchen Surfaces Walls Cabinets Floors Countertops

Painting Kitchen Cabinets With Chalk Paint Simply Today Life

Faux Painting Kitchen Surfaces Walls Cabinets Floors Countertops

20 Diy Painted Kichen Cabinet Ideas A Cultivated Nest

Painting Your Kitchen Cabinets White

How To Paint Kitchen Cabinets Without Sanding Sustain My Craft Habit

Diy Painting Your Kitchen Cabinets The Right Way
Related Posts