DIY Faux Painting Kitchen Cabinets: A Guide to Transformative Techniques
Revitalizing your kitchen without breaking the bank is possible with DIY faux painting techniques. By imitating the intricate details of wood grain, marble, or antique patina, you can achieve a stunning transformation that adds character and value to your home. Here's a comprehensive guide to help you master the art of faux painting kitchen cabinets.
Color Selection: Setting the Foundation
The color palette plays a crucial role in determining the overall ambiance of your kitchen. For wood grain effects, choose warm and earthy tones such as beige, brown, and amber. For marble imitation, opt for cool grays, whites, and veined accents. If you prefer an antique look, consider muted greens, deep reds, and gold highlights.
Materials You'll Need: A Painter's Toolkit
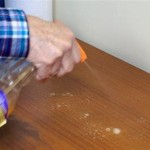
Gather the essential materials for your faux painting adventure: high-quality latex paint in your desired colors, glazing medium, synthetic brushes (round and flat), rags, sandpaper, chalk, and a spray bottle filled with water. A steady hand, patience, and a keen eye for detail are also valuable assets.
Step 1: Preparation and Base Color
Ensure your cabinets are clean and free of grease or dirt. Sand them lightly to create a smooth surface for paint to adhere to. Apply two coats of your base color, allowing each coat to dry completely before proceeding. The base color should be lighter than your desired wood grain or marble effect.
Step 2: Creating Wood Grain Illusions
Mix a darker shade of your base color with glazing medium to create a glazing mixture. Use a round brush to apply thin, wavy strokes simulating wood grain. Work in small sections and blend the edges using a damp rag. Allow the glazing mixture to set for a few minutes before applying a second coat, adding more depth and definition to the grain.
Step 3: Imitating Marble Veins
To achieve a marble-like effect, use a mixture of light and dark gray paints with glazing medium. Start by applying a thin layer of the light gray mixture, then use a smaller brush to add darker veins. Use a damp rag to blend the colors, creating a soft transition between the shades. Repeat the process until you're satisfied with the veining pattern.
Step 4: Aging and Antiquing
For an aged or antique look, apply a glaze of dark brown or green paint over the base color. Use a damp rag to wipe off most of the glaze, leaving it in the crevices and details to create an illusion of depth and wear. Additionally, you can sprinkle chalk dust over the wet glaze and lightly rub it in, giving the finish a weathered appearance.
Step 5: Finishing Touches
Once the faux painting is complete, protect your cabinets with two coats of polyurethane. Allow the polyurethane to cure for several hours before putting your kitchen back into full use. Your newly transformed cabinets will not only look stunning, but they'll also be durable and easy to clean.
DIY faux painting kitchen cabinets is a rewarding project that can dramatically enhance the aesthetics of your home. With careful planning, quality materials, and a little patience, you can achieve professional-looking results that will impress your family and friends.

Faux Painting Kitchen Surfaces Walls Cabinets Floors Countertops

Faux Painting Kitchen Surfaces Walls Cabinets Floors Countertops

Faux Painting Kitchen Surfaces Walls Cabinets Floors Countertops

How To Paint Pressed Wood Kitchen Cabinets Choice Cabinet

How To Paint Fake Wood Kitchen Cabinets Simple Made Pretty 2024

Painting Kitchen Cabinets With Chalk Paint Simply Today Life

15 Best Painted Kitchen Cabinets Ideas For Transforming Your With Color

How To Paint Fake Wood Kitchen Cabinets Simple Made Pretty 2024

Painting Kitchen Cabinets With Chalk Paint Simply Today Life

20 Diy Cabinet Door Makeovers With Furniture Stencils Makeover Doors Cabinets
Related Posts


