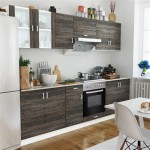
DIY High Gloss Kitchen Cabinets: A Comprehensive Guide
High gloss kitchen cabinets offer a sleek, modern aesthetic, reflecting light and creating a sense of spaciousness. Opting for a do-it-yourself approach to achieving this finish can significantly reduce costs, but it requires meticulous planning, patience, and attention to detail. This article provides a comprehensive guide to transforming existing or new kitchen cabinets into stunning high gloss masterpieces.
Before embarking on this project, assess the current state of your cabinet doors and frames. Are they solid wood, MDF (Medium-Density Fiberboard), or covered in laminate? The material will dictate the appropriate surface preparation and the types of paint or coating systems to use. It is essential to have a clear understanding of the project scope and the necessary resources before starting.
Safety should be a paramount concern. Proper ventilation is crucial when working with paints, primers, and clear coats, especially those containing solvents. Wear appropriate personal protective equipment, including a respirator, gloves, and eye protection, to minimize exposure to potentially harmful chemicals. Work in a well-ventilated area or outdoors, if weather permits.
Key Point 1: Surface Preparation - The Foundation of a Flawless Finish
Achieving a high gloss finish hinges on having a perfectly smooth and even surface. Any imperfections, such as scratches, dents, or unevenness, will be amplified by the reflective quality of the gloss. Thorough surface preparation is non-negotiable.
The first step is to remove all hardware, including hinges, handles, and knobs. Label each piece and its corresponding location to ensure proper reinstallation later. Clean the cabinet doors and frames thoroughly with a degreaser to remove any grease, dirt, or grime. This will allow the primer and paint to adhere properly.
Next, sand the surfaces using progressively finer grits of sandpaper. Start with a coarser grit, such as 120-grit, to remove any existing finish or imperfections. Gradually move to finer grits, such as 220-grit and finally 320-grit, to achieve a smooth, even surface. Sanding should be done in the direction of the wood grain, if applicable. For MDF cabinets, be careful not to sand too aggressively, as this can damage the surface.
After sanding, thoroughly remove all sanding dust with a tack cloth or a vacuum cleaner with a brush attachment. Even a small amount of dust can ruin the final finish. Once the dust is removed, inspect the surfaces for any remaining imperfections. Fill any dents or scratches with wood filler or auto body filler, following the manufacturer's instructions. Allow the filler to dry completely and then sand it smooth, blending it seamlessly with the surrounding surface.
Finally, apply a high-quality primer specifically designed for the cabinet material. Primer serves several purposes: it seals the surface, providing a uniform base for the paint; it enhances the adhesion of the paint; and it blocks stains from bleeding through the finish. Apply the primer in thin, even coats, allowing each coat to dry completely before applying the next. Sand lightly between coats of primer using a fine-grit sandpaper (320-grit or higher) to remove any imperfections and create an even smoother surface.
Key Point 2: Choosing the Right Paint and Application Method
The choice of paint significantly impacts the final appearance and durability of the high gloss finish. Several options are available, each with its own advantages and disadvantages. Consider factors such as durability, ease of application, drying time, and VOC (Volatile Organic Compounds) content when making your selection.
One option is oil-based paint. Oil-based paints offer excellent durability and a rich, glossy finish. However, they have a longer drying time, require mineral spirits for cleanup, and contain higher VOC levels. Due to environmental regulations and health concerns, oil-based paints are becoming less common.
Another option is water-based acrylic or latex paint. Water-based paints are easier to work with, dry quickly, and have lower VOC levels. They are also easier to clean up with soap and water. However, they may not be as durable as oil-based paints and may require multiple coats to achieve the desired gloss level.
A third option is specialized cabinet enamel. These paints are formulated specifically for use on cabinets and offer a combination of durability, ease of application, and a high gloss finish. They are typically more expensive than standard paints but can provide superior results.
Regardless of the type of paint chosen, the application method is crucial for achieving a professional-looking finish. Spraying is generally considered the best method for achieving a smooth, even high gloss finish. A high-volume, low-pressure (HVLP) sprayer is ideal, as it minimizes overspray and allows for precise control of the paint flow. However, spraying requires proper ventilation and masking to protect surrounding surfaces.
If spraying is not feasible, you can use a high-quality brush or roller designed for smooth finishes. Use a brush with fine, synthetic bristles to minimize brush strokes. Apply the paint in thin, even coats, overlapping each stroke slightly. For rollers, use a short-nap roller to minimize texture. After applying each coat, lightly sand the surface with a fine-grit sandpaper (400-grit or higher) to remove any imperfections and create a smooth base for the next coat.
Apply multiple thin coats of paint rather than one thick coat. Thick coats are more likely to run, sag, or develop orange peel texture. Allow each coat to dry completely before applying the next, following the manufacturer's instructions.
Key Point 3: Achieving the High Gloss Sheen and Protecting the Finish
Once the paint has dried completely, the next step is to achieve the desired high gloss sheen. This can be accomplished by applying multiple coats of a clear coat specifically designed for high gloss finishes. Polyurethane clear coats are a popular choice due to their durability and resistance to scratches and stains. However, epoxy clear coats can also be used for exceptional durability, although they may be more difficult to work with.
Apply the clear coat in thin, even coats, using a sprayer or a high-quality brush. As with the paint, multiple thin coats are preferable to one thick coat. Allow each coat to dry completely before applying the next, following the manufacturer's instructions. Lightly sand the surface between coats with a very fine-grit sandpaper (600-grit or higher) to remove any imperfections and create a perfectly smooth surface.
For the final coat, consider using a technique called "wet sanding" to achieve an even higher gloss sheen. Wet sanding involves using a very fine-grit sandpaper (1000-grit or higher) and water to gently sand the surface. This removes any remaining imperfections and creates a mirror-like finish. Be careful not to sand too aggressively, as this can damage the clear coat.
After wet sanding, polish the surface with a polishing compound and a buffing pad to restore the gloss and remove any swirl marks. Use a slow, even motion and apply light pressure. Wipe the surface clean with a microfiber cloth after polishing.
Finally, apply a coat of wax to protect the finish and enhance the gloss. Use a high-quality furniture wax and apply it in a thin, even layer. Allow the wax to dry completely and then buff it to a shine with a clean microfiber cloth.
Allow the cabinets to cure completely for several days before reinstalling the hardware and putting them back into use. This will allow the paint and clear coat to fully harden and resist scratches and damage.
Maintaining the high gloss finish requires regular cleaning with a soft, damp cloth. Avoid using abrasive cleaners or harsh chemicals, as these can scratch or dull the finish. Wipe up spills immediately to prevent staining. With proper care, your DIY high gloss kitchen cabinets will provide years of enjoyment and add a touch of modern elegance to your kitchen.
This process demands patience and meticulousness. Rushing any step can compromise the final result. Take your time, follow the instructions carefully, and be prepared to invest the necessary effort to achieve a professional-quality high gloss finish.

How To Create A High Gloss Kitchen

High Gloss Kitchen Cabinets Design Ideas
Painting High Gloss On White Laminate Diy Home Improvement Forum

High Gloss Acrylic Slab Cabinet Fronts The Face

High Gloss Kitchen Cabinet Designs For Your Home Design Cafe

High Gloss Kitchen Cabinets Pros And Cons Fabuwood

High Gloss Kitchen Cabinets Professional Guide Pa

7 High Gloss Kitchen Cabinets For A Sleek Space Domino

High Gloss Kitchens Kitchen Units At Trade S Diy

Guide To High Gloss White Kitchen Doors Warehouse
Related Posts

