Diy Installing Kitchen Wall Cabinets: A Step-by-Step Guide
Installing kitchen wall cabinets can be a great way to refresh the look of your kitchen and enhance its storage space. While it may seem like a daunting task, with the right tools and know-how, you can complete this project successfully. This guide will walk you through the essential steps involved in DIY kitchen wall cabinet installation.
1. Planning and Preparation
Before embarking on the installation, it is crucial to plan out the layout of your cabinets. Measure the available space carefully and consider the size and style of cabinets you want to install. You will also need to purchase all the necessary materials, including cabinets, mounting brackets, screws, nails, and a level. Once you have everything you need, it's time to prepare the area.
2. Prepping the Area
Before installing the cabinets, it is vital to prep the wall surface. Ensure that it is clean, dry, and free of any obstacles. If there are any nails or screws sticking out, remove them. You may also need to level the wall if it is uneven. Use a level to check for any high or low spots and make adjustments as needed with shims or leveling compound.
3. Installing the Mounting Brackets
Once the wall is ready, it's time to install the mounting brackets. These brackets will support the weight of the cabinets. Position the brackets according to the manufacturer's instructions, ensuring they are evenly spaced and securely fastened to the wall. Use a level to make sure they are perfectly horizontal.
4. Hanging the Cabinets
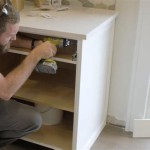
With the mounting brackets in place, you can start hanging the cabinets. Begin with the base cabinets and work your way up. Carefully lift each cabinet and align it with the corresponding mounting bracket. Make sure the cabinet is level before securing it with screws or nails. To ensure a snug fit, use shims or spacers between the cabinet and the wall as needed.
5. Securing the Cabinets to the Wall
Once all the cabinets are hung, it is crucial to secure them to the wall. This added reinforcement helps prevent the cabinets from pulling away from the wall due to weight or movement. To secure the cabinets, drive screws or nails through the back of the cabinet into the wall studs. It is recommended to use at least two screws or nails per cabinet for maximum stability.
6. Installing Doors and Hardware
With the cabinets securely mounted, it's time to install the doors and hardware. Align the doors with the cabinet frames and attach them with hinges. Use a screwdriver or drill to tighten the screws. Next, install the handles, knobs, and pulls. Make sure to follow the manufacturer's guidelines for proper installation.
7. Final Touches
After installing the doors and hardware, you can add the finishing touches to your kitchen cabinets. This may include caulking around the edges of the cabinets to seal any gaps and prevent water damage. You can also apply a fresh coat of paint or stain to match the cabinets with the rest of your kitchen décor. Finally, organize the cabinets with shelves, drawers, and storage solutions to maximize their functionality.
Conclusion
Installing kitchen wall cabinets can be a rewarding DIY project that adds both aesthetic and functional value to your kitchen. By following these steps carefully, you can successfully complete the installation and enjoy a fresh, organized, and stylish kitchen space. Remember to take safety precautions, use the right tools, and refer to the manufacturer's instructions for specific cabinet models.

How To Install Kitchen Cabinets Diy Family Handyman

How To Install Kitchen Cabinets Buildipedia Diy

How To Install Cabinets Like A Pro The Family Handyman

How To Install Upper Cabinets Like A Pro Cabinetselect Com

Installing Kitchen Cabinets Momplex Vanilla Ana White

How To Install Wall Cabinets The Home Depot

Installing Kitchen Cabinets Diy How To Install Like Pros

Kitchen Cabinet Installation

How To Install Kitchen Cabinets The Home Depot

How To Install Upper Cabinets Like A Pro Cabinetselect Com


