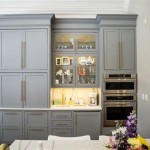
DIY Kitchen Cupboard Refacing: A Comprehensive Guide to Transform Your Kitchen
Kitchen cupboard refacing is a cost-effective and rewarding project that can dramatically transform the look and feel of your kitchen. By replacing the doors, drawer fronts, and hardware, you can create a fresh new style without the expense and hassle of a complete kitchen remodel.
Benefits of DIY Kitchen Cupboard Refacing
- Save money: Refacing your kitchen cupboards is significantly less expensive than replacing them entirely.
- Update the look of your kitchen: Choose new door styles, finishes, and hardware to create a modern or classic look that matches your taste.
- Increase home value: A well-done kitchen refacing project can add value to your home.
- DIY-friendly: Refacing kitchen cupboards is a manageable project that most homeowners can complete with basic tools and DIY skills.
Materials and Tools for DIY Kitchen Cupboard Refacing
* New cupboard doors and drawer fronts * New hardware (handles and knobs) * Decorative molding (optional) * Measuring tape * Level * Drill * Screws * Adhesive * Wood fillerSteps for DIY Kitchen Cupboard Refacing
- Remove the old doors and drawer fronts: Use a screwdriver to remove the screws that hold the doors and drawer fronts in place. Be careful not to damage the cabinet frames.
- Measure and cut the new doors and drawer fronts: Measure the openings for the new doors and drawer fronts. Cut the new pieces to size using a saw or a jigsaw.
- Drill pilot holes: Drill pilot holes into the new doors and drawer fronts for the screws.
- Attach the new doors and drawer fronts: Use screws to attach the new doors and drawer fronts to the cabinet frames. Make sure to level the doors and drawer fronts before tightening the screws.
- Install the new hardware: Attach the new handles and knobs to the doors and drawer fronts.
- Add decorative molding (optional): If desired, you can add decorative molding around the cabinet frames to give your kitchen a more finished look.
- Fill any gaps: Use wood filler to fill any gaps between the new doors and drawer fronts and the cabinet frames. Allow the wood filler to dry completely before sanding it smooth.
Tips for Success
* Use a level to ensure that your doors and drawer fronts are hanging straight. * Don't overtighten the screws when attaching the doors and drawer fronts. * Be patient and take your time. Refacing your kitchen cupboards is a project that should be enjoyed, not rushed. * If you're unsure about any step of the process, consult with a professional or watch a tutorial video.
How To Reface Kitchen Cabinets Affordable Cabinet Update On A Budget Anika S Diy Life

Diy Cabinet Refacing Budget Friendly Made Easy Wisewood

Diy Cabinet Refacing Budget Friendly Made Easy Wisewood

Cabinet Refacing Ideas Diy Projects Craft How To S For Home Decor With

Painted Furniture Ideas Diy Refacing Kitchen Cabinets

The Best Part Of A Kitchen Makeover Is Seeing Before And After Whether Youre K Remodel Small Remodeling Projects Refacing Cabinets

Cabinet Refacing Ideas Diy Projects Craft How To S For Home Decor With

Kitchen Cabinet Refacing The Happy Housewife Home Management

Professional Kitchen Cabinet Refacing Services Magic

The Case For Cabinet Refacing Infographic Bendheim
Related Posts

