DIY Molding on Kitchen Cabinets: Elevate Your Kitchen's Style
Transforming your kitchen's look can be as simple as adding molding to your cabinets. Molding adds depth, character, and a touch of elegance that instantly elevates the space. Here's a comprehensive guide to DIY molding on kitchen cabinets, covering all the essential aspects.
Types of Molding
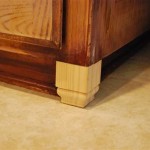
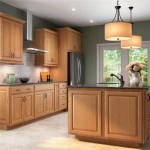
Choose molding that complements the style of your kitchen and cabinets. Crown molding adds a stately touch, while chair rails create a sophisticated division. Base molding provides a finishing touch along the bottom of cabinets. Consider the thickness and width of the molding to ensure it doesn't overpower your cabinets.
Materials
Molding is typically made from wood, MDF, or PVC. Wood molding, such as oak or maple, offers a classic look and natural beauty. MDF is a cost-effective option with a smooth surface suitable for painting. PVC molding is durable, moisture-resistant, and suitable for high-traffic areas.
Tools
You'll need essential tools for this project: a miter saw, a brad nailer, wood filler, caulk, and a level. A miter saw precisely cuts angles for corners, while a brad nailer secures the molding to the cabinets. Wood filler fills gaps and imperfections, and caulk seals the joints.
Preparation
Before applying the molding, clean the cabinet surfaces to remove grease or dirt. Measure and mark the exact placement of each molding piece to ensure proper alignment. For crown molding, use a laser level to create a straight line around the top of the cabinets.
Cutting and Joining
Use the miter saw to cut 45-degree angles on the ends of the molding pieces that will meet at corners. Dry-fit the pieces together to check for proper fit. Apply wood glue to the joints and secure them with brad nails. Use a level to ensure the molding is level and plumb.
Finishing
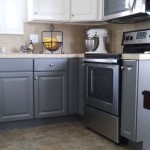
Fill any gaps or nail holes with wood filler. Once dry, sand the filled areas flush with the surface. Apply caulk to the joints between the molding and the cabinets to seal them. If desired, paint or stain the molding to match the cabinets or create a contrasting effect.
Tips
- Use a sharp blade on your miter saw to ensure clean cuts. - Sand any splinters or rough edges before applying finish. - Caulk thoroughly to prevent moisture from seeping under the molding. - Consider adding lighting under crown molding for a dramatic effect. - If you're not confident in your DIY skills, consult a professional cabinet maker.
Conclusion
Adding molding to your kitchen cabinets is a rewarding project that can transform the space. By following these steps carefully and using the right tools and materials, you can achieve a professional-looking result that will enhance the look and feel of your kitchen.

Diy Kitchen Cabinet Upgrade With Paint And Crown Molding

Adding Moldings To Your Kitchen Cabinets Remodelando La Casa

From Drab To Fab Adding Trim Cabinets

How To Add Trim And Paint Your Laminate Cabinets

Adding Molding To Old Cabinets Diy Tutorial Kitchen Cabinet Doors

Adding Crown Molding To Kitchen Cabinets Young House Love

From Drab To Fab Adding Trim Cabinets

Painting Kitchen Cabinets And Diy Cabinet Molding Midcounty Journal

Diy Kitchen Cabinet Upgrade With Paint And Crown Molding

Diy Cabinet End Panels With Shaker Style Trim Average But Inspired
Related Posts