DIY Painting Distressed Kitchen Cabinets: A Step-by-Step Guide
Distressed kitchen cabinets add a touch of vintage charm to any space. Whether you're looking to update your dated cabinets or create a rustic farmhouse look, this DIY project is perfect for you. Here's a step-by-step guide to help you achieve beautiful distressed kitchen cabinets:
Materials You'll Need:
- Deglosser
- Sandpaper (120-grit and 220-grit)
- Tack cloth
- Primer
- Paint in desired color
- Glazing medium
- Antique glaze
- Polyurethane
- Brushes and rags
Step 1: Preparation
Clean the cabinets thoroughly with deglosser and remove all hardware. Lightly sand the surfaces with 120-grit sandpaper to create a roughened surface for paint adhesion. Wipe away sanding dust with a tack cloth.
Step 2: Prime the Cabinets
Apply a coat of primer to the cabinets, allowing it to dry completely. This will provide a smooth base for the paint and help prevent bleeding.
Step 3: Paint the Cabinets
Apply two coats of paint in your desired color. Let each coat dry thoroughly before applying the next. For a more distressed look, use a brush with slightly stiff bristles.
Step 4: Create the Glaze
Mix equal parts glazing medium and antique glaze in a small container. This glaze will help create the distressed effect.
Step 5: Distress the Cabinets
Apply the glaze to the cabinets using a brush or rag. Work in small sections and wipe away excess glaze with a clean rag. The key is to create a subtle, uneven finish.
Step 6: Sand and Seal
Once the glaze has dried, lightly sand the cabinets with 220-grit sandpaper to blend the distressed areas. Wipe away any sanding dust. Apply two coats of polyurethane to protect the cabinets and enhance their distressed look.
Tips for Success:
- Use a sanding block to ensure even sanding.
- Don't over-apply the glaze. Less is more for a subtle distressed effect.
- Experiment with different glaze colors to achieve the desired level of distress.
- Allow ample drying time between each step.
- Protect the surrounding area from paint and glaze splatters with plastic sheets or drop cloths.
Conclusion:
Distressed kitchen cabinets can transform the look of your kitchen with minimal effort and expense. By following these steps carefully, you can create beautiful and unique cabinets that will add character and charm to your space for years to come.

Rescuing And Reviving A Glazed Distressed Kitchen Bella Tucker

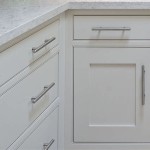
Distressed Kitchen Cabinets How To Distress Your

Rescuing And Reviving A Glazed Distressed Kitchen Bella Tucker

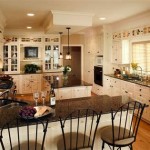
Rustic Style Really Brings The Excitement To Room It Works Great With Farmhouse And Distressed Kitchen Cabinets

Antiqued Cabinets Home Decor Kitchen Remodel Refinishing

Distressed Worn Looking Kitchen Cabinet Designs

Rescuing And Reviving A Glazed Distressed Kitchen Bella Tucker

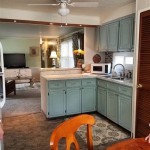
Distressed And Antiqued Kitchen Cabinets

Painting Kitchen Cabinets With Chalk Paint Simply Today Life

Chalk Painted Kitchen Cabinets 2 Years Later Our Storied Home
Related Posts