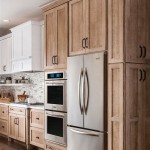
DIY Refacing Kitchen Cabinets: A Comprehensive Guide to Transform Your Kitchen
Are you looking to refresh your kitchen without breaking the bank? DIY refacing kitchen cabinets is a cost-effective and efficient way to give your kitchen a brand new look. This guide will walk you through the essential aspects of cabinet refacing, empowering you to tackle this project with confidence.
Preparation: Planning and Materials
Before you start, it's crucial to plan your project carefully. Measure your cabinets precisely to determine the amount of materials you'll need. Choose a veneer or laminate that complements your kitchen decor and budget. Other necessary materials include adhesive, trim, new hardware, and tools.
Removing Existing Doors and Hardware
Carefully remove the existing cabinet doors and hardware. Use a screwdriver or drill to release any screws or hinges. Protect your countertops and floors with a tarp or cardboard while working. Label the doors and hardware for easy reinstallation later.
Preparing the Cabinet Frames
Thoroughly clean the cabinet frames to remove any dirt or debris. Sand any rough edges or uneven surfaces. Prime the frames with a high-quality latex primer to create a smooth surface for adhesion.
Applying the Veneer or Laminate
Cut the veneer or laminate pieces to fit the cabinet frames. Apply adhesive to both the cabinet frame and the veneer. Carefully align the veneer and firmly press it into place. Use a roller or block to smooth out any air bubbles.
Trimming and Finishing
Once the veneer or laminate is secured, it's time to trim any excess material. Use a sharp utility knife or trimming tool to cut along the edges of the frames. Install any trim pieces to cover the edges and create a polished look.
Reinstalling Doors and Hardware
Reattach the original cabinet doors or install new ones. Use new screws or hinges to secure the doors firmly. Replace the hardware, such as knobs and handles, to complete the transformation.
Tips for Success
- Use a sharp utility knife to ensure clean, precise cuts.
- Apply adhesive evenly and press firmly to prevent bubbles.
- Allow ample time for the adhesive to set before using the cabinets.
- Protect your countertops and floors from adhesive spills.
- If you're unsure about any step, consult a professional.
With proper preparation and care, DIY refacing kitchen cabinets is a rewarding project that can dramatically enhance the look of your kitchen. Whether you're a seasoned DIYer or a novice, this guide will empower you to tackle this project with confidence and create a kitchen that reflects your style and functionality.

Cabinet Refacing Ideas Diy Projects Craft How To S For Home Decor With

Cabinet Refacing Ideas Diy Projects Craft How To S For Home Decor With

Diy Cabinet Refacing Budget Friendly Made Easy Wisewood

Painted Furniture Ideas Diy Refacing Kitchen Cabinets

Cabinet Refacing Ideas Diy Projects Craft How To S For Home Decor With Kitchen Remodel Small Remodeling Cabinets

Diy Cabinet Refacing Budget Friendly Made Easy Wisewood

20 Kitchen Cabinet Refacing Ideas Options To Refinish Cabinets Remodel Small Backsplash Designs Design

Best Kitchen Cabinet Refacing For Your Home The Depot

Kitchen Cabinet Refacing Options And Tips

Kitchen Cabinet Refacing How To Redo Cabinets
Related Posts


