DIY Refinishing Kitchen Cabinets: A Comprehensive Guide
Transforming your kitchen's aesthetics and functionality doesn't have to involve a costly remodel. Refinishing your kitchen cabinets is an affordable and rewarding DIY project that can breathe new life into your space. Here's a comprehensive guide to help you achieve stunning results:
Step 1: Preparation
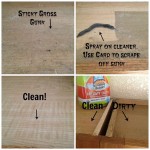
Before embarking on your refinishing journey, meticulous preparation is crucial. Remove all cabinet doors and drawers, and thoroughly clean them to remove grease and grime. Use a degreaser or TSP cleaner for optimal results. Protect your countertops and floors with drop cloths or plastic sheeting.
Step 2: Cleaning and Sanding
To ensure proper adhesion of the new finish, sand the surfaces of the doors and drawers with fine-grit sandpaper (120-150 grit). This process removes the existing finish, prepares the wood for staining or painting, and helps to smooth out any imperfections. Use a sanding block for consistent results and remove any dust with a damp cloth.
Step 3: Staining or Painting
This is where your creative vision takes shape. If you desire a natural wood look, apply a wood stain of your choice in even strokes, following the grain of the wood. Wipe off excess stain with a clean cloth. Alternatively, if you prefer a painted finish, use a high-quality primer and latex paint in the color of your choice. Apply even coats, allowing each layer to dry thoroughly before applying the next.
Step 4: Finishing and Protection
To seal the stain or paint and protect your cabinets from wear and tear, apply a polyurethane finish. Use a brush or foam roller to apply thin, even coats. Allow each coat to dry completely before applying the next. For a durable and glossy finish, apply at least two to three coats.
Step 5: Reassembly
Once the finish is completely dry, it's time to reassemble your cabinets. Attach the doors and drawers to their frames, making sure they align properly. Adjust hinges and handles as needed to ensure smooth operation. Clean up any excess adhesive or paint from the surfaces.
Step 6: Final Touches
The final touches can elevate the overall look of your refinished cabinets. Install new hardware, such as knobs or handles, in a style that complements your decor. Consider adding decorative elements like trim or molding to enhance the cabinetry's visual appeal.
Additional Tips
- Test the stain or paint color on an inconspicuous area before applying it to the entire surface.
- Use a respirator and open windows for proper ventilation while sanding and finishing.
- Allow ample drying time between each step to achieve optimal results.
- Use high-quality materials and tools for a professional-looking finish.
- Clean your refinished cabinets regularly to maintain their beauty and longevity.
Refinishing your kitchen cabinets is a satisfying DIY project that can transform the heart of your home. By following these steps and incorporating your own personal style, you can create a kitchen that is both functional and aesthetically pleasing.

How To Refinish Cabinets Like A Pro

How To Paint Kitchen Cabinets In 7 Simple Steps

A Diy Project Painting Kitchen Cabinets

20 Diy Painted Kichen Cabinet Ideas A Cultivated Nest

Budget Kitchen Renovation With Diy Shaker Painted Cabinets I

Update On Our Diy White Painted Kitchen Cabinets 2 Years Later

9 Step Guide To Diy Kitchen Cabinet Refinishing

Diy Painted Oak Kitchen Cabinets Makeover

Pa Wedding Photographer Diy Painted Kitchen Cabinets Before After
Refinishing Kitchen Cabinets A Beautiful Mess
Related Posts


