DIY Refinishing Kitchen Cupboards: A Step-by-Step Guide
Are your kitchen cupboards looking tired and outdated? Refinishing them is a great way to give your kitchen a fresh look without breaking the bank. Here's a step-by-step guide to help you refinish your kitchen cupboards like a pro.
1. Preparation
Before you start, you'll need to gather your materials. You'll need: - Sandpaper (120- and 220-grit) - Tack cloth - Degreaser - Primer - Paint or stain - Polyurethane - Paint brushes or a sprayer - Screwdriver
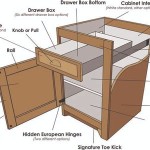
Once you have your materials, you can start by removing the doors and drawers from the cupboards. Then, use the 120-grit sandpaper to sand down the surface of the cupboards. This will help to remove any bumps or imperfections.
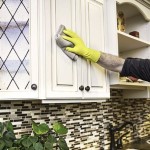
Once you've sanded the cupboards, use a tack cloth to remove any dust. Then, apply a degreaser to the surface of the cupboards. This will help to remove any grease or dirt that could prevent the primer or paint from adhering properly.
2. Priming
Once the cupboards are clean and dry, you can start priming them. Primer helps to create a smooth, even surface for the paint or stain to adhere to. Apply a thin, even coat of primer to the surface of the cupboards, using a paint brush or a sprayer.
Allow the primer to dry completely before moving on to the next step.
3. Painting or Staining
Once the primer is dry, you can start painting or staining the cupboards. If you're painting the cupboards, use a high-quality paint that is specifically designed for kitchen cabinets. Apply a thin, even coat of paint to the surface of the cupboards, using a paint brush or a sprayer.
If you're staining the cupboards, use a high-quality stain that is specifically designed for kitchen cabinets. Apply a thin, even coat of stain to the surface of the cupboards, using a paint brush or a sprayer.
Allow the paint or stain to dry completely before moving on to the next step.
4. Polyurethane
Once the paint or stain is dry, you can apply polyurethane to protect the surface of the cupboards. Polyurethane is a clear, protective coating that will help to prevent the paint or stain from chipping or peeling.
Apply a thin, even coat of polyurethane to the surface of the cupboards, using a paint brush or a sprayer. Allow the polyurethane to dry completely before reinstalling the doors and drawers.
5. Reinstallation
Once the polyurethane is dry, you can reinstall the doors and drawers on the cupboards. Use a screwdriver to tighten the screws that hold the doors and drawers in place.
And that's it! You've now refinished your kitchen cupboards like a pro. Enjoy your new-looking kitchen!

How To Paint Kitchen Cabinets In 7 Simple Steps

A Diy Project Painting Kitchen Cabinets

9 Step Guide To Diy Kitchen Cabinet Refinishing

Diy Painted Oak Kitchen Cabinets Makeover

Budget Kitchen Renovation With Diy Shaker Painted Cabinets I

Pa Wedding Photographer Diy Painted Kitchen Cabinets Before After

Diy Painting Your Kitchen Cabinets The Right Way

Budget Kitchen Renovation With Diy Shaker Painted Cabinets I

Cabinet Refinishing Guide

20 Diy Painted Kichen Cabinet Ideas A Cultivated Nest
Related Posts

