DIY Whitewash Kitchen Cabinets: A Step-by-Step Guide
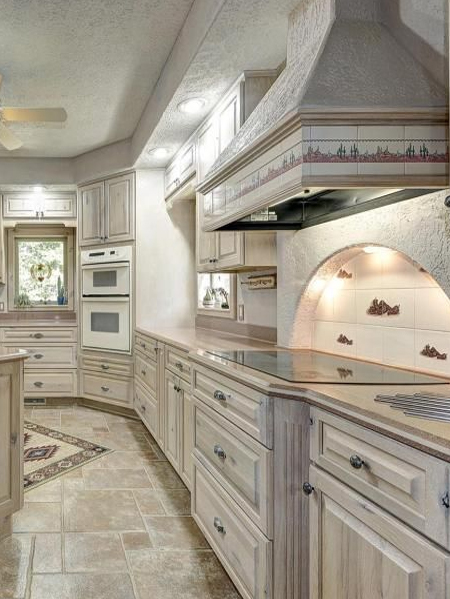
Transforming your kitchen cabinets with a whitewash finish is a budget-friendly and stylish way to update your space. This technique creates a subtle aged appearance, adding character and warmth to your kitchen's ambiance. Here's a comprehensive guide to DIY whitewashing kitchen cabinets:
Materials You'll Need:
- Latex paint in your desired white shade
- Water
- Sponge or paintbrush
- Sandpaper (120-grit and 220-grit)
- Tack cloth
- Plastic or foil sheets to protect surrounding areas
- Primer (optional)
Step 1: Preparation
Clear your cabinets and remove hardware. If your cabinets are sealed, lightly sand them to create a rough surface for better paint adhesion. Wipe away dust with a tack cloth. Protect surrounding surfaces with plastic or foil sheets.
Step 2: Create the Whitewash Mixture
Mix the latex paint with water in a 50:50 ratio. Adjust the ratio as needed; a thicker mixture will create a more opaque finish, while a thinner mixture will be more transparent. Stir the mixture thoroughly until it's smooth.
Step 3: Prime (Optional)
If you're working with dark-colored or stained cabinets, applying a coat of primer will prevent bleed-through. Choose a latex primer that is compatible with your paint.
Step 4: Apply the Whitewash
Dip a sponge or paintbrush into the whitewash mixture and gently dab it onto the cabinet surface. Use a circular motion and apply the mixture unevenly for a weathered look. Avoid applying too much paint; less is more in this case.
Step 5: Remove Excess Paint
Immediately after applying the whitewash, wipe away any excess paint with a damp cloth. This will help create a textured, aged appearance. Let the first coat dry completely.
Step 6: Sand and Apply Additional Coats
Once the first coat is dry, lightly sand the surface with 220-grit sandpaper to remove any brushstrokes or unevenness. Clean the surface with a tack cloth and apply additional coats of whitewash as desired. Let each coat dry completely before sanding and applying the next.
Step 7: Finishing Touches
When you're satisfied with the whitewash finish, seal it with a clear topcoat to protect it and enhance its durability. Choose a matte or satin finish to maintain the aged look.
Tips for a Successful DIY Whitewash
- Test the whitewash mixture on an inconspicuous area first to ensure it achieves the desired effect.
- Use a light touch when applying the whitewash; the less paint you use, the more authentic the aged look will be.
- Don't be afraid to experiment with different ratios of paint and water to create a customized finish.
- Protect your surrounding surfaces thoroughly to prevent paint splatter.
- Allow ample drying time between coats. Rushing the process can compromise the durability of the finish.

Whitewashed Cabinet Makeover Confessions Of A Serial Do It Yourselfer

Whitewashed Cabinet Makeover Confessions Of A Serial Do It Yourselfer

Diy Distressed Whitewashed Farmhouse Vanity Refacing For Under 40 Staining Cabinets Bathroom

Armoire Makeover Whitewashing Tutorial Love Grows Wild

6 Diy Whitewashed Cabinets For Cozy Shabby Chic Décor Shelterness

How To Bleach And White Wash Oak Cabinets

Distressed Kitchen Cabinets How To Distress Your

How To Stain Dark Or Yellow Kitchen Cabinets Lighter

Whitewashed Kitchen Cabinets Before And After Finishes Close Up Finishe Whitewash Cherry

How To Make A Pickled Or White Wash Finish Ron Hazelton
Related Posts


