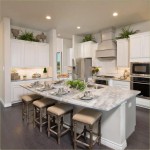
Essential Aspects of Glazing Painted Kitchen Cabinets
Adding a touch of elegance to your kitchen can be as simple as glazing your painted cabinets. Glazing is a technique that involves applying a thin layer of translucent or transparent paint over a base color, creating a sophisticated and visually appealing effect. Here are the essential aspects of glazing painted kitchen cabinets to help you achieve the perfect finish:
Choosing the Right Paint
The key to successful glazing lies in selecting the appropriate paint. For the base color, choose a durable paint that adheres well to your cabinets. For the glaze, opt for a translucent or transparent glaze specifically designed for glazing. These glazes come in various colors and finishes, allowing you to customize the look of your cabinets.
Surface Preparation
Before glazing, ensure your cabinets are properly prepared. Thoroughly clean and degrease the surfaces using a cleaner designed for kitchen cabinets. Any dirt or grease will prevent the glaze from adhering properly. Sand the cabinets lightly to create a slightly rough surface, which will improve the glaze's grip.
Applying the Glaze
Apply a thin layer of glaze using a soft brush or a sponge. Start by brushing in small sections and gradually blend them together. Allow the glaze to dry slightly before wiping off the excess with a clean cloth. You can control the opacity of the glaze by adjusting the thickness of the application.
Glazing Techniques
Different glazing techniques can create unique effects. To achieve a subtle antique look, apply the glaze in the recesses of the cabinets, such as grooves and details. For a more dramatic effect, apply the glaze more evenly over the entire surface. You can also use multiple layers of glaze and different colors to create complex and sophisticated looks.
Blending and Smoothing
Once the glaze is applied, blend and smooth the transitions between different sections using a soft brush or cloth. This will help create a seamless and even finish. Remember to work with the dried glaze to avoid smudging or removing it unintentionally.
Protective Coating
To preserve the glazed finish, apply a protective coating such as polyurethane or varnish. Choose a coating that is durable and compatible with the glaze. This will protect your cabinets from wear and tear, ensuring their beauty for years to come.
Additional Tips
* Experiment with different glaze colors to create custom hues. * Use thin layers of glaze and build up the opacity gradually to achieve the desired effect. * Clean your brushes thoroughly between glaze applications to prevent color contamination. * Allow ample drying time for each layer of glaze and coating to ensure proper adhesion and a smooth finish.
How To Glaze Kitchen Cabinets

How To Glaze Kitchen Cabinets Diyer S Guide Bob Vila

Rescuing And Reviving A Glazed Distressed Kitchen Bella Tucker

Porchswings N Honeysuckle Paint And Glaze Cabinet Tutorial Kitchen Cabinets Makeover Renovation Glazed

How To Glaze Cabinets At Home With The Barkers

3 Steps To Glaze Cabinets Correctly Painted Furniture Ideas Distressed Kitchen Glazed Chalk Paint

How To Glaze Cabinets At Home With The Barkers

How To Glaze Kitchen Cabinets Diyer S Guide Bob Vila

3 Great Reasons To Glaze Your Kitchen Cabinets

How To Glaze Kitchen Cabinets Diy Network
Related Posts

