Grey Stained Kitchen Cabinets: A DIY Guide to Transform Your Space
Grey hues have been a staple in interior design for years, and for good reason. They exude a sense of calm and sophistication, making them a popular choice for kitchen cabinets. Grey stained cabinets offer a unique blend of warmth and modernity, creating a timeless and elegant aesthetic that can complement various styles. If you're looking to refresh your kitchen without a complete overhaul, staining your cabinets grey can be a budget-friendly DIY project with transformative results. This guide outlines key steps and considerations for achieving a stunning grey finish on your kitchen cabinets.
1. Preparation is Key: Ensuring a Smooth Transformation
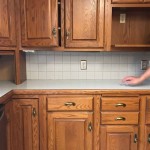
Before diving into the staining process, proper preparation is crucial for a successful outcome. This involves cleaning, sanding, and priming the cabinets to create a smooth and receptive surface for the stain. Begin by thoroughly cleaning the cabinets with a degreaser to remove any grease, grime, or dirt that could prevent the stain from adhering properly. Next, use sandpaper to smooth out any imperfections, paying attention to rough edges and areas with existing paint or varnish. Sanding helps to create a uniform surface for the stain to penetrate evenly. Finally, apply a primer suited for your cabinets. This acts as a barrier between the existing surface and the stain, promoting better adhesion and a more consistent colour. If you're working with bare wood, consider using a wood conditioner to help the stain absorb evenly. Proper preparation will ensure a professional-looking finish and prevent uneven colour application.
2. Choosing the Right Grey Stain: Finding the Perfect Match for Your Vision
The vast array of grey stain options can be overwhelming, but understanding your desired aesthetic and considering the existing elements in your kitchen will help you make the right choice. Think about the overall style you want to achieve: modern, farmhouse, traditional, or contemporary. Do you prefer a warm grey that leans towards brown or a cool grey with blue undertones? The light levels in your kitchen also play a role. Darker greys may make a small kitchen appear smaller, while lighter shades can open up the space. Consider visiting a paint store or browsing online retailers to see samples and compare different shades. Ask for swatches to test the colour on your cabinets before committing to a large purchase. Experimenting with different wood finishes, such as natural wood, painted wood, or stained wood, can also influence the final shade of grey. Selecting the right shade of grey stain is crucial in achieving your desired kitchen aesthetic.
3. Applying the Stain: Techniques for a Smooth and Consistent Finish
Apply the grey stain using a brush, foam applicator, or a rag. Work in thin, even coats, ensuring the stain penetrates the wood evenly. Avoid over-applying, as this can lead to an uneven finish. Start with the top horizontal surfaces and work your way down, using smooth, consistent strokes. Allow each coat to dry completely before applying the next one, typically for several hours. If you're aiming for a darker grey, several thin coats are recommended. For a lighter grey, one or two coats may suffice. After applying the final coat, allow the stain to cure for at least 24 hours before applying a sealant. This helps protect the stain from scratches and spills. A clear polyurethane sealant in a satin or semi-gloss finish will enhance the grey shade and add durability. Following the recommended drying times and applying the sealant correctly are crucial for a long-lasting and beautiful finish.
To ensure a professional-looking result, consider these additional tips:
- Wear gloves and eye protection when applying the stain and sealant to safeguard yourself from potential hazards.
- Use a paint thinner to clean brushes and applicators after use.
- Work in a well-ventilated area to allow the stain and sealant to dry properly.
- Sand lightly between coats to remove any imperfections or brushstrokes. This helps create a smooth and consistent finish.
- Consider using a pre-stain wood conditioner, especially if you're working with bare wood. This helps to even out the wood's texture and prevent the stain from absorbing unevenly.
- Do a test application in an inconspicuous area to see how the stain looks on your cabinets before you start on the entire project.
Grey stained kitchen cabinets can transform your space, creating a sophisticated and modern aesthetic. By following these tips, you can confidently tackle this DIY project and achieve a stunning finish that will be the envy of your guests. Remember, proper preparation, careful stain selection, and the right application techniques are essential for a polished and durable result.

Diy Kitchen Cabinet Upgrade Ideas

Gray Stained Kitchen Cabinets Seasons Of Home Painted Grey Glazed

7 Best Farmhouse Kitchen Cabinet Ideas For 2024

25 Modern Grey Kitchen Cabinet Ideas Lily Ann Cabinets

25 Modern Grey Kitchen Cabinet Ideas Lily Ann Cabinets

Give Your Kitchen A Whole New Look Without Spending Thousands Of Dollars By Glazing C Cabinets Makeover Glazed Renovation

25 Modern Grey Kitchen Cabinet Ideas Lily Ann Cabinets

Distressed Kitchen Cabinets Pictures Options Tips Ideas

Kitchen Remodel Renovation Inspirations

25 Modern Grey Kitchen Cabinet Ideas Lily Ann Cabinets
Related Posts