How Can I Update My Kitchen Cabinets Without Painting Them?
Kitchen cabinets often serve as a focal point within the room, significantly impacting its overall aesthetic. Over time, these cabinets can appear dated or worn, prompting a desire for updates. While painting remains a popular choice, it's not the only option. Several alternative methods exist to refresh kitchen cabinets without resorting to paint, offering varying degrees of complexity and cost.
Choosing to forgo painting can be advantageous in several scenarios. For instance, the existing wood grain and finish may be desirable features. Painting could mask these natural elements, diminishing the cabinet's inherent character. Additionally, painting requires careful preparation, including sanding, priming, and multiple coats of paint, which can be a time-consuming and labor-intensive process. Avoiding paint can significantly reduce the project timeline and effort involved.
Furthermore, some cabinets may possess intricate details or be constructed from materials that don't readily accept paint, making a paint-free approach more practical. Considerations regarding the existing cabinet finish should also be addressed. If the finish is in relatively good condition, preserving it might be preferable to embarking on a potentially challenging and messy painting project.
Replacing Hardware for an Instant Refresh
One of the simplest and most impactful ways to update kitchen cabinets without painting is by replacing the hardware. Knobs, pulls, and hinges can dramatically alter the cabinet's appearance. This method is relatively inexpensive and requires minimal tools, making it an accessible option for most homeowners.
The key to success lies in selecting hardware that complements the existing cabinet style and the overall kitchen design. Consider the finish, material, and shape of the hardware. For example, sleek, modern cabinets might benefit from brushed nickel or stainless steel pulls, while more traditional cabinets could be enhanced with antique brass knobs.
Before purchasing new hardware, carefully measure the existing hole spacing. Replacing hardware with the same hole spacing eliminates the need to drill new holes, simplifying the installation process. However, if desired, filling existing holes and drilling new ones allows for greater flexibility in hardware selection.
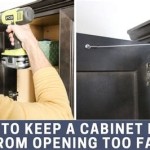
When replacing hinges, ensure the new hinges are compatible with the cabinet type (e.g., face frame or frameless). Different hinge styles offer various functionalities, such as soft-close mechanisms, which can add a touch of luxury to the cabinets.
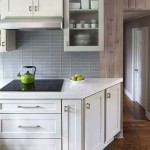
The impact of new hardware should not be underestimated. It can quickly transform dated cabinets into modern, stylish features, significantly enhancing the kitchen's overall aesthetic without the need for paint or extensive renovations. This approach is particularly effective when the cabinet finish is still in good condition but the hardware appears worn or outdated.
Adding Decorative Elements and Trim
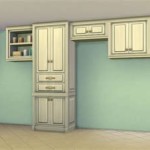
Introducing decorative elements and trim can significantly alter the appearance of kitchen cabinets, adding visual interest and personality without resorting to paint. This method allows for creativity and customization, enabling homeowners to tailor the cabinets to their specific tastes and preferences.
One approach is to add decorative moldings to the cabinet doors. Options range from simple, clean lines to more ornate, elaborate designs. The type of molding used should complement the existing cabinet style and the overall kitchen design. For example, a traditional kitchen might benefit from raised panel moldings, while a more contemporary kitchen could feature flat panel moldings.
Another option is to incorporate decorative trim around the edges of the cabinets. This can be achieved using various materials, such as wood, metal, or even decorative tape. The key is to select a trim that complements the cabinet finish and adds a subtle yet noticeable visual enhancement.
Glass panels can also be incorporated into cabinet doors, adding a touch of elegance and sophistication. Replacing solid cabinet doors with glass-fronted doors allows for displaying decorative items, such as dishes or glassware, creating a visually appealing focal point.
Decorative appliques can be applied to cabinet doors or drawers, adding texture and dimension. These appliques come in a variety of styles, from floral motifs to geometric patterns, allowing for customization to suit individual preferences. When selecting appliques, consider the existing cabinet style and ensure the appliques complement the overall design.
Installation of these decorative elements typically involves using wood glue and finishing nails. Careful planning and precise measurements are essential to ensure a professional-looking result. Sanding and staining or varnishing the added elements to match the existing cabinet finish may be necessary to create a cohesive look.
Refacing or Resurfacing Cabinets
Refacing or resurfacing kitchen cabinets involves replacing the existing cabinet doors and drawer fronts with new ones while leaving the cabinet boxes intact. This method offers a more substantial update than simply replacing hardware or adding decorative elements, but it's less involved than completely replacing the cabinets. It provides a significant aesthetic change without the extensive demolition and reconstruction associated with a full remodel.
The resurfacing process begins with removing the existing doors, drawer fronts, and any exposed hardware. The cabinet boxes are then prepared by cleaning and sanding them to ensure proper adhesion of the new veneer or laminate. The new doors and drawer fronts, which can be made from a variety of materials such as wood, laminate, or thermofoil, are then installed.
Refacing offers a wide range of design options. Homeowners can choose from various door styles, colors, and finishes to create a completely new look for their kitchen. This method allows for modernizing dated cabinets or simply updating the aesthetic to better reflect personal preferences.
When selecting new doors and drawer fronts, it's crucial to consider the existing cabinet box construction. Ensure the new components are compatible with the existing boxes and that they fit properly. Professional installation is often recommended to ensure a seamless and professional-looking result.
Refacing can be a cost-effective alternative to replacing cabinets, particularly if the existing cabinet boxes are in good condition. It reduces waste and minimizes disruption to the kitchen, making it a more environmentally friendly option. Furthermore, it allows for a significant aesthetic upgrade without the extensive demolition and reconstruction associated with a full remodel.
Before committing to refacing, carefully assess the condition of the cabinet boxes. If the boxes are damaged or structurally unsound, replacing the cabinets may be a more prudent investment. However, if the boxes are in good condition, refacing can be an excellent way to update the kitchen's appearance without resorting to paint or a full-scale renovation.
Cleaning and Polishing Existing Cabinets
Often, a simple cleaning and polishing can revitalize kitchen cabinets, restoring their original luster and beauty. This method is particularly effective for cabinets with solid wood construction and relatively well-maintained finishes. Over time, cabinets can accumulate dirt, grime, and grease, dulling their appearance. A thorough cleaning can remove these accumulated residues, revealing the beauty of the underlying wood.
Start by cleaning the cabinets with a mild detergent and warm water. Avoid using harsh chemicals or abrasive cleaners, as these can damage the finish. A soft cloth or sponge should be used to gently scrub the cabinets, paying particular attention to areas that tend to accumulate dirt, such as around the handles and near the stovetop.
After cleaning, thoroughly rinse the cabinets with clean water to remove any soap residue. Dry the cabinets with a soft, clean cloth. Once the cabinets are dry, apply a furniture polish or wax specifically designed for wood surfaces. This will help to protect the finish and restore its shine.
When selecting a furniture polish or wax, consider the type of finish on the cabinets. Some products are specifically formulated for certain types of finishes, such as lacquer or varnish. It's important to choose a product that is compatible with the existing finish to avoid damaging the cabinets.
Apply the polish or wax according to the manufacturer's instructions. Typically, this involves applying a thin, even layer of the product to the cabinets and then buffing it with a clean, soft cloth. Buffing helps to distribute the polish or wax evenly and brings out the shine.
Regular cleaning and polishing can help to maintain the beauty of kitchen cabinets and prevent them from becoming dull or faded. This simple method can significantly improve the appearance of the kitchen without the need for more extensive renovations.
Applying Wood Stain or Toner
While this method involves a coloring agent, it differs substantially from painting. Applying wood stain or toner allows for enhancing or altering the existing wood tone without completely obscuring the grain. This technique is suitable for cabinets constructed from solid wood or wood veneer. It can be used to deepen the existing color, even out inconsistencies in tone, or introduce a subtly different hue.
Proper preparation is essential for successful staining or toning. This involves thoroughly cleaning the cabinets to remove any dirt, grease, or existing finish. Light sanding may be necessary to create a smooth, receptive surface for the stain or toner. The degree of sanding depends on the existing finish and the desired result. A coarser grit sandpaper may be needed to remove a thick finish, while a finer grit sandpaper can be used to simply scuff the surface.
Choosing the right stain or toner is crucial. Consider the existing wood species and the desired color. Stain is generally more transparent than toner, allowing more of the wood grain to show through. Toner, on the other hand, typically contains more pigment and provides a more uniform color. Test the stain or toner on an inconspicuous area of the cabinet to ensure the desired result.
Apply the stain or toner evenly using a brush, cloth, or spray gun. Follow the manufacturer's instructions carefully, paying attention to the recommended drying time. Multiple coats may be necessary to achieve the desired color depth. Wipe off any excess stain or toner after a few minutes to prevent a sticky or uneven finish. After the final coat has dried completely, apply a clear topcoat, such as polyurethane, to protect the finish and provide durability.
This method requires careful attention to detail and proper ventilation. It's often best suited for experienced DIYers or professional finishers. However, when done correctly, it can transform the appearance of kitchen cabinets without completely covering the wood grain with paint.

Updating A 90s Kitchen Without Painting Cabinets

How To Update Your Kitchen Without Painting Cabinets Meredith Lynn Designs

Updating A 90s Kitchen Without Painting Cabinets

How I Updated My Oak Cabinets Without Paint By Using Briwax Easy Budget Kitchen Makeover Only 24

How To Update A Kitchen With Cherry Cabinets Without Painting

Updating A 90s Kitchen Without Painting Cabinets

How To Update Oak Or Wood Cabinets Without A Drop Of Paint Part 2 Kylie M Interiors

Updating A Kitchen With Oak Cabinets Without Painting Them

How To Make Oak Kitchen Cabinets Look Modern Without Painting The Diy Nuts

Updating A Kitchen With Oak Cabinets Without Painting Them
Related Posts