How to Stain Unfinished Kitchen Cabinets: A Comprehensive Guide
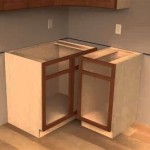
Unfinished kitchen cabinets offer a blank canvas to customize your kitchen's aesthetic. Staining them is a rewarding DIY project that can transform their appearance and enhance the overall ambiance of your space. Here's a comprehensive guide to guide you through each essential step.
Preparing the Cabinets
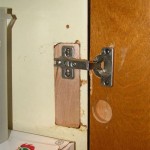
Before staining, thorough preparation is crucial to ensure even and long-lasting results. Start by removing all hardware, including knobs, handles, and hinges.
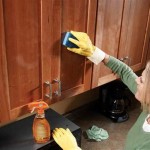
Next, clean the cabinets thoroughly with a degreaser or cleaning solution. Wipe down the surfaces with a clean cloth to remove any dirt, dust, or grease. Allow the cabinets to dry completely before proceeding.
Sanding the Cabinets
Sanding is necessary to smooth the surface of the cabinets and remove any imperfections. Start with coarse-grit sandpaper (80-grit) and gradually move to finer grits (120-grit, 180-grit) for a smoother finish.
Use a sanding block for even sanding and avoid applying too much pressure. Sand in the direction of the wood grain to prevent cross-grain scratches.
Removing Dust
Once the cabinets are sanded, remove all sanding dust thoroughly. Use a vacuum cleaner with a soft brush attachment or wipe down the surfaces with a tack cloth.
Any remaining dust can interfere with the stain's adhesion, resulting in an uneven finish.
Applying the Stain
Select a stain that complements your desired color and finish. Use a foam brush or a clean cloth to apply the stain evenly along the wood grain.
Apply thin coats, allowing each coat to dry completely before applying the next. This technique allows the stain to penetrate the wood without overwhelming it.
Wiping Off Excess Stain
Once the stain is applied, use a clean cloth to wipe off any excess that may have remained on the surface. This step helps prevent streaks or unevenness.
Use a light touch and avoid rubbing the cloth too hard, as this could remove the stain.
Drying the Cabinets
Allow the stained cabinets to dry completely before applying any finish. The drying time depends on the type of stain used, so refer to the manufacturer's instructions.
Ensure the drying area is well-ventilated to prevent dust or debris from settling on the freshly stained surfaces.
Applying Finish
To protect the stain and enhance its durability, apply a finish such as polyurethane or varnish. Use a brush or a foam roller to apply a thin, even coat.
Allow the finish to dry completely before reattaching the hardware and putting the cabinets back in place.
Tips for Success
- Always test the stain on a small, inconspicuous area before applying it to the entire cabinet.
- Sand in the direction of the wood grain to avoid cross-grain scratches.
- Apply thin coats of stain and avoid overwhelming the wood.
- Wipe off excess stain promptly to prevent streaks or unevenness.
- Allow ample drying time before applying the finish.
- Use a brush or foam roller to apply the finish evenly.
- Protect the stained cabinets from dust or debris during the drying process.

How To Stain Unfinished Cabinets Painting By The Penny

How To Stain Unfinished Cabinets Painting By The Penny

How To Stain Unfinished Cabinets Painting By The Penny

How To Finish Wood Cabinets Cabinet Doors N More

How To Stain Oak Cabinetry Tutorial The Kim Six Fix

Diy Staining Home Depot Unfinished Cabinets Good Or Bad Idea

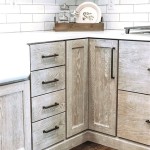
How To Make Rustic Kitchen Cabinets By Refinishing Them The Best Stain Color Amanda Katherine

How To Finish Unfinished Cabinets

Kitchen Renovation Unfinished Oak Cabinets

How To Paint Unfinished Cabinets Houseful Of Handmade
Related Posts