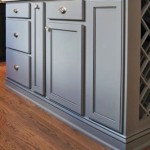
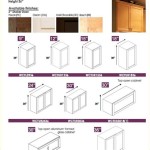
Essential Aspects of Installing Kitchen Cabinet Handles
Installing kitchen cabinet handles is a crucial step in completing the aesthetics and functionality of your new kitchen. While it may seem like a simple task, there are a few essential aspects to consider to ensure a successful and professional-looking installation.
1. Planning and Measurements
Before drilling any holes, it's essential to plan the placement of your handles carefully. Use a measuring tape to determine the exact center point of each cabinet door and drawer front. Mark the location of each handle with a pencil or masking tape to avoid any misalignment.
2. Drilling Holes
Once you have the placement of your handles determined, it's time to drill the holes for the screws. Use a drill bit that is slightly smaller than the diameter of the screw, and drill perpendicular to the surface of the cabinet door or drawer front. The depth of the holes should be just enough to accommodate the length of the screw.
3. Installing the Screws
Insert the screws into the drilled holes, being careful not to overtighten them. Use a screwdriver or drill set on a low setting to gently tighten the screws until the handles are securely attached.
4. Check for Alignment
Once all the handles are installed, take a step back and check for alignment. Are the handles centered and level on each cabinet door and drawer front? If necessary, make minor adjustments by slightly loosening the screws and repositioning the handles.
5. Tightening the Handles
Once you're satisfied with the alignment of the handles, fully tighten the screws using a screwdriver or drill set on a medium setting. Ensure that the handles are firmly attached without any wobble or movement.
6. Cleaning and Finishing
After installing the handles, clean any sawdust or debris from the cabinet surfaces. Apply a touch of furniture polish or wax to the handles to maintain their shine and protect them from wear and tear.
7. Professional Tips
- Use a countersink bit to create a slight depression in the cabinet surface around the screw holes. This will help the screws sit flush with the surface for a more professional look.
- If the screws are too short, they may not provide enough support for the handles. Use screws that are slightly longer than the thickness of the cabinet door or drawer front.
- For heavy handles or oversized cabinet doors, consider using additional screws or even bolts for added reinforcement.
By following these essential aspects, you can ensure a successful installation of your kitchen cabinet handles. With careful planning, precise measurements, and a bit of patience, you can achieve a professional-looking result that will enhance the aesthetics and functionality of your kitchen for years to come.
How To Install Cabinet Handles Ultimate Stress Free Tips

How To Install Cabinet Handles Ultimate Stress Free Tips

How To Install Hardware Like A Pro Kitchen Renovation House Of Hepworths

How To Install Cabinet Handles Ultimate Stress Free Tips

Mistakes To Avoid When You Install Kitchen Cabinet Pulls Free Template

How To Install Cabinet Handles Ultimate Stress Free Tips

How To Install Kitchen Cabinet Handles Detailed Guide 2024

How To Easily Install Kitchen Cabinet Hardware The American Patriette

How To Install Cabinet Door And Drawer Handles Knobs Pulls

How To Replace Kitchen Cabinet Hardware A Girl S Guide Home Diy