How to Add Molding to Kitchen Cabinet Doors
Moldings are a great way to add style and depth to your kitchen cabinets. They can be used to frame the doors, create a raised panel effect, or simply add a decorative touch. With a little bit of effort, you can easily add molding to your cabinet doors to give your kitchen a whole new look.
Here are the steps on how to add molding to kitchen cabinet doors:
1. Choose the Right Molding
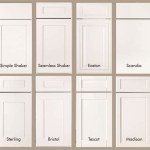
The first step is to choose the right molding for your cabinet doors. There are many different types of molding available, so it's important to take some time to browse and find one that you like. You'll also need to decide whether you want to use a plain molding or one with a decorative design. Once you've chosen your molding, you can purchase it from a home improvement store or online.
2. Cut the Molding
Once you have your molding, you need to cut it to the right size. To do this, you'll need a miter saw. A miter saw is a power tool that can be used to cut precise angles. If you don't have a miter saw, you can rent one from a home improvement store.
To cut the molding, measure the length of the cabinet door and then cut the molding to that length. You'll need to cut two pieces of molding for each cabinet door.
3. Apply Adhesive to the Molding
Once you've cut the molding, you need to apply adhesive to the back of it. You can use a variety of different adhesives, such as wood glue, construction adhesive, or liquid nails. Once you've applied the adhesive, press the molding into place on the cabinet door.
4. Secure the Molding
Once the molding is in place, you need to secure it. You can do this by using nails or screws. If you're using nails, be sure to countersink them so that they don't stick out.
5. Fill the Nail Holes
Once the molding is secured, you need to fill the nail holes. You can do this by using wood filler. Once the wood filler has dried, you can sand it smooth.
6. Paint or Stain the Molding
The final step is to paint or stain the molding. You can paint or stain the molding to match the rest of your kitchen cabinets. Once the paint or stain has dried, your cabinet doors will be complete.
Tips for Adding Molding to Cabinet Doors
Here are a few tips for adding molding to cabinet doors:
- Use a miter saw to cut the molding for precise angles.
- Apply adhesive to the back of the molding before pressing it into place.
- Secure the molding with nails or screws.
- Fill the nail holes with wood filler and sand them smooth.
- Paint or stain the molding to match the rest of your kitchen cabinets.

From Drab To Fab Adding Trim Cabinets

From Drab To Fab Adding Trim Cabinets

Adding Molding To Old Cabinets Diy Tutorial Kitchen Cabinet Doors

Add Moulding To Flat Cabinet Doors Home Kitchens Cabinets Kitchen

Adding Moldings To Your Kitchen Cabinets Remodelando La Casa

Adding Shaker Trim To Flat Panel Cabinets Hometalk

Great Way To Add Interest Bathroom Or Kitchen Cabinets Ck This Out Wow Plain Cabinet Doors Home Diy

How To Add Cabinet Molding Decor And The Dog

Kitchen Diy Shaker Style Cabinets Cherished Bliss

Adding Crown Molding To Cabinets Young House Love
Related Posts