How to Add Moulding to Kitchen Cabinets: A Comprehensive Guide
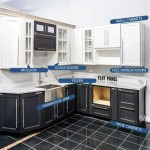
Adding moulding to kitchen cabinets can instantly elevate the look of your kitchen, giving it a more polished and sophisticated appearance. This relatively simple upgrade can be completed in a few hours and requires minimal tools and materials. Here's a comprehensive guide to help you add moulding to your kitchen cabinets like a pro:
Materials You'll Need:
- Cabinet moulding of your choice (crown, base, or decorative)
- Mitre saw
- Measuring tape
- Pencil
- Wood filler
- Paintable caulk
- Brad nailer and 1-inch brads
- Sandpaper or sanding sponge
Step 1: Plan and Measure
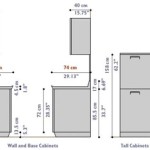
Before you start cutting, take the time to plan the placement of the moulding and measure the length of each piece. Use a measuring tape to determine the dimensions of the cabinets and the moulding you'll be using. Mark the cut lines on the moulding with a pencil.
Step 2: Cut the Moulding
Use a mitre saw to cut the moulding at a 45-degree angle. A mitre saw allows you to make precise cuts that ensure a perfect fit. If you don't have access to a mitre saw, you can use a hand saw, but it's important to be careful and make clean, straight cuts.
Step 3: Prepare the Cabinet
Before you attach the moulding, make sure the cabinet is clean and free of debris. Sand any rough edges or uneven surfaces to create a smooth base for the moulding.
Step 4: Attach the Moulding
Use a brad nailer to attach the moulding to the cabinet. Drive the brads at an angle, countersinking them slightly below the surface of the moulding. Space the brads every 2-3 inches to ensure a secure hold.
Step 5: Fill and Caulk
Once the moulding is attached, use wood filler to fill any gaps or nail holes. Smooth the wood filler using a putty knife or your finger. Once the wood filler has dried, apply paintable caulk to the joints between the moulding and the cabinet. This will create a seamless and professional-looking finish.
Step 6: Paint or Stain
If you want to change the color of the moulding, paint or stain it to match the cabinets or the rest of the kitchen. Allow the paint or stain to dry completely before using the cabinets.
Tips for Success:
- Use a mitre saw guide to ensure precise cuts.
- Dry-fit the moulding before attaching it to make sure it fits properly.
- Use a brad nailer with a depth gauge to avoid driving the brads too deep.
- Apply wood filler sparingly and sand it smooth once it's dry.
- Use paintable caulk that matches the color of the moulding.

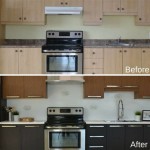
From Drab To Fab Adding Trim Cabinets

How To Add Trim And Paint Your Laminate Cabinets

From Drab To Fab Adding Trim Cabinets

Adding Molding To Old Cabinets Diy Tutorial Cabinet Doors Kitchen

Adding Crown Molding To Cabinets Young House Love

Adding Shaker Trim To Flat Panel Cabinets Hometalk

Diy Kitchen Cabinet Upgrade With Paint And Crown Molding

Adding Kitchen Cabinet Moulding To Existing Cupboards

Easy And Inexpensive Cabinet Updates Adding Trim To Cabinets Drawers The Rozy Home

Add Moulding To Flat Cabinet Doors Home Kitchens Cabinets Diy Kitchen
Related Posts

