How to Adjust Kitchen Wall Cupboards
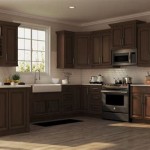
Kitchen wall cupboards, often referred to as upper cabinets, are an integral part of any kitchen, providing valuable storage space for dishes, cookware, food, and other essentials. Over time, these cabinets may become misaligned or uneven, leading to aesthetic issues and potential functionality problems. Adjusting kitchen wall cupboards can be a relatively straightforward process, requiring only a few basic tools and some patience. This article will guide you through the process, highlighting key steps and considerations to ensure a successful and efficient adjustment.
Assessing the Problem
Before embarking on any adjustments, it's crucial to identify the specific issues plaguing your kitchen wall cupboards. Carefully examine the cabinet doors, paying attention to any gaps, misalignment, or unevenness. Check if the doors are sticking, rubbing against the cabinet frame, or closing improperly. Observe the cabinet's position relative to the surrounding walls and countertop, noting any discrepancies. Understanding the exact nature of the problem will help you determine the appropriate adjustments.
For instance, doors that are tight or sticking might indicate issues with the hinges or the cabinet's vertical alignment. Gaps or misalignment between doors suggest potential problems with the hinges or the cabinet's horizontal alignment. Cabinets that appear to be leaning or tilting might require adjustments to the mounting screws or brackets.
Tools and Materials
Adjusting kitchen wall cupboards typically requires a few essential tools. Gather the following items before you start: *
Screwdriver:
A standard Phillips head screwdriver is usually sufficient to work with most cabinet screws. Choose one with a comfortable grip and a magnetic tip for easier handling. *Level:
A level is essential for accurate adjustments, ensuring that the cabinets are perfectly horizontal and plumb. A 24-inch level is generally recommended for kitchen cabinets. *Tape Measure:
A tape measure is useful for precise measurements, particularly when aligning doors or checking for any discrepancies in cabinet placement. *Pencil:
A pencil or marker is handy for marking screw locations or adjusting cabinet alignment. *Safety Glasses:
For your own safety, always wear safety glasses when working with tools, especially when handling screws or making potentially forceful adjustments. *Optional:
If you plan to adjust hinges, you may need a small wrench or pliers.Adjusting the Hinges
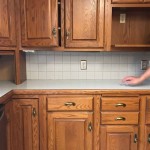
Hinges are the primary points of articulation for cabinet doors, and they often play a crucial role in ensuring smooth and proper door operation. Most cabinet hinges have built-in adjustment screws that allow you to fine-tune their position and alignment.
To adjust the hinges, locate the adjustment screws on the side or bottom of the hinge. Typically, there are three screws: one for vertical adjustment, one for horizontal adjustment, and one for tightening the hinge to the door.
To adjust the door vertically, use the vertical adjustment screw. Turning the screw clockwise will raise the door, while turning it counterclockwise will lower it. To adjust the door horizontally, use the horizontal adjustment screw. Turning the screw clockwise will move the door in, and turning it counterclockwise will move it out.
When making hinge adjustments, it's essential to work on one hinge at a time, making small adjustments and checking the door's position after each change. Remember to tighten the hinge screw after adjusting the door to secure it in place.
Adjusting the Cabinet's Position
If the problem lies with the cabinet's position itself, rather than the hinges, you'll need to adjust the cabinet's mounting screws or brackets. This process may involve removing the cabinet from the wall or loosening the mounting screws to reposition it.
Before making any adjustments, ensure that the cabinet is empty and that you have a helper to assist with lifting or supporting it. Once the cabinet is loose or removed, use a level to verify that the wall is plumb and that the cabinet is positioned correctly. Use a pencil or marker to mark the new screw locations if necessary. Re-install the cabinet, ensuring that the mounting screws are secure and the cabinet is level.
When adjusting cabinets, always prioritize safety and use caution. Seek assistance if you feel uncomfortable or unsure about any part of the process. If you encounter significant difficulties, it's advisable to consult a professional contractor or cabinetmaker for assistance.

Wall Unit Fitting Adjustments Diy Kitchens Advice

Setting Kitchen Cabinets 41 Lumber Serving Iron Mountain And The U P

How To Adjust Cabinet Hinges Bob Vila

Heavy Duty Wall Cabinet Mounting Adjustable Brackets Hangers Debonair Joinery S

How To Install Cabinets Like A Pro The Family Handyman

How High Upper Cabinets Should Be From Your Floor And Countertop

What Gap Do I Need Between The Worktop And Bottom Of Wall Units

A Step By Guide To Refitting Your Kitchen Installing Cabinets Installation

Kitchen Wall Cabinet Mounting Adjustable Brackets Hangers Set Debonair Joinery S

Blum Wall Hanging Bracket Set
Related Posts