How to Apply Vinyl Wrap to Kitchen Worktops
Vinyl wrapping kitchen worktops is a budget-friendly and aesthetically pleasing solution for revitalising tired worktops. Vinyl wrap, also known as contact paper, comes in a wide variety of colours, patterns, and textures, allowing homeowners to achieve a custom look without the cost and hassle of replacing the entire worktop. This guide will walk you through the process of applying vinyl wrap to kitchen worktops, ensuring a professional finish.
Preparing the Worktop
The first step is to ensure that the worktop surface is clean and free of any debris. A thorough cleaning with a mild detergent and warm water will remove any grease, grime, or residue. Once the worktop is dry, it is crucial to assess the surface for any imperfections. If there are scratches, dents, or uneven surfaces, it's essential to address these before wrapping. For minor imperfections, a light sanding with fine-grit sandpaper can smooth out the surface. For larger imperfections, consider using wood filler or epoxy to create a smooth and even base for the vinyl wrap.
The next step involves applying a primer. A primer will create a uniform surface for the vinyl wrap to adhere to, enhancing its adhesion and preventing air bubbles from forming. Choose a primer specifically designed for use on laminate worktops, and apply it evenly with a roller or brush. Allow the primer to dry completely before proceeding with the next step.
Measuring and Cutting the Vinyl Wrap
Accurate measurements are crucial for a seamless, professional finish. Begin by carefully measuring the length and width of each section of the worktop. Add several inches to each measurement to account for overlaps and trimming. Transfer these measurements to the vinyl wrap, using a ruler or a cutting mat and a sharp utility knife. Make sure to cut the vinyl wrap with precision, as any uneven edges will be noticeable after installation.
When cutting vinyl wrap, it's crucial to consider the direction of the pattern or texture. If the vinyl wrap features a linear pattern, such as wood grain or marble, ensure that the pattern runs in the same direction on each section of the worktop. For patterned vinyl wraps, consider overlapping the edges slightly to create a seamless transition.
Applying the Vinyl Wrap
To ensure proper adhesion and prevent wrinkles, it's essential to apply the vinyl wrap slowly and carefully. Start by peeling back a small portion of the backing paper, exposing a few inches of the adhesive side of the vinyl wrap. Align the vinyl wrap with the edge of the worktop and slowly press it down, working your way from one end of the worktop to the other.
Use a squeegee or a smooth, firm object, such as a credit card, to gently smooth out any air bubbles as you move along. Apply pressure evenly, working outwards from the centre of the vinyl wrap. Be careful not to stretch the vinyl wrap as you apply it, as this can cause wrinkles or distortion. If any air bubbles remain, use a small pin to puncture them and gently smooth out the vinyl wrap.
Once you reach the end of the worktop, trim any excess vinyl wrap with a sharp utility knife. Use a straightedge as a guide for clean and precise cuts. If you're applying vinyl wrap to multiple sections of the worktop, overlap the edges slightly to create a seamless transition. Use a small amount of pressure to firmly press the overlapping edges together.
Finishing Touches
After applying the vinyl wrap to all sections of the worktop, it's important to seal the edges to prevent peeling or lifting. A clear sealant, designed for use on vinyl wrap, can be applied along the edges of the worktop using a fine-tipped brush or a cotton swab. Allow the sealant to dry completely before using the worktop.
Finally, it's recommended to clean the worktop with a mild detergent and warm water to remove any dust or residue from the installation process. With proper care and maintenance, the vinyl wrap will provide a durable and aesthetically pleasing finish for years to come.
Key Considerations
Vinyl wrap is a temporary solution and is not as durable as a solid surface worktop. It can be prone to scratches, especially if sharp objects are placed directly on the surface. While the vinyl wrap is waterproof, it's important to avoid prolonged exposure to extreme heat or direct sunlight, as this can affect the adhesion and colour of the vinyl wrap.
Alternatives to Vinyl Wrap
For a more permanent solution, consider other options such as laminate countertops, solid surface countertops, or natural stone countertops. These options offer greater durability, heat resistance, and scratch resistance compared to vinyl wrap.
Applying Self Adhesive Vinyl Around A Kitchen Sink And Taps
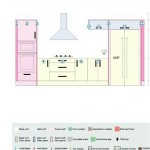
Applying Vinyl To A Kitchen Worktop
Oak Sheffield Pearl Grey Self Adhesive Vinyl Kitchen Wrap Wraps
How To Revamp Your Kitchen With This Diy Without Damaging Al And Make It Look Like A Professional Job Daily Mail
Tutorial How To Wrap A Kitchen Worktop With Cover Styl Adhesive S
Self Adhesive Vinyl Wrap For Kitchen Doors Worktops Dc Fix Artisan Oak
Kitchen Vinyl Wrap Worktop Wrapping
Dc Fix Concrete Grey Self Adhesive Vinyl Kitchen Wrap Wraps
Self Adhesive Vinyl Wrap For Kitchen Doors Worktops Dc Fix Sheffield Grey
Looking To Update Your Kitchen On A Budget Here S How Wrap Worksurface With Vinyl In 2024 Apply Worktop