How to Build a Built-In Kitchen Cupboard
Building a built-in kitchen cupboard offers a unique opportunity to personalize kitchen storage and enhance the overall design aesthetic. While it may seem like a daunting task, the process is manageable with careful planning and execution. This article outlines the essential steps involved in building a built-in kitchen cupboard, empowering homeowners to create a bespoke storage solution that elevates their kitchen space.
1. Planning and Design
The foundation of any successful built-in cupboard lies in meticulous planning and design. Before embarking on construction, it is essential to consider the following aspects:
- Measure the space: Accurately measure the width, height, and depth of the area designated for the cupboard. This ensures the built-in fits seamlessly within the existing kitchen layout.
- Determine the desired configuration: Consider the number of shelves, drawers, and doors needed to meet storage requirements. Sketch out the layout to visualize the final design.
- Choose materials: Decide on the type of wood, plywood, or other materials to be used. Factor in aesthetic preferences, durability, and budget constraints.
- Select hardware: Choose hinges, drawer slides, knobs, and other hardware that complements the chosen design and materials.
- Obtain necessary permits: Depending on local regulations, obtaining permits for structural modifications may be required.
2. Construction and Installation
Once the design is finalized, the construction and installation process can begin. This phase involves the following steps:
- Prepare the area: Clear the construction area of any obstructions and ensure the floor is level. Install a moisture barrier if necessary.
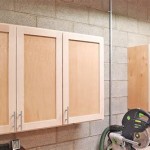
- Frame the structure: Cut and assemble the framing using studs or other appropriate materials. Ensure the framing is square and plumb.
- Create shelves and drawers: Cut and construct the shelves and drawers according to the design specifications. Attach drawer slides and hardware.
- Install doors and hardware: Attach the doors to the frame using hinges. Install knobs, pulls, and other necessary hardware.
- Finish and trim: Sand and prime the cupboard. Apply paint or stain according to the desired aesthetic.
- Secure the cupboard: Attach the built-in securely to the surrounding walls or existing cabinetry to ensure stability.
3. Customization and Finishing Touches
To further personalize the built-in kitchen cupboard, consider the following customization options:
- Add lighting: Install under-cabinet lighting to illuminate the interior and enhance visibility.
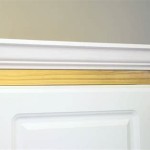
- Incorporate decorative elements: Enhance the aesthetic appeal by adding moldings, trim, or decorative hardware.
- Install a countertop: If the cupboard is designed to incorporate a countertop, ensure proper support and installation.
- Add a backsplash: Install a backsplash behind the cupboard to protect the wall and create a visually appealing finish.
- Personalize storage: Designate specific storage areas for different items, such as dishes, appliances, or pantry staples.
Building a built-in kitchen cupboard demands careful planning, execution, and attention to detail. However, the rewards of this endeavor are substantial, offering a personalized storage solution that enhances functionality, aesthetics, and the overall enjoyment of the kitchen space.

How To Build Cabinets The Complete Guide Houseful Of Handmade

21 Diy Kitchen Cabinets Ideas Plans That Are Easy To Build Building Cabinet New

Diy Kitchen Cabinets 25 And Easy Ideas For An Update Joyful Derivatives

Diy Built In Cabinets For The Kitchen Angela Marie Made

Convert Stock Cabinets To Custom With Inset Doors Sincerely Marie Designs

Diy Media Cabinet Built In That Looks Great And Hides Everything This Life

Upper Cabinets Made Into Built Ins Just Call Me Homegirl

Diy Kitchen Cabinets 25 And Easy Ideas For An Update Joyful Derivatives

How To Build Base Cabinets The Complete Guide Houseful Of Handmade

Diy Media Cabinet Built In That Looks Great And Hides Everything This Life
Related Posts