How To Build A Concrete Kitchen Benchtop
Concrete kitchen benchtops have become increasingly popular due to their durability, aesthetic versatility, and potential for customization. Constructing a concrete benchtop is a challenging yet rewarding DIY project that, when executed correctly, can significantly enhance the look and value of a kitchen space. This article provides a detailed guide on how to build a concrete kitchen benchtop, covering key steps from design and mold construction to pouring, curing, and finishing.
Planning and Design Considerations
Before commencing any physical work, meticulous planning is crucial. The design phase dictates the overall aesthetic and functionality of the benchtop. It is important to accurately measure the space where the benchtop will be installed. These measurements directly influence the dimensions of the mold and the volume of concrete required.
Benchtop thickness is another important consideration. A minimum thickness of 1.5 inches (approximately 38 mm) is generally recommended for structural integrity. Thicker benchtops, ranging from 2 to 3 inches, provide a more substantial look and can accommodate embedded features or integrated sinks more easily.
Consider the overhang of the benchtop beyond the base cabinets. A standard overhang is typically between 1 and 1.5 inches. This overhang provides a comfortable space for seating and prevents spills from running directly down the cabinet fronts.
The inclusion of features like integrated sinks, drain boards, or embedded decorations requires careful planning and integration into the mold design. These features necessitate additional steps and specialized techniques during the pouring and finishing processes.
Finally, consider the desired finish and color of the concrete. Integral color pigments can be added to the concrete mix, or the benchtop can be stained after curing. The choice of finish, whether polished, honed, or sealed, will influence the final appearance and maintenance requirements of the benchtop.
Mold Construction
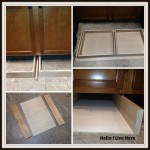
The mold forms the negative space into which the concrete is poured. The accuracy and integrity of the mold directly affect the quality and appearance of the finished benchtop. Melamine-coated particleboard is a commonly used material for mold construction due to its smooth surface and ease of release.
Cut the melamine board to the precise dimensions of the benchtop, including any overhangs or edge details. Accuracy is paramount to avoid discrepancies in the final product.
Assemble the mold using screws and sealant. Ensure all joints are watertight to prevent concrete leakage. Apply a generous bead of silicone sealant along all interior seams and smooth it out with a finger. Clamps can be used to hold the mold pieces together while the sealant dries.
Reinforcement is critical, because it provides structural integrity to the concrete benchtop. Steel rebar or wire mesh can be used for reinforcement. Cut the rebar or mesh to fit inside the mold, leaving adequate clearance around the edges. Position the reinforcement approximately halfway through the thickness of the benchtop.
For features like integrated sinks or drain boards, construct separate molds from wood or foam and incorporate them into the main mold. Ensure these molds are securely attached and properly sealed to prevent concrete from seeping underneath.
Apply a release agent to the interior surfaces of the mold. This facilitates the removal of the concrete benchtop after it has cured. Concrete-specific release agents are available, or a mixture of mineral oil and petroleum jelly can be used.
Mixing and Pouring the Concrete
Choosing the right concrete mix is crucial for achieving a durable and aesthetically pleasing benchtop. A high-strength concrete mix with a low water-to-cement ratio is recommended. Pre-blended concrete mixes specifically designed for countertops are commercially available and can simplify the mixing process.
Mix the concrete according to the manufacturer's instructions. Use a concrete mixer for larger projects to ensure thorough and consistent mixing. Add water gradually until the concrete reaches a workable consistency. Avoid adding too much water, as this can weaken the concrete and increase the risk of cracking.
If integral color pigments are being used, add them to the concrete mix according to the manufacturer's instructions. Thoroughly mix the pigments to ensure even distribution of color throughout the concrete.
Pour the concrete into the mold in layers, typically 2 to 3 inches thick. After pouring each layer, consolidate the concrete using a rubber mallet or vibration table. This removes air bubbles and ensures the concrete fills all corners of the mold. Excessive vibration can lead to aggregate segregation, so it is important to use a controlled approach.
Embed the reinforcement (rebar or wire mesh) within the concrete as each layer is poured. Ensure the reinforcement is properly positioned and does not come into contact with the mold walls.
Once the mold is completely filled, level the surface of the concrete using a screed board. Remove any excess concrete and smooth the surface. For a rougher finish, leave the surface uneven. For a smoother finish, float the surface with a magnesium float.
Curing and Demolding
Proper curing is essential for achieving maximum strength and durability of the concrete. Curing involves maintaining a consistently moist environment to allow the concrete to fully hydrate and harden.
Cover the poured concrete with plastic sheeting to prevent moisture loss. Alternatively, apply a curing compound that seals the surface and retains moisture. Keep the concrete moist for a minimum of 7 days, and ideally for 28 days, for optimal strength development.
After the curing period, carefully demold the concrete benchtop. Remove the screws holding the mold together and gently separate the sides of the mold. Use a rubber mallet to tap the mold lightly if necessary. Avoid using excessive force, as this can damage the concrete.
Once the benchtop is removed from the mold, inspect it for any imperfections or blemishes. Small air bubbles or voids can be filled with a concrete patching compound. Allow the patching compound to dry completely before proceeding with the finishing process.
Finishing and Sealing
The finishing process enhances the appearance and protects the concrete benchtop from stains and damage. Grinding, polishing, and sealing are common finishing techniques.
Grinding the surface of the concrete removes any imperfections and reveals the aggregate. Use a concrete grinder with progressively finer grit diamond pads. Start with a coarse grit pad and gradually move to finer grits to achieve the desired level of smoothness. Wear a respirator and eye protection during the grinding process, as it generates a significant amount of dust.
Polishing the concrete further enhances its smoothness and shine. Use a concrete polisher with polishing pads. Apply water to the surface during polishing to lubricate the pads and reduce dust. Continue polishing until the desired level of shine is achieved.
Sealing the concrete protects it from stains, water damage, and chemical attack. Apply a concrete sealer according to the manufacturer's instructions. Choose a sealer that is specifically designed for countertops and is food-safe. Multiple coats of sealer may be required for optimal protection.
Apply a concrete wax after the sealer has dried. The wax adds a protective layer and enhances the shine of the benchtop. Reapply the wax periodically to maintain the benchtop's appearance and protect it from wear and tear.
Installation
Before installation, ensure the base cabinets are level and securely fastened to the floor. A perfectly level base is crucial for ensuring the benchtop sits evenly and prevents stress cracks.
Carefully lift the concrete benchtop onto the base cabinets. Concrete is heavy, so enlist the help of at least two people to avoid injury and prevent damage to the benchtop.
Use shims to level the benchtop if necessary. Place shims under the benchtop where it rests on the cabinets. Check the levelness of the benchtop with a spirit level and adjust the shims accordingly.
Secure the benchtop to the base cabinets using construction adhesive or screws. Apply construction adhesive to the top of the cabinets before placing the benchtop. Alternatively, drill pilot holes through the cabinets and into the underside of the benchtop and secure it with screws. Be careful not to overtighten the screws, as this can crack the concrete.
Apply a bead of silicone sealant along the backsplash and any other joints to prevent water from seeping underneath the benchtop. Smooth the sealant with a finger for a clean and professional finish.

Diy Concrete Countertops Easy Step By Guide Run To Radiance

Diy Concrete Benchtops Part One Owner Building

Diy Concrete Countertops Outdoor Kitchen Update Modern Builds

Diy Concrete Countertop Gray House Studio

How To Diy Concrete Countertops Over Old Laminate Bless Er House

Diy White Concrete Countertops Clover Lane

Concrete Countertops How To Pour In Place Outdoor Kitchen Part 6

Diy Concrete Countertops Home With Stefani

Diy Concrete Countertops Pour In Place The Inspired Work

Polished Concrete Benchtops A Guide To Diy Countertops Architecture Design
Related Posts