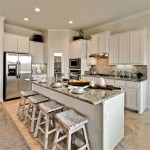
How To Build A Concrete Kitchen Benchtop
Concrete benchtops offer a durable, visually appealing, and customisable surface for kitchens. Constructing one requires careful planning, execution, and attention to detail. This article will outline the process of creating a concrete kitchen benchtop, encompassing mould construction, concrete mixing and pouring, and finishing techniques.
Planning and Design
Before commencing any physical work, a comprehensive design phase is critical. This involves accurately measuring the intended space for the benchtop, accounting for any appliances, sinks, or other fixtures that will be integrated. The design should specify the dimensions of the benchtop, including length, width, and thickness. Common thicknesses range from 1.5 to 2 inches (38 to 50 mm), but this can be adjusted based on preference and structural requirements. Consider the overhang required beyond the cabinets, typically around 1 inch (25 mm).
The design should also incorporate any desired features, such as edge profiles, integrated sinks, drain boards, or embedded objects. Edge profiles can range from simple square edges to more elaborate bullnose or ogee shapes. If an integrated sink is planned, the specifications of the sink must be obtained to create the appropriate cutout in the mould. Drain boards can be formed by creating a slightly sloped surface in the mould. Embedded objects, such as glass, stones, or metal, can be added to the concrete mix to create a unique aesthetic. It’s crucial to carefully plan the placement and securing method for these embedded items.
Colour and aggregate selection are also essential design considerations. Concrete can be pigmented using integral colour additives, which are mixed directly into the concrete mix. A wide range of colours is available, allowing for customization to match the kitchen's décor. The type of aggregate used will also affect the final appearance of the benchtop. Fine aggregates, such as sand, will produce a smoother surface, while coarser aggregates, such as gravel, will create a more textured look. Consider locally sourced aggregates for a unique and characterful finish.
Finally, determine the support structure for the concrete benchtop. Concrete is heavy, and the cabinets or supporting frame must be strong enough to bear the load. Ensure the cabinets are level and securely fastened before installing the benchtop. For larger benchtops, additional support may be required in the form of steel brackets or legs.
Mould Construction
The mould forms the negative space into which the concrete is poured, so its accuracy and integrity are paramount. Melamine-coated particleboard is a common material for mould construction due to its smooth surface and water resistance. The mould should be slightly larger than the final dimensions of the benchtop to allow for adjustments and fine-tuning during the finishing process.
Cut the melamine board to the required dimensions using a circular saw or table saw. Assemble the mould using screws and construction adhesive. Ensure all joints are tight and square to prevent leaks. The inside surfaces of the mould should be perfectly smooth and free from imperfections. Any imperfections will be reflected in the final concrete surface.
For custom edge profiles, attach pre-made moulding or create custom forms using flexible materials like rubber or silicone. These forms should be securely attached to the mould using adhesive or screws. Apply a generous amount of silicone caulk to all seams and corners to create a watertight seal. This is crucial to prevent concrete from leaking out of the mould, which can compromise the integrity of the benchtop.
If an integrated sink is part of the design, create a cutout in the mould that matches the dimensions of the sink. The cutout should be slightly smaller than the actual sink opening to allow for a slight overhang of the concrete. Create a form for the sink basin using melamine board or another suitable material. The form should be positioned within the cutout and securely attached to the mould. Ensure the form is properly sealed to prevent concrete from seeping underneath.
Apply a release agent to the inside surfaces of the mould to prevent the concrete from sticking. A commercial concrete release agent or a mixture of mineral oil and petroleum jelly can be used. Apply the release agent evenly and thoroughly, ensuring all surfaces are covered. This will make it easier to remove the concrete benchtop from the mould after it has cured.
Concrete Mixing and Pouring
The concrete mix is a critical component of the benchtop's strength and appearance. A high-quality concrete mix specifically designed for countertops is recommended. These mixes typically contain a blend of Portland cement, sand, and admixtures to enhance workability, strength, and durability.
Follow the manufacturer's instructions for mixing the concrete. Use a concrete mixer or a large mixing tub and a drill with a mixing paddle. Add water gradually while mixing until the concrete reaches a workable consistency. The concrete should be wet enough to flow easily into the mould but not so wet that it separates or bleeds. Avoid adding too much water, as this can weaken the concrete.
For coloured concrete, add the integral colour additive to the mix according to the manufacturer's instructions. Mix the colour thoroughly to ensure even distribution. Consider creating sample batches of coloured concrete to test the desired hue before mixing the entire volume.
Before pouring the concrete, reinforce the mould with wire mesh or rebar to provide additional strength and prevent cracking. Cut the reinforcement to fit inside the mould and position it so that it is embedded within the concrete. Ensure the reinforcement is clean and free from rust or debris.
Pour the concrete into the mould in layers, tamping each layer to remove air pockets and consolidate the concrete. Use a rubber mallet or a vibrating concrete finishing tool to further consolidate the concrete. Pay particular attention to corners and edges to ensure they are fully filled. If embedding objects in the concrete, carefully position them within each layer and secure them in place.
Once the mould is filled, screed the surface of the concrete to level it. Use a screed board or a straightedge to remove excess concrete and create a smooth, even surface. Allow the concrete to sit for a few minutes to allow any remaining air bubbles to rise to the surface. Use a trowel to smooth the surface and remove any imperfections.
Curing and Finishing
Curing is the process of maintaining moisture in the concrete to allow it to hydrate properly and develop its full strength. Cover the concrete benchtop with plastic sheeting or a wet burlap to prevent it from drying out too quickly. Keep the concrete moist for at least seven days. Longer curing times are recommended for increased strength and durability.
After the concrete has cured, carefully remove it from the mould. Use a rubber mallet or a pry bar to gently separate the concrete from the mould. Be careful not to damage the concrete during removal. If the concrete is difficult to remove, try tapping the mould with a rubber mallet to loosen it.
Once the benchtop is removed from the mould, allow it to dry completely. This may take several days, depending on the climate and humidity. After the concrete is dry, begin the finishing process. This involves grinding, polishing, and sealing the concrete to achieve the desired look and feel.
Grind the surface of the concrete using a diamond grinding pad attached to a concrete grinder or angle grinder. Start with a coarse grit pad and gradually move to finer grit pads to achieve a smooth, even surface. Pay particular attention to any imperfections or blemishes. Grinding can be done wet or dry, but wet grinding produces less dust.
After grinding, polish the concrete using a diamond polishing pad attached to a concrete polisher or angle grinder. Use a progressively finer grit polishing pad to achieve the desired level of shine. Polishing can enhance the natural beauty of the concrete and create a smooth, easy-to-clean surface.
Finally, seal the concrete benchtop with a concrete sealer to protect it from stains and water damage. A penetrating sealer is recommended as it soaks into the concrete and provides long-lasting protection. Apply the sealer according to the manufacturer's instructions. Multiple coats may be required for optimal protection. Allow the sealer to dry completely before using the benchtop.
Installation
Before installing the concrete benchtop, ensure the supporting cabinets or frame are level and securely fastened. Apply a bead of construction adhesive to the top of the cabinets to provide a secure bond. Carefully lift the concrete benchtop into place and position it on the cabinets. Ensure the benchtop is properly aligned and centered.
Secure the benchtop to the cabinets using screws or construction adhesive. Drill pilot holes through the cabinets and into the underside of the benchtop. Use screws that are long enough to penetrate the concrete but not so long that they go through the top. Alternatively, apply construction adhesive to the underside of the benchtop and press it firmly onto the cabinets.
Once the benchtop is installed, caulk any gaps between the benchtop and the backsplash or adjacent surfaces. Use a silicone caulk that matches the colour of the concrete or the surrounding surfaces. This will prevent water from seeping behind the benchtop and causing damage. Allow the caulk to dry completely before using the benchtop.
Connect any plumbing or electrical fixtures that are required, such as sinks, faucets, or cooktops. Follow the manufacturer's instructions for installation and ensure all connections are properly sealed and grounded. Test all fixtures to ensure they are working properly before using the benchtop.
Clean the concrete benchtop with a mild soap and water solution. Avoid using harsh chemicals or abrasive cleaners, as these can damage the sealer. Regularly clean the benchtop to prevent stains and maintain its appearance. With proper care and maintenance, a concrete kitchen benchtop can provide years of durable and beautiful service.

Diy Concrete Countertops Easy Step By Guide Run To Radiance

Diy Concrete Countertops Outdoor Kitchen Update Modern Builds

How To Diy Concrete Countertops Over Old Laminate Bless Er House

Diy White Concrete Countertops Clover Lane

Concrete Countertops How To Pour In Place Outdoor Kitchen Part 6

Diy Concrete Countertops Pour In Place The Inspired Work

How To Make A Concrete Countertop 8 Steps With Pictures Instructables

Concrete Countertop Diy A Beautiful Mess

Diy Concrete Countertops Easy Step By Guide Run To Radiance
Concrete Countertop Diy A Beautiful Mess

